6mm Acoustic Rubber Underlay
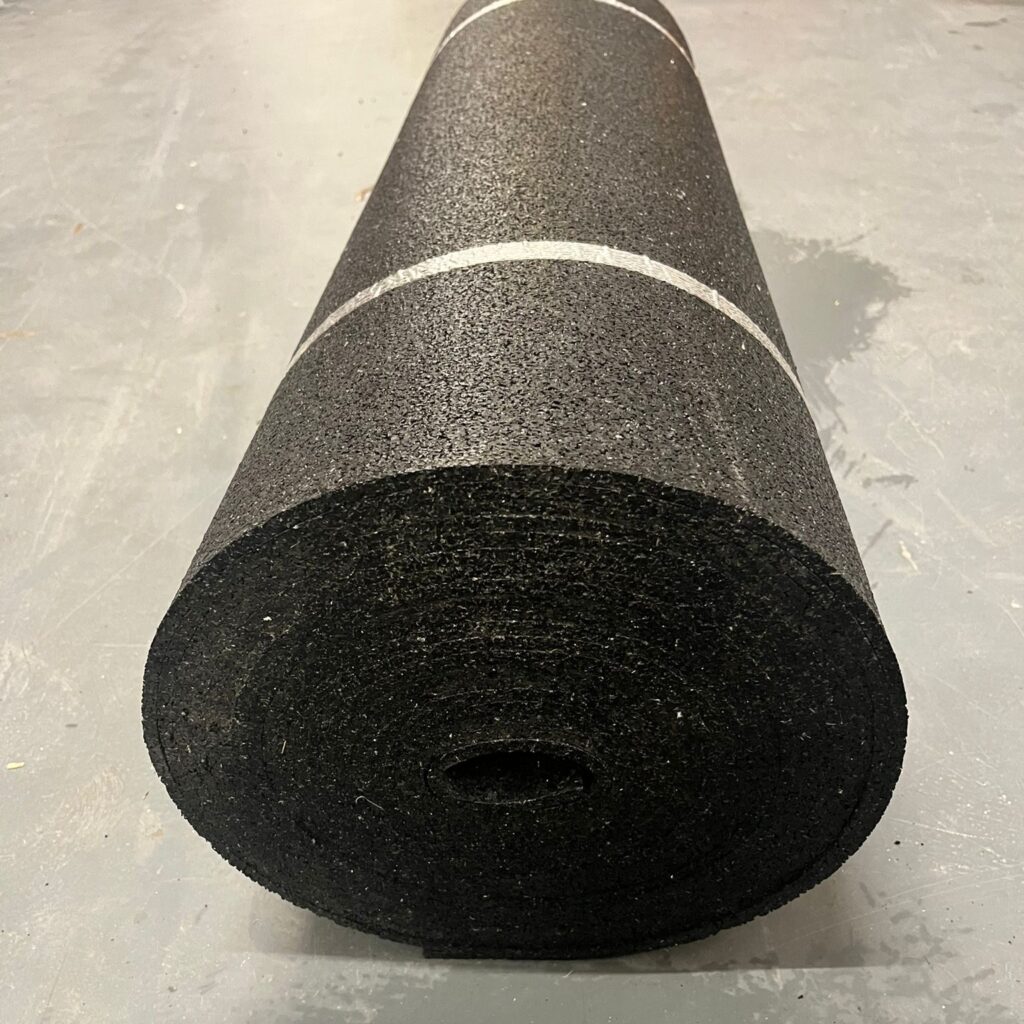
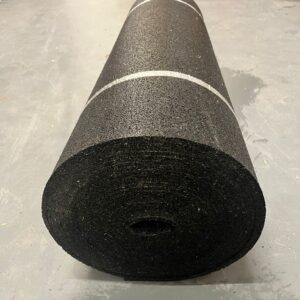
6mm Acoustic Rubber Underlay is a dense recycled rubber floor underlay designed to help reduce impact noise through floor structures. Supplied in a 10m x 1m roll, each roll covers 10m² and provides a slim acoustic layer beneath suitable hard floor finishes.
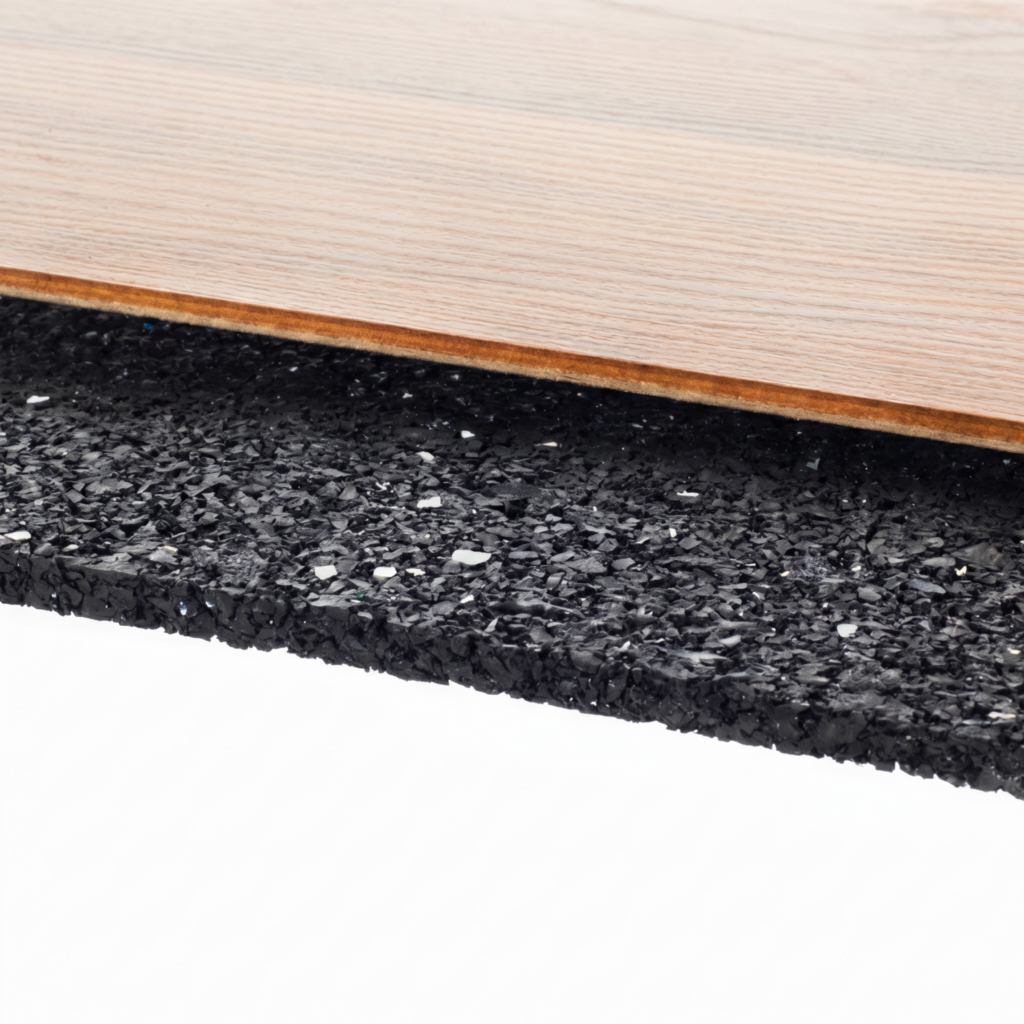
This 6mm rubber underlay is commonly used under laminate, engineered wood and screed floor systems where footfall noise, dropped items and movement across the floor need to be reduced. It is a practical option for flats, apartments, bedrooms, living rooms, home offices and refurbishment projects where a low-build-up acoustic floor solution is required.
What is 6mm Acoustic Rubber Underlay used for?
6mm Acoustic Rubber Underlay is used as an acoustic layer beneath suitable floor finishes. It helps reduce impact noise travelling through the floor, making it useful for rooms above other occupied spaces.
It is commonly installed over timber floors, chipboard decks and concrete subfloors as part of a wider floor soundproofing system. It can also be used under screed applications where a resilient acoustic layer is required.
How does 6mm Acoustic Rubber Underlay work?
6mm Acoustic Rubber Underlay works by adding a dense but resilient rubber layer between the subfloor and the final floor finish. The recycled rubber granule structure helps absorb and dampen impact vibration before it transfers into the structure below.
The product is especially useful for impact noise, such as footsteps and furniture movement. For airborne noise, such as voices, TV noise or music, it is usually best used alongside other soundproofing materials such as acoustic mineral wool, Tecsound acoustic membrane, acoustic sealant or a suitable ceiling treatment below.
What type of noise does 6mm Acoustic Rubber Underlay help reduce?
6mm Acoustic Rubber Underlay is mainly used to help reduce impact noise. This includes:
- Footsteps
- Dropped items
- Furniture movement
- Chair movement
- General footfall noise
- Noise transfer through floors to rooms below
It may also support the wider reduction of airborne noise when used as part of a complete floor soundproofing system, but it should not be relied on as a standalone airborne noise solution.
Where can 6mm Acoustic Rubber Underlay be used?
6mm Acoustic Rubber Underlay is suitable for a range of domestic, residential and light commercial floor applications, including:
- Laminate floor soundproofing
- Engineered wood floor soundproofing
- Timber floor upgrades
- Concrete floor upgrades
- Under screed applications
- Flats and apartments
- Bedrooms and living rooms
- Home offices and studies
- Rental properties and refurbishment projects
- Rooms above other occupied spaces
Why choose 6mm Acoustic Rubber Underlay?
6mm Acoustic Rubber Underlay is a useful choice where impact noise reduction is needed but floor height needs to be kept low. At only 6mm thick, it can be installed beneath compatible floor finishes without adding a large build-up to the floor.
Its dense rubber construction gives a firm underfoot feel, making it well suited to laminate and engineered wood floors where a soft or spongy underlay may not be suitable.
Key benefits
- 6mm acoustic rubber underlay — slim floor soundproofing layer with minimal height increase.
- Helps reduce impact noise — useful for footsteps, dropped items and furniture movement.
- Recycled rubber construction — made from dense rubber granules for acoustic resilience.
- 10m² coverage per roll — supplied in a 10m x 1m roll for efficient floor coverage.
- Firm underfoot feel — suitable for laminate and engineered wood flooring systems.
- Suitable for timber and concrete floors — useful for domestic and refurbishment projects.
- Can be used under screed — suitable for certain under screed acoustic applications.
- Easy to roll out and cut — can be trimmed around room edges, pipes and thresholds.
- Works within complete systems — can be combined with Tecsound membrane, acoustic mineral wool and acoustic sealant.
- Suitable for underfloor heating in some systems — always check compatibility with the heating and floor finish manufacturer.
Helpful advice before buying
6mm Acoustic Rubber Underlay performs best when used as part of a complete floor soundproofing build-up. The final result will depend on the existing floor type, ceiling construction below, floor finish, installation quality and how well gaps and flanking paths are controlled.
For timber floors, performance can often be improved by sealing floorboard gaps and adding acoustic mineral wool between joists before installing the underlay. For airborne noise issues, additional materials such as Tecsound acoustic membrane or an upgraded ceiling system may be required.
If you are unsure whether 6mm Acoustic Rubber Underlay is right for your project, please contact our team before ordering. We can help advise on the most suitable floor soundproofing system based on your property, noise issue, subfloor type and final floor finish.
6mm Acoustic Rubber Underlay Technical Specifications
6mm Acoustic Rubber Underlay is a recycled rubber acoustic floor underlay designed to reduce impact noise beneath suitable floor finishes. It is supplied in a roll format and can be used over timber or concrete subfloors as part of a complete acoustic floor system.
Product Specification
| Product Name |
6mm Acoustic Rubber Underlay |
| Product Type |
Acoustic rubber floor underlay |
| Material |
Recycled rubber granules with PUR bonding agent |
| Application |
Floor soundproofing systems |
| Suitable For |
Timber floors, concrete floors, laminate floors, engineered wood floors and under screed applications |
| Roll Size |
10m x 1m |
| Thickness |
6mm |
| Coverage |
10m² per roll |
| Pack Size |
1 roll |
| Approx. Roll Weight |
36kg per roll |
| Density |
Approx. 665kg/m³ |
| Thermal Conductivity |
0.12 W/mK |
| Fire Rating |
EN 13501-1 Class E |
| Main Noise Type |
Impact noise |
| Impact Sound Improvement |
Published data indicates approximately 18–22 dB, depending on the full system and test conditions |
| Installation Method |
Normally loose laid beneath suitable floor finishes; can be bonded where required using suitable adhesive |
| Cutting Method |
Sharp knife or suitable cutting tool |
| Underfloor Heating |
May be suitable in some systems; confirm compatibility with the heating and floor finish manufacturer |
| Standalone Product? |
No — should be used as part of a complete acoustic floor system where higher performance is required |
Suitable Applications
6mm Acoustic Rubber Underlay can be used in a range of floor soundproofing applications, including:
- Impact noise reduction through floors
- Laminate floor acoustic upgrades
- Engineered wood floor acoustic upgrades
- Timber floor soundproofing
- Concrete floor soundproofing
- Under screed soundproofing applications
- Flats and apartment refurbishments
- Bedrooms, lounges and home offices
- Rooms above other occupied spaces
- Domestic and light commercial renovation projects
Acoustic Use
6mm Acoustic Rubber Underlay is mainly used to reduce impact noise caused by footfall, dropped items and movement across the floor. The dense recycled rubber layer helps damp vibration before it transfers into the floor structure below.
It can also support the wider acoustic performance of a floor system when combined with other materials. For airborne noise reduction, additional materials such as acoustic mineral wool between joists, Tecsound acoustic membrane, acoustic sealant or an acoustic ceiling system may be required.
Common System Uses
- Loose laid beneath laminate flooring
- Loose laid beneath engineered wood flooring
- Used as a resilient layer beneath screed systems
- Used over timber floorboards or chipboard decks
- Used over suitable concrete subfloors
- Combined with acoustic mineral wool between joists
- Combined with Tecsound acoustic membrane for upgraded floor systems
- Used with acoustic sealant around perimeter gaps and service penetrations
Important Performance Note
6mm Acoustic Rubber Underlay is an acoustic underlay, not a complete soundproofing system on its own. It is mainly designed to reduce impact noise through floors.
The final result will depend on the existing floor structure, ceiling below, floor finish, installation quality, perimeter isolation and any flanking noise paths. If airborne noise from voices, TV or music is the main issue, additional soundproofing layers may be required.
For best results, seal floorboard gaps, perimeter edges, pipe penetrations and service openings before fitting the underlay.
Handling Advice
6mm Acoustic Rubber Underlay is supplied as a heavy roll and should be handled carefully. Store the roll dry, flat where possible and protected before installation.
Before fitting, make sure the floor is clean, dry and free from loose debris. Cut carefully around pipes, corners, thresholds and awkward areas, keeping gaps as small as possible.
How to Install 6mm Acoustic Rubber Underlay
6mm Acoustic Rubber Underlay is installed over a suitable subfloor as part of an acoustic floor system. It is normally rolled out and loose laid beneath compatible floor finishes, although it can be bonded where required using a suitable adhesive.
For the best result, the existing floor should be clean, dry, level, stable and properly sealed before the underlay is installed.
What You’ll Need
- 6mm Acoustic Rubber Underlay roll
- Acoustic sealant
- Tape measure
- Pencil or marker
- Straight edge
- Sharp utility knife or suitable cutting tool
- Suitable adhesive, if bonding is required
- Jointing tape, if required by the floor system
- PPE gloves
- Safety glasses
- Knee pads
- Waste bag for offcuts
Before You Start
Check the existing floor before installation. The floor should be clean, dry, level and stable.
Remove loose floor coverings and check for damaged boards, protruding nails, screws, gaps or unstable sections. Loose floorboards should be fixed down before the acoustic underlay is fitted.
Where possible, remove skirting boards before installation. This helps create a cleaner edge detail and makes it easier to seal the perimeter of the floor system.
Step 1: Prepare the Floor
Make sure the floor is ready for the 6mm Acoustic Rubber Underlay. The floor should be:
- Clean
- Dry
- Level
- Stable
- Free from dust and loose debris
- Free from protruding nails or screws
If installing over timber floorboards, check that the boards are secure and do not move excessively. If installing over concrete, make sure the slab is dry, sound and suitable for the chosen floor finish.
Step 2: Seal Gaps and Sound Leakage Points
Before rolling out the underlay, seal obvious gaps and weak points in the floor.
Pay close attention to:
- Gaps between floorboards
- Perimeter gaps around the room
- Pipe penetrations
- Service openings
- Cracks or holes in the floor
- Gaps around hearths, alcoves and thresholds
Use acoustic sealant where suitable. The aim is to reduce air paths through the floor before the acoustic layer is installed.
Step 3: Plan the Layout
Measure the room and plan the roll layout before cutting. The underlay is supplied in a 10m x 1m roll, covering 10m².
Plan the layout so the strips run neatly across the room with tight joints and minimal waste. Avoid unnecessary small strips where possible.
Step 4: Roll Out the Underlay
Roll out the 6mm Acoustic Rubber Underlay across the prepared floor. Allow the material to relax and settle before making final cuts.
Lay the underlay flat with no folds, ripples or raised sections. The underlay should sit evenly across the floor surface.
Step 5: Cut to Size
Cut the underlay to suit the room layout, edges and obstructions. Use a sharp utility knife and straight edge for clean cuts.
Cut carefully around:
- Doorways
- Corners
- Pipes
- Alcoves
- Fireplace hearths
- Thresholds
- Other floor obstructions
Keep cuts neat and avoid leaving unnecessary gaps, as open gaps can reduce acoustic performance.
Step 6: Butt the Joints Tightly
Lay each strip of underlay tightly against the next. Joints should be close-fitting with no open gaps.
Where required by the flooring system, use suitable jointing tape to hold the underlay edges together. Do not overlap the underlay unless the specific system requires it.
Step 7: Leave and Seal the Perimeter
Keep the underlay neatly fitted around the room perimeter. If a small perimeter gap is required by the floor system, seal it with acoustic sealant once the underlay is in position.
Perimeter sealing is important because sound can travel through small gaps at the edges of the room.
Step 8: Bond the Underlay Where Required
In many laminate and engineered wood applications, the underlay can be loose laid because it remains in place under its own weight and the floor finish above.
Where bonding is required, use a suitable water-based acrylic adhesive or another adhesive recommended for recycled rubber acoustic underlays. Do not use solvent-based adhesives unless they have been specifically approved for the product.
Follow the adhesive manufacturer’s instructions for coverage, open time and curing time.
Step 9: Install the Final Floor Finish
Once the underlay is laid flat, jointed and sealed, install the final floor finish according to the flooring manufacturer’s instructions.
Suitable finishes may include:
- Laminate flooring
- Engineered wood flooring
- Carpet systems, where suitable
- Screed systems, where specified
Do not install a floor finish unless it is suitable for use over acoustic rubber underlay. Always check the floor finish manufacturer’s guidance before fitting.
Installing Laminate Over 6mm Acoustic Rubber Underlay
For laminate floors, the underlay is normally rolled out over the prepared subfloor and the laminate is then installed above it as a floating floor.
Do not add an additional soft underlay unless the flooring manufacturer confirms it is suitable. Adding extra soft layers may make the floor unstable or affect click-lock joints.
Installing Engineered Wood Over 6mm Acoustic Rubber Underlay
For engineered wood floors, check whether the floor is being installed as a floating system or bonded system. Floating engineered wood may be suitable over the underlay, subject to the flooring manufacturer’s requirements.
Leave the required expansion gap around the room perimeter and seal suitable acoustic gaps with flexible acoustic sealant where possible.
Installing Carpet Over 6mm Acoustic Rubber Underlay
Where used beneath carpet, an additional carpet underlay may be required for comfort, depending on the carpet system.
Check the carpet and underlay manufacturer’s guidance before installation. The floor height around door thresholds and gripper rods may need to be adjusted.
Using 6mm Acoustic Rubber Underlay with Underfloor Heating
6mm Acoustic Rubber Underlay may be suitable for use with some underfloor heating systems, but compatibility should always be checked before installation.
Confirm with the underfloor heating manufacturer and the floor finish manufacturer before fitting. Make sure the full floor build-up is suitable for heat transfer, temperature limits and long-term use.
Optional Upgrade: Acoustic Mineral Wool Between Joists
For timber floors, performance can often be improved by installing acoustic mineral wool between the joists before fitting the rubber underlay above.
This usually involves lifting floorboards, fitting acoustic mineral wool neatly into the joist void and then relaying the boards before installing the underlay and final floor finish.
Optional Upgrade: Tecsound Acoustic Membrane
For improved airborne noise reduction, 6mm Acoustic Rubber Underlay can be combined with Tecsound acoustic membrane as part of an upgraded floor system.
Tecsound is normally used to add mass to the system, while the rubber underlay helps reduce impact noise. The correct layer order will depend on the floor construction and final floor finish.
Installation Tips
- Make sure the floor is clean, dry, level and stable before installation.
- Fix loose floorboards before laying the underlay.
- Seal gaps, cracks, pipe penetrations and perimeter edges before fitting.
- Roll the underlay out flat and allow it to settle before cutting.
- Keep joints tight and avoid overlaps.
- Use jointing tape where required by the floor system.
- Use suitable adhesive only if bonding is required.
- Avoid solvent-based adhesives unless approved for the product.
- Check compatibility with laminate, engineered wood, carpet or screed before installation.
- Do not rely on the underlay alone for airborne noise problems.
Important Soundproofing Note
6mm Acoustic Rubber Underlay helps reduce impact noise through floors, but the final result depends on the complete floor and ceiling construction.
Existing floorboards, joist voids, ceiling type, perimeter gaps, service penetrations, floor finish and flanking paths can all affect performance. If airborne noise from voices, TV or music is the main issue, additional products such as acoustic mineral wool, Tecsound membrane or a ceiling soundproofing system may be required.
If you are unsure how to use 6mm Acoustic Rubber Underlay in your project, please contact our team before installation. We can help advise on the most suitable floor soundproofing system based on your property, subfloor, noise issue and final floor finish.