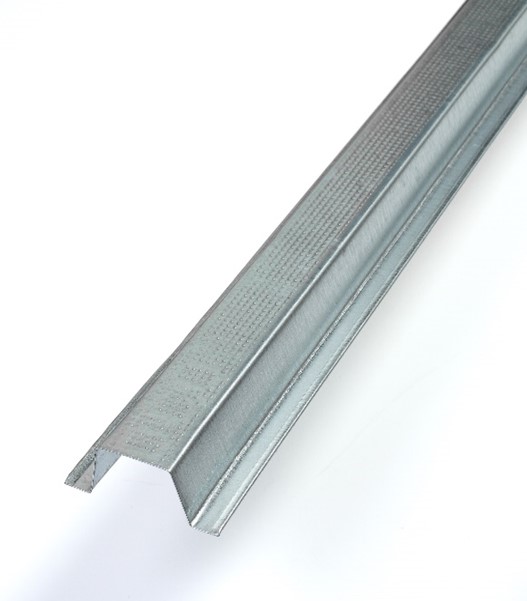
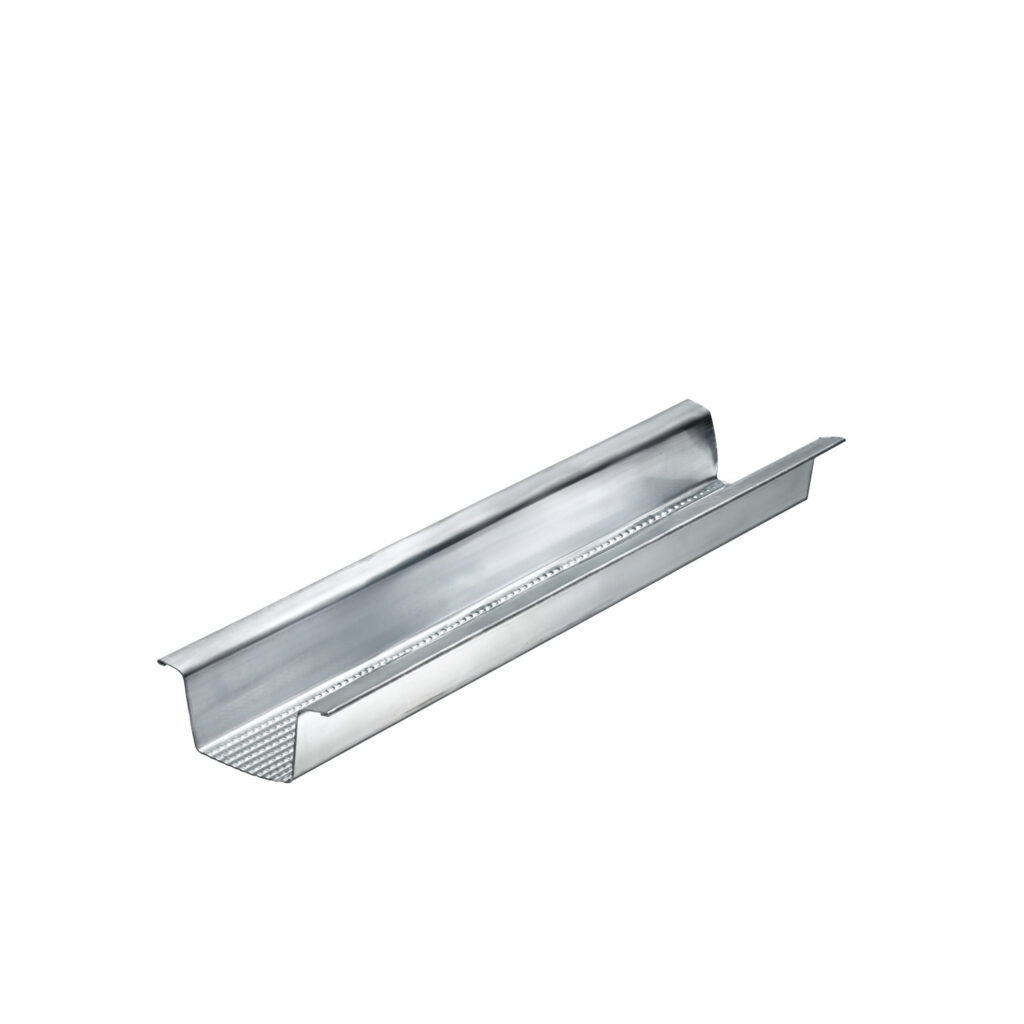
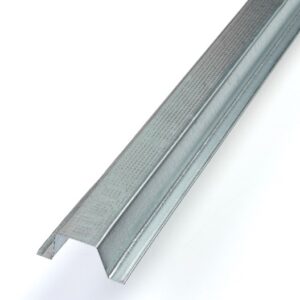
Resilient Bar
A resilient bar is a cold-rolled steel acoustic channel used to improve soundproofing in walls and ceilings. It helps separate plasterboard or acoustic board from the main structure, reducing vibration transfer and improving the overall performance of an acoustic build-up.
This resilient bar is supplied in a 3 metre length and has a corrosion-resistant finish, making it suitable for standard drywall and plasterboard systems. It is commonly used in homes, flats, offices, studios and commercial spaces where better noise control is required.
What is a resilient bar?
A resilient bar is a thin metal channel that is fixed to timber studs, ceiling joists or suitable wall and ceiling framing. Plasterboard is then fixed to the bar instead of being fixed directly to the structure behind it.
This creates a small flexible gap between the structure and the plasterboard. That separation helps reduce the amount of vibration that can pass through the wall or ceiling.
What is a resilient bar used for?
A resilient bar is used in soundproofing systems for walls and ceilings. It is especially useful where you want to reduce noise passing between rooms, floors or neighbouring properties.
It is commonly used for party walls, ceilings, stud wall upgrades, bedrooms, home offices, media rooms, studios, flats, apartments and shared buildings.
How does a resilient bar work?
Sound can travel through a building as vibration. When plasterboard is fixed directly to timber, metal or masonry, those vibrations can pass more easily through the structure.
A resilient bar helps by creating a flexible fixing point for the plasterboard. This creates a slight spring effect, helping to isolate the plasterboard lining from the structure behind it. When installed correctly, it can improve the sound reduction of the full wall or ceiling system.
Does a resilient bar reduce noise?
Yes, a resilient bar can help reduce noise when it is installed as part of a complete soundproofing system. It is mainly used to help reduce airborne noise, such as voices, TV noise, music and general room-to-room sound transfer.
In ceiling systems, a resilient bar can also help reduce some vibration transfer from above. However, impact noise from footsteps usually needs a full acoustic system, including insulation, suitable board layers, acoustic sealant and sometimes additional isolation products.
Where can a resilient bar be installed?
A resilient bar can be installed on suitable wall and ceiling structures, including timber studs, timber joists and other compatible framing systems. It is commonly used in:
- Party wall soundproofing systems
- Ceiling soundproofing systems
- Stud wall acoustic upgrades
- Noise from above treatments
- Bedrooms and home offices
- Media rooms and home cinemas
- Studios and music rooms
- Flats, apartments and shared buildings
- Commercial offices and meeting rooms
Why use a resilient bar instead of fixing plasterboard directly?
Fixing plasterboard directly to the structure creates a rigid connection. This can allow sound vibration to travel more easily through the wall or ceiling.
Using a resilient bar helps reduce this direct connection. The plasterboard is supported on the bar instead of being fixed straight back to the framing, which helps reduce vibration transfer and improves the performance of the soundproofing system.
Key benefits
- Improves wall and ceiling soundproofing — helps reduce sound transfer through the structure.
- Creates a spring effect — helps isolate plasterboard from the framing behind it.
- Cold-rolled steel construction — strong, reliable and suitable for drywall systems.
- 3 metre length — practical for domestic and trade installations.
- Corrosion-resistant finish — suitable for long-term use inside wall and ceiling systems.
- Helps reduce airborne noise — useful for voices, TV noise, music and general room-to-room noise.
- Useful for ceiling systems — often used in systems designed to reduce noise from above.
- Simple screw-fix installation — straightforward to fit when installed correctly.
What should a resilient bar be used with?
A resilient bar works best as part of a complete soundproofing build-up. It is commonly used with:
- Acoustic plasterboard
- Standard plasterboard layers
- Tecsound acoustic membrane
- ROCKWOOL acoustic mineral wool
- Acoustic sealant
- Suitable plasterboard screws
Important installation advice
Correct installation is very important. Plasterboard should be fixed to the resilient bar only. It should not be fixed through the bar and back into the timber or metal frame behind it.
If screws pass through into the structure, they can create a sound bridge. This gives vibration a direct path through the system and can reduce the acoustic benefit of the resilient bar.
Helpful advice before buying
A resilient bar is not normally used as a standalone soundproofing product. It performs best when used with the correct board layers, cavity insulation, acoustic membrane where required and acoustic sealant around the edges.
If you are unsure whether a resilient bar is suitable for your wall or ceiling project, please contact our team before ordering. We can help advise on the right system based on your noise issue, room type and existing construction.
Resilient Bar Technical Specifications
A resilient bar is a cold-rolled steel acoustic channel used in wall and ceiling soundproofing systems. It helps decouple plasterboard or acoustic board from the main structure, reducing direct vibration transfer and improving the acoustic performance of the complete build-up.
Product Specification
| Product Name |
Resilient Bar |
| Also Known As |
Acoustic resilient bar, resilient channel, soundproofing bar, acoustic channel |
| Product Type |
Acoustic resilient bar / decoupling channel |
| Application |
Walls and ceilings |
| Primary Use |
To help decouple plasterboard or acoustic board from timber studs, ceiling joists or suitable framing |
| Material |
Cold-rolled steel |
| Finish |
Corrosion-resistant / galvanised steel finish |
| Length |
3 metres |
| Profile Size |
Profile dimensions can vary by manufacturer. Please check supplier data before installation. |
| Typical Standard Reference |
Comparable resilient bar systems are commonly manufactured to EN 14195 for metal framing components used with plasterboard systems |
| Board Compatibility |
Suitable for use with standard plasterboard, acoustic plasterboard and multi-layer acoustic board systems when installed correctly |
| Typical Substrates |
Timber studs, ceiling joists, timber battens and suitable framing systems |
| Installation Method |
Screw-fixed to the supporting structure, with plasterboard fixed to the resilient bar only |
| Suitable Areas |
Party walls, stud walls, ceilings, bedrooms, home offices, studios, flats, apartments and commercial spaces |
| Fire Rating |
System dependent. Fire performance depends on the full wall or ceiling build-up, board specification and installation method. |
| Pack Size |
Usually sold individually or in bundles, depending on supplier |
Suitable Applications
A resilient bar can be used in wall and ceiling systems where improved acoustic performance is required. It is commonly installed in:
- Party wall soundproofing systems
- Ceiling soundproofing systems
- Stud wall acoustic upgrades
- Noise from above treatments
- Bedrooms and home offices
- Media rooms and home cinemas
- Studios and music rooms
- Flats, apartments and shared buildings
- Commercial offices and meeting rooms
Acoustic Use
A resilient bar is used to reduce the direct connection between the plasterboard layer and the wall or ceiling structure. This helps reduce vibration transfer and improves the soundproofing performance of the complete system.
It is mainly used to help reduce airborne noise, such as voices, TV noise, music and general room-to-room sound transfer. In ceiling systems, it can also help reduce some vibration transfer from above when used as part of a full acoustic build-up.
Common System Uses
- Fixed horizontally across timber studs in wall systems
- Fixed across ceiling joists in ceiling systems
- Used with acoustic plasterboard or standard plasterboard layers
- Used with ROCKWOOL acoustic mineral wool inside the cavity
- Used with Tecsound acoustic membrane where specified
- Used with acoustic sealant around perimeter gaps and joints
Important Compatibility Note
A resilient bar should be installed the correct way around and fixed only at the designed fixing flange. The plasterboard should then be fixed to the resilient bar, not through the bar and into the structure behind.
If screws pass through the plasterboard, through the resilient bar and into the timber or metal frame behind, this can create a sound bridge. A sound bridge gives vibration a direct route through the system and can reduce acoustic performance.
Performance Note
A resilient bar is not a complete soundproofing system on its own. It performs best as part of a full wall or ceiling build-up, normally including acoustic mineral wool, acoustic plasterboard, acoustic membrane where required, and acoustic sealant around all weak points.
The final soundproofing result will depend on the existing structure, bar spacing, board layers, installation quality and how well gaps and flanking paths are controlled.
Handling and Installation Advice
Before installation, check the correct fixing type for the supporting structure. Fixings should securely hold the resilient bar in place without distorting the profile.
If you are unsure how many resilient bars you need, or whether this product is suitable for your wall or ceiling, please contact our team before ordering. We can help advise on the correct system based on your room size, noise issue and existing construction.
How to Install a Resilient Bar
A resilient bar is used to help decouple plasterboard or acoustic board from the main wall or ceiling structure. When installed correctly, it creates a small flexible break between the board layer and the framing behind it, helping to reduce vibration transfer and improve the performance of the full soundproofing system.
Correct installation is very important. A resilient bar only works properly if the plasterboard is fixed to the bar and not through into the timber, metal or ceiling structure behind it. If the board is accidentally fixed back into the structure, it can create a sound bridge and reduce the acoustic benefit.
What You’ll Need
- Resilient bars
- Acoustic plasterboard or standard plasterboard
- Acoustic mineral wool, if filling the cavity
- Acoustic sealant
- Suitable screws for fixing the resilient bar to the structure
- Suitable plasterboard screws for fixing boards to the resilient bar
- Drill or impact driver
- Measuring tape
- Pencil or marker
- Spirit level or laser level
- Tin snips or metal cutting tool, if bars need trimming
- PPE, including gloves and safety glasses
Before You Start
Check the wall or ceiling structure before installation. A resilient bar is commonly fixed to timber studs, ceiling joists, battens or suitable framing systems. The structure should be secure, dry and capable of supporting the finished board layers.
You should also check the board layout, number of plasterboard layers and fixing centres required for your system. Bar spacing can vary depending on the system design, board weight and installation area, so always follow the supplier or project specification where available.
Step 1: Prepare the Wall or Ceiling
Before fitting the resilient bars, make sure the installation area is ready. The surface or frame should be:
- Clean — remove loose dust, debris and old fixings.
- Dry — avoid installing over damp or unstable surfaces.
- Structurally sound — only fix into secure studs, joists, battens or suitable framing.
- Clear of services — check for cables, pipes and other services before drilling or screwing.
If acoustic mineral wool is being used inside the cavity, this is usually fitted before the plasterboard layers are installed.
Step 2: Mark the Bar Positions
Use a tape measure and level to mark where each resilient bar will be fitted. The bars should be straight, evenly spaced and installed in the correct direction for the wall or ceiling system.
For walls, a resilient bar is usually fitted horizontally across the studs or framing. For ceilings, a resilient bar is usually fitted across the joists. Always follow the system guidance for spacing and orientation.
Step 3: Cut the Resilient Bars to Length
If a bar needs to be shortened, measure carefully and cut it using tin snips or a suitable metal cutting tool.
Take care when handling cut metal edges, as they can be sharp. Wear gloves and avoid leaving sharp offcuts in the work area.
Step 4: Fix the Resilient Bar to the Structure
Position the resilient bar against the marked line and fix it through the correct fixing flange only. The bar should be securely fixed to the structure without being bent, crushed or distorted.
- Hold the bar in position on the marked line.
- Fix through the correct fixing side of the bar.
- Keep the bar straight and level as you work across the wall or ceiling.
- Continue installing the remaining bars at the required centres.
Do not over-tighten fixings in a way that deforms the bar. The shape of the bar is what helps create the spring effect, so it needs to remain correctly formed.
Step 5: Fit Acoustic Mineral Wool, If Required
If the soundproofing system includes acoustic mineral wool, fit it into the cavity before boarding. The insulation should sit neatly between the studs or joists without being heavily compressed.
Acoustic mineral wool helps absorb sound inside the cavity, while the resilient bar helps reduce vibration transfer through the structure. Together, they improve the performance of the full wall or ceiling build-up.
Step 6: Fix the Plasterboard to the Resilient Bar
Offer the plasterboard or acoustic board into position and fix it to the resilient bar only. This is the most important part of the installation.
- Position the board against the resilient bars.
- Use suitable plasterboard screws to fix the board into the bar.
- Make sure screws do not pass through the resilient bar and into the studs, joists or structure behind.
- Continue fixing the board across the system.
- If using more than one board layer, stagger the joints between layers where possible.
If a screw goes through into the structure behind the resilient bar, it can create a direct sound bridge. This gives vibration a route through the system and can reduce the acoustic performance.
Step 7: Leave and Seal the Perimeter Gap
Leave a small gap around the perimeter of the board layer where it meets adjoining walls, ceilings or floors. This gap should then be sealed with acoustic sealant.
Do not hard-fill the perimeter with rigid filler before acoustic sealing, as this can create a rigid connection. Acoustic sealant helps maintain the separation and reduces sound leakage around the edges.
Step 8: Seal Joints and Service Penetrations
Seal any weak points in the system, including board edges, service penetrations, socket areas and gaps around pipes or cables.
For sockets and switches, use suitable acoustic detailing such as acoustic putty pads where required. Small gaps can reduce soundproofing performance, so careful sealing is important.
Step 9: Finish the Wall or Ceiling
Once the boards are installed and sealed, the wall or ceiling can be finished according to the project requirements. This may include taping, jointing, plastering and decorating.
Avoid adding fixings that go through the finished board layer and into the original structure unless they are part of the approved system design. Unplanned rigid fixings can reduce the benefit of the resilient bar.
Installing a Resilient Bar on Walls
For wall soundproofing, a resilient bar is commonly fixed horizontally across timber studs or suitable framing. The plasterboard or acoustic board is then fixed to the bar rather than directly to the studs.
This method is often used for party walls, stud wall upgrades, bedrooms, home offices, media rooms, studios and shared walls where airborne noise is a problem.
Installing a Resilient Bar on Ceilings
For ceiling soundproofing, a resilient bar is commonly fixed across ceiling joists. The plasterboard or acoustic board is then fixed to the bars below.
This method is often used to help reduce noise from above, including voices, TV noise, general movement and some vibration transfer. For stronger impact noise reduction, it should be used as part of a complete ceiling soundproofing system.
Installation Tips
- Install the bar the correct way around — follow the profile and fixing guidance for the product.
- Fix through the correct flange only — do not flatten or crush the bar.
- Keep bars level and evenly spaced — this helps support the board correctly.
- Do not screw boards into the structure — fix plasterboard to the resilient bar only.
- Use the correct screw length — screws should fix into the bar without reaching the structure behind.
- Stagger board joints — especially when using multiple plasterboard layers.
- Seal perimeter gaps — use acoustic sealant around all edges and weak points.
- Use within a full system — combine with acoustic mineral wool, acoustic boards and sealant for better results.
Common Mistakes to Avoid
- Fixing plasterboard through the resilient bar and into the studs or joists behind.
- Installing the resilient bar the wrong way around.
- Using screws that are too long.
- Crushing or flattening the bar during installation.
- Leaving unsealed gaps around the perimeter.
- Leaving sockets, pipework or service penetrations untreated.
- Expecting a resilient bar to work as a standalone soundproofing solution.
Important Soundproofing Note
A resilient bar is not a complete soundproofing system by itself. It is designed to improve the performance of a wall or ceiling build-up by reducing direct vibration transfer between the structure and the board layer.
For best results, use a resilient bar with suitable acoustic mineral wool, acoustic plasterboard, acoustic membrane where required and acoustic sealant. The final performance will depend on the existing structure, installation quality, board layers, bar spacing and how well flanking paths are controlled.
If you are unsure how many resilient bars you need, or whether this product is suitable for your wall or ceiling, please contact our team before ordering. We can help advise on the right system based on your room size, noise issue and existing construction.