Genie Clip Box
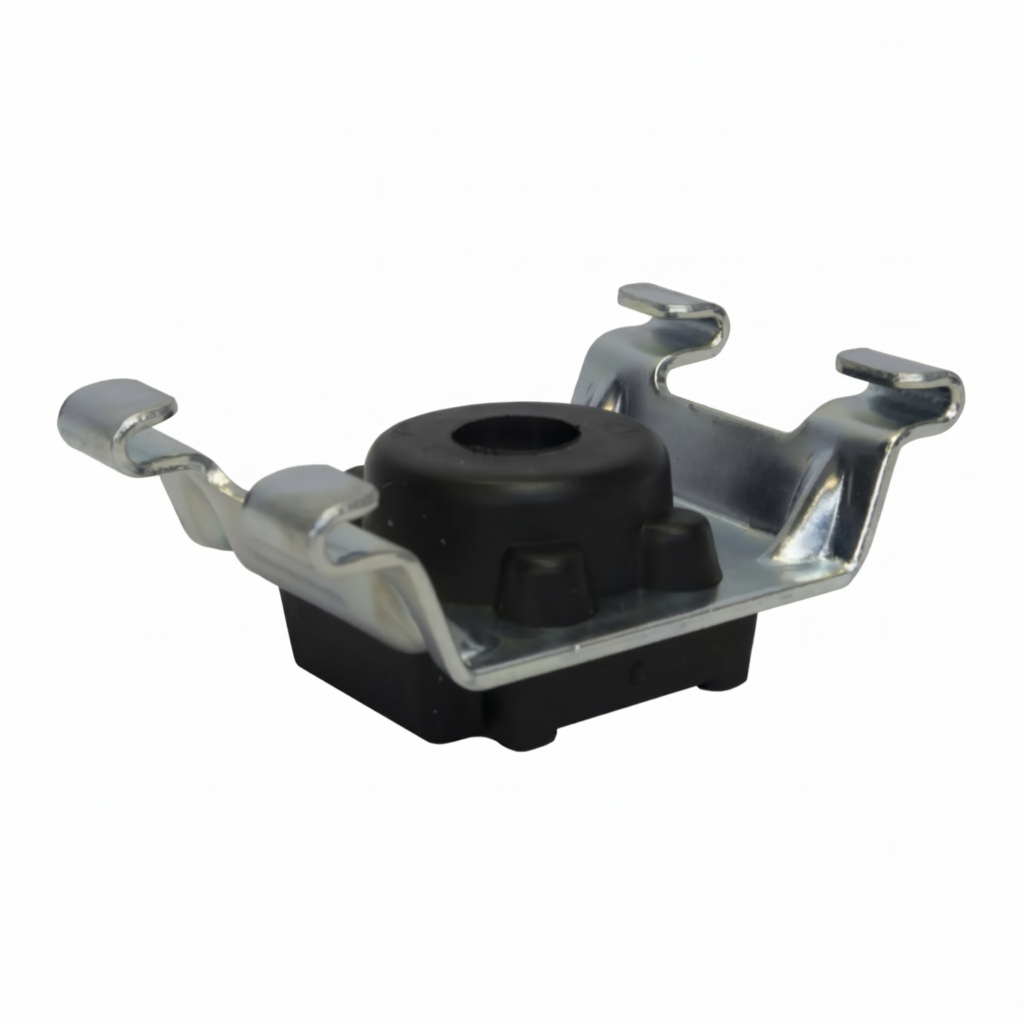
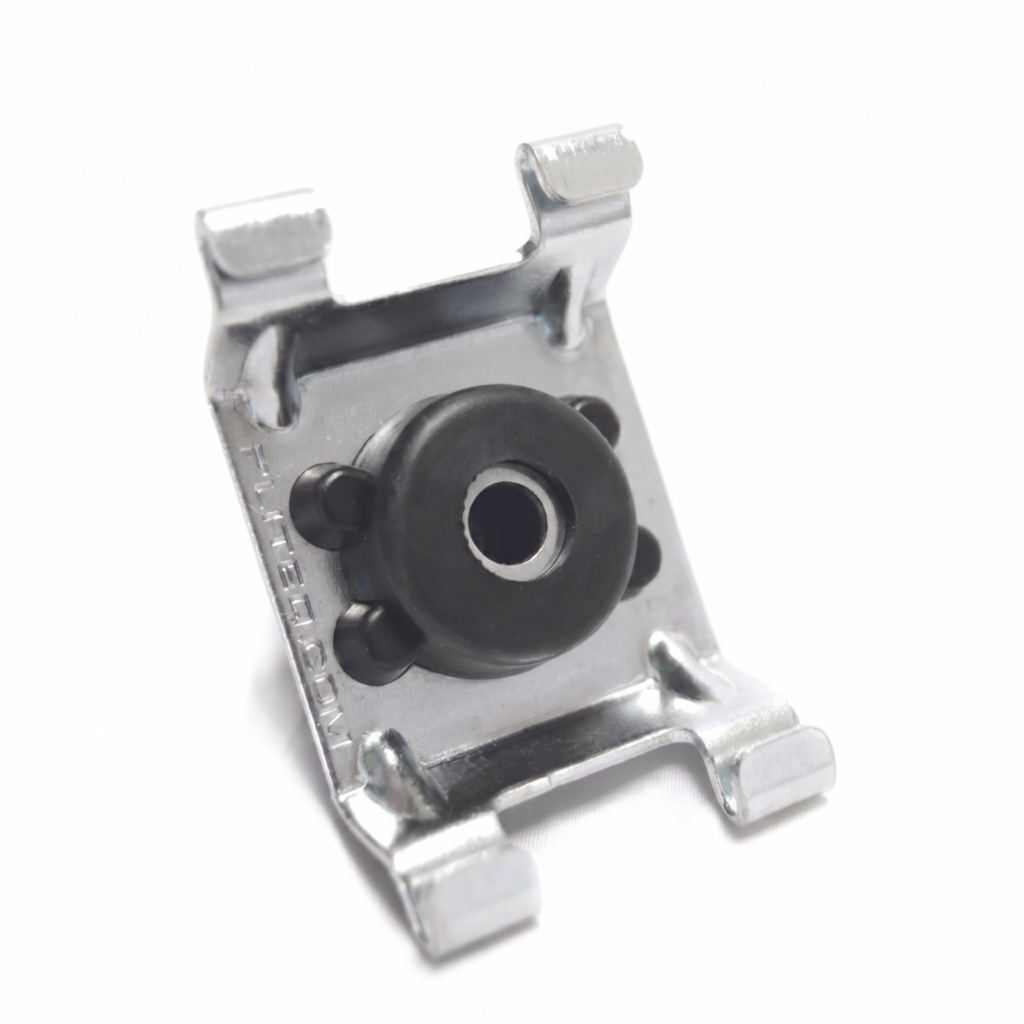
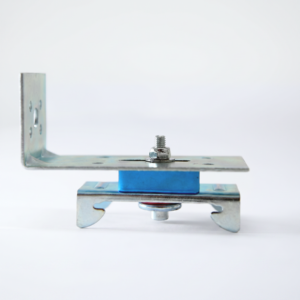
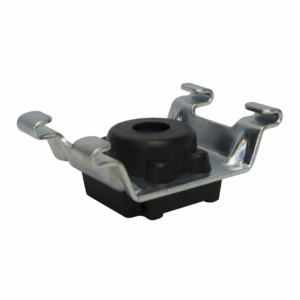
Genie Clip Box contains 100 GenieClip RST resilient sound isolation clips for use in wall and ceiling soundproofing systems. Genie Clips are designed to decouple plasterboard from the supporting structure, helping reduce airborne noise and impact vibration when used with compatible furring channel and acoustic plasterboard.
Each Genie Clip is made from a moulded rubber and galvanised steel construction. The clip is fixed to the wall or ceiling structure, the furring channel is clipped into place, and the plasterboard is then fixed to the furring channel rather than directly to the structure behind.
What is a Genie Clip Box used for?
A Genie Clip Box is used when installing larger acoustic wall or ceiling systems where multiple clips are required. The box format is ideal for full-room installations, ceiling soundproofing projects, party wall upgrades, studio builds and commercial acoustic fit-outs.
Genie Clips are commonly used as part of:
- Wall soundproofing systems
- Ceiling soundproofing systems
- Party wall upgrades
- Stud wall acoustic upgrades
- Floor/ceiling acoustic systems
- Recording studios and music rooms
- Cinema rooms and media rooms
- Flats, apartments and conversion projects
- Commercial acoustic refurbishment projects
- Projects requiring a higher-performance alternative to resilient bar
How do Genie Clips work?
Genie Clips work by creating a resilient separation between the plasterboard lining and the structure behind it.
The clip is fixed to timber, steel, masonry or concrete using suitable fixings. A compatible furring channel is then clipped into the Genie Clip. Plasterboard or acoustic plasterboard is fixed to the furring channel, creating a decoupled lining system.
This separation helps reduce direct vibration transfer through the wall or ceiling structure. The rubber element in the Genie Clip helps absorb vibration, while the metal section provides support for the furring channel and board layers.
What type of noise do Genie Clips help reduce?
Genie Clips can help reduce both airborne noise and impact noise when used as part of a complete acoustic system.
Airborne noise includes voices, TV noise, music, traffic noise and general sound transfer between rooms or properties.
Impact noise includes footsteps, dropped items, furniture movement and vibration through floor and ceiling structures.
The final result will depend on the full build-up, including the existing structure, insulation, clip spacing, furring channel, plasterboard layers, perimeter sealing and flanking noise paths.
Where can Genie Clips be installed?
Genie Clips are suitable for a range of wall and ceiling applications, including:
- Party walls
- Stud walls
- Independent wall linings
- Direct-to-wall acoustic lining systems
- Ceilings below timber joists
- Floor/ceiling assemblies
- Concrete or masonry wall upgrades
- Studios, cinemas and music rooms
- Domestic and commercial refurbishment projects
Why choose a Genie Clip Box?
A box of 100 clips is useful when fitting a full wall or ceiling system. It provides enough clips for larger acoustic installations and is more practical than buying individual clips when working across multiple rooms or larger areas.
Genie Clips are often chosen instead of standard resilient bar because the clip and channel system offers a more controlled decoupling method. When installed correctly, plasterboard is fixed to the furring channel only, reducing the risk of direct fixing into the structure behind.
Genie Clip vs resilient bar — what is the difference?
Both Genie Clips and resilient bars are designed to decouple plasterboard from the structure, but they work differently.
A resilient bar is a continuous metal profile fixed directly across studs or joists. Genie Clips use separate rubber and steel isolation clips with a compatible furring channel. This can make the system more robust and reduce the risk of acoustic short-circuiting when installed correctly.
Key benefits
- Box of 100 clips — suitable for larger wall and ceiling soundproofing projects.
- Resilient sound isolation clip — helps decouple plasterboard from the supporting structure.
- Helps reduce airborne noise — useful for voices, TV noise, music and general sound transfer.
- Helps reduce impact vibration — useful in ceiling and floor/ceiling acoustic systems.
- Rubber and galvanised steel construction — designed for acoustic isolation and board support.
- Suitable for walls and ceilings — versatile use across domestic and commercial projects.
- Works with compatible furring channel — plasterboard is fixed to the channel, not directly to the structure.
- Useful alternative to resilient bar — provides a more controlled clip and channel decoupling system.
- Quick to install — each clip is fixed with one suitable fixing into the supporting structure.
- Suitable for high-performance acoustic systems — commonly used in studios, flats, cinemas and party wall upgrades.
Helpful advice before buying
Genie Clips are not a complete soundproofing system on their own. They should be used with compatible furring channel, acoustic plasterboard, acoustic mineral wool, acoustic sealant and correct perimeter detailing.
The number of clips required depends on the wall or ceiling size, furring channel spacing, board weight and system specification. Always check the correct clip layout and loading requirements before installation.
If you are unsure how many Genie Clips you need, or whether this is the right decoupling system for your project, please contact our team before ordering.
Genie Clip Box Technical Specifications
Genie Clip Box contains 100 GenieClip RST resilient acoustic isolation clips for use with compatible furring channel in wall and ceiling soundproofing systems. The clips are designed to reduce direct vibration transfer between the plasterboard lining and the supporting structure.
Product Specification
| Product Name |
Genie Clip Box |
| Common Product Reference |
GenieClip RST – Box of 100 |
| Product Type |
Resilient sound isolation clip / acoustic decoupling clip |
| Pack Size |
100 clips per box |
| Material |
Moulded rubber and galvanised steel mount |
| Application |
Wall and ceiling soundproofing systems |
| Suitable For |
Walls, ceilings, floor/ceiling assemblies, studios, cinema rooms, music rooms and acoustic plasterboard systems |
| Approx. Clip Dimensions |
Approx. 41mm wide x 64mm high x 25mm deep |
| Approx. Clip Weight |
Approx. 45g per clip |
| Approx. Box Weight |
Approx. 4.5kg for 100 clips, excluding packaging |
| Maximum Acoustic Design Load |
Approx. 16kg / 36lb per clip according to manufacturer data |
| Compatible Channel |
Compatible plasterboard furring channel / hat channel with hemmed edges |
| Projection from Structure |
Approx. 46mm when used with 22mm furring channel, according to manufacturer data |
| Maximum Furring Channel Spacing |
Manufacturer guidance lists maximum 24 inches / 609mm centres |
| Maximum Clip Spacing |
Manufacturer guidance lists maximum 48 inches / 1219mm centres along the furring channel |
| Main Noise Types |
Airborne noise and impact vibration, depending on full system build-up |
| Fixing Method |
Fixed to timber, steel, masonry or concrete substrates using suitable approved fixings |
| Minimum Fixing Strength |
Manufacturer guidance requires fixings with suitable pull-out or shear strength for the substrate |
| Important Fixing Note |
Do not over-tighten fixings, as this can reduce acoustic isolation performance |
| Fire Rating |
System-dependent — confirm the full tested wall or ceiling build-up before compliance-led use |
| Standalone Product? |
No — should be used as part of a complete acoustic wall or ceiling system |
Suitable Applications
Genie Clip Box can be used in a range of acoustic applications, including:
- Party wall soundproofing
- Stud wall acoustic upgrades
- Independent wall lining systems
- Ceiling soundproofing systems
- Timber joist ceiling upgrades
- Floor/ceiling acoustic systems
- Recording studios and music rooms
- Drum rooms and rehearsal spaces
- Cinema rooms and media rooms
- Domestic and commercial acoustic refurbishments
Acoustic Use
Genie Clips are used to decouple plasterboard from the supporting wall or ceiling structure. By separating the board layer from the structure, the system helps reduce vibration transfer and improves the sound insulation of the overall build-up.
The clips should be used with compatible furring channel and suitable board layers. Acoustic mineral wool, acoustic sealant and correct perimeter isolation are normally used alongside the clip and channel system.
Common System Uses
- Fixed to timber studs or joists
- Fixed to metal framing where suitable
- Fixed to masonry or concrete using suitable anchors
- Used with furring channel to carry acoustic plasterboard
- Used with one or two layers of plasterboard depending on system design
- Combined with acoustic mineral wool in wall or ceiling cavities
- Combined with acoustic sealant around board perimeters
- Used where resilient bar may not provide enough isolation or installation control
Important Performance Note
Genie Clips are acoustic decoupling components, not complete soundproofing systems on their own. The final result depends on the full wall or ceiling build-up.
Clip spacing, furring channel spacing, plasterboard weight, insulation, perimeter sealing, substrate type, fixing method, workmanship and flanking noise paths can all affect performance.
Published system figures should be treated as system-dependent. For Building Regulations, fire-rated or compliance-led projects, use the correct tested specification and seek project-specific acoustic advice where required.
Handling Advice
Store Genie Clips clean, dry and protected before installation. Check that the supporting structure is suitable before fitting.
Do not install onto weak, loose, rotten or unstable substrates. Do not over-tighten the fixing through the clip, as excessive compression can reduce the acoustic isolation performance of the rubber element.
How to Install Genie Clips
Genie Clips are installed to the supporting wall or ceiling structure and used with compatible furring channel to create a decoupled plasterboard lining. The system helps reduce sound transfer by separating the plasterboard from the structure behind it.
For best results, Genie Clips should be installed as part of a complete acoustic wall or ceiling system, using the correct clip spacing, furring channel, board layers, insulation and acoustic sealing.
What You’ll Need
- Genie Clip Box
- Compatible furring channel / hat channel
- Acoustic plasterboard or suitable gypsum board
- Acoustic mineral wool, where specified
- Acoustic sealant
- Suitable fixings for timber, steel, masonry or concrete
- Drywall screws for fixing plasterboard to furring channel
- Tape measure
- Pencil or marker
- Laser level or spirit level
- Drill/driver
- Metal snips or suitable channel cutter
- Temporary shims for board perimeter gaps
- PPE gloves
- Safety glasses
- Dust mask
- Waste bag for offcuts
Before You Start
Check the wall or ceiling structure before installation. The structure should be stable, dry and capable of supporting the full acoustic system, including clips, furring channel, plasterboard layers and any additional acoustic materials.
Plan the layout before fixing the clips. The number of clips required depends on the room size, board weight, furring channel spacing and acoustic specification.
Check that the fixings are suitable for the substrate. Fixing strength is important because each clip supports part of the board and channel load.
Step 1: Prepare the Wall or Ceiling
Make sure the installation area is ready. The substrate should be:
- Clean
- Dry
- Stable
- Structurally suitable
- Free from loose material
- Suitable for the chosen fixing type
Repair loose boards, damaged studs, unstable masonry or weak ceiling areas before installing the clips.
Step 2: Install Acoustic Insulation Where Required
Where the system requires cavity treatment, install acoustic mineral wool before the plasterboard layers are fitted.
For walls, insulation is commonly fitted between studs or within the wall lining cavity. For ceilings, insulation is commonly installed between joists.
The insulation should fit neatly without being over-compressed and should not interfere with the clip and channel system.
Step 3: Mark the Clip Layout
Mark the furring channel lines on the wall or ceiling.
Manufacturer guidance commonly uses furring channel rows at a maximum of 24 inches / 609mm centres, with Genie Clips spaced at a maximum of 48 inches / 1219mm centres along the channel.
For walls, the bottom row of furring channel is normally positioned close to the floor, with the top row close to the ceiling. For ceilings, the first and last rows are normally positioned close to the wall edges.
Always follow the project-specific layout or manufacturer guidance where provided.
Step 4: Fix the Genie Clips
Fix each Genie Clip to the structure using a suitable approved fixing for the substrate.
Common substrates include:
- Timber studs
- Timber joists
- Metal studs
- Masonry walls
- Concrete soffits
Tighten the fixing until it comes into contact with the top washer of the Genie Clip. Do not over-tighten. Over-tightening can compress the resilient element and reduce acoustic performance.
Step 5: Fit the Furring Channel
Snap the compatible furring channel into the Genie Clips.
Make sure the channel is fully seated and runs straight across the wall or ceiling. Furring channel should be installed perpendicular to studs or joists, depending on the system.
Where channels need to be joined, overlap the channel ends in the middle of the span between clips. Manufacturer guidance commonly refers to a 6 inch / 150mm overlap, secured with suitable wire or framing screws.
Do not cantilever the furring channel excessively beyond the final clip.
Step 6: Check the Clip and Channel System
Before installing plasterboard, check the full clip and channel layout.
Check that:
- All clips are securely fixed
- Fixings are not over-tightened
- Furring channels are fully seated in the clips
- Channel spacing is correct
- Clip spacing is correct
- Channel joints are properly overlapped
- There are no rigid bridges to the structure behind
- Extra support is included around doors, windows and board edges where required
Correct any issues before fitting plasterboard.
Step 7: Install the First Layer of Plasterboard
Install the plasterboard onto the furring channel using suitable drywall screws.
Only fix the plasterboard to the furring channel. Do not screw through into the studs, joists, masonry or structure behind, as this can create an acoustic bridge.
Leave a small perimeter gap around the plasterboard. This gap should be sealed later with acoustic sealant.
Step 8: Install Additional Board Layers Where Required
If the system requires a second layer of plasterboard or acoustic plasterboard, install it after the first layer.
For best acoustic performance, stagger board seams between layers. Avoid lining up joints where possible.
Use the correct screw length so the screws fix into the furring channel without passing through into the structure behind.
Step 9: Seal the Perimeter
Once the plasterboard layers are installed, seal the full perimeter gap with non-hardening acoustic sealant.
Seal around:
- Floor and ceiling junctions
- Wall perimeters
- Socket penetrations
- Pipe penetrations
- Service openings
- Board edges
- Awkward corners and junctions
Good sealing is important because sound can pass through small air gaps.
Step 10: Finish the Wall or Ceiling
After the acoustic sealant has cured, tape and finish the plasterboard joints as required.
The final finish may include jointing compound, skim plaster, paint or another suitable decorative finish.
Do not fix heavy point loads such as cabinets, shelving or heavy equipment directly to the Genie Clip and plasterboard system unless the wall or ceiling has been specifically designed to support them.
Installing Genie Clips on Walls
For wall installations, Genie Clips are typically fixed to timber studs, metal studs or masonry walls. Furring channel is then installed horizontally, and plasterboard is fixed to the channel.
Avoid any direct plasterboard fixings into the structure behind. Any rigid bridge can reduce acoustic performance.
Installing Genie Clips on Ceilings
For ceiling installations, Genie Clips are typically fixed to timber joists or a suitable ceiling substrate. Furring channel is installed perpendicular to the joists, and plasterboard is fixed to the channel.
Ceiling systems must be designed to carry the full board weight. Check clip loading, fixing strength and board specification before installation.
Installation Tips
- Plan the clip and channel layout before fixing anything.
- Use suitable fixings for the substrate.
- Do not exceed the specified clip and channel spacing.
- Do not over-tighten the clip fixings.
- Make sure furring channel is fully engaged in the clip.
- Only fix plasterboard into the furring channel, not the structure behind.
- Stagger plasterboard joints where multiple layers are used.
- Leave a perimeter gap around the plasterboard.
- Seal the perimeter with non-hardening acoustic sealant.
- Use putty pads and acoustic sealant around sockets where required.
- Do not hang heavy point loads from the decoupled plasterboard layer unless the system is designed for it.
Important Soundproofing Note
Genie Clips can significantly improve the acoustic performance of a wall or ceiling system, but the final result depends on the complete build-up.
Existing structure, clip spacing, furring channel, plasterboard mass, insulation, fixing method, perimeter sealing and flanking paths can all affect the result.
If you are unsure how to use Genie Clips in your project, please contact our team before installation. We can help advise on the most suitable wall or ceiling soundproofing system based on your structure, noise issue and available build-up depth.