GTR Glazing Seal Roll – 20m
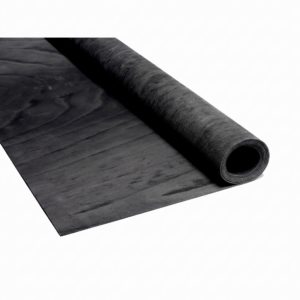
GTR Glazing Seal Roll – 20m is a flexible, self-adhesive intumescent foam glazing tape developed for use within approved glazed apertures in fire-resisting doors and screens.
The tape combines a highly compressible foam structure with graphite-based intumescent material.
During normal conditions, it provides a flexible bedding and sealing layer between the fire-resistant glass and the associated glazing bead or glazing-system component.
When exposed to elevated temperatures during a fire, the intumescent material expands to help seal the glazing pocket and protect the glazed aperture.
The stocked range is supplied in three profiles:
- 10 × 5mm
- 15 × 5mm
- 20 × 5mm
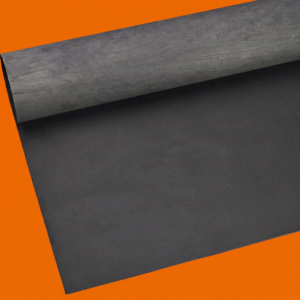
Every size is supplied as a 20m black roll.
What is GTR glazing tape used for?
GTR tape is intended for use as part of an approved fire-resistant glazing system in:
- Glazed fire-door apertures
- Fire-resistant timber screens
- Fire-resistant glazed partitions
- Other supported fire-glazing constructions
The tape is normally fitted around the glass or to the glazing beads in the position required by the tested glazing-system detail.
It should not be treated as a general-purpose glazing tape where fire performance is required without supporting evidence.
Intumescent fire-glazing protection
During a fire, the graphite-based material expands and forms an insulating char within the glazing pocket.
This expansion can help:
- Restrict the passage of flames and hot gases around the glass
- Seal gaps created as glazing components heat and move
- Protect the edges of the fire-resistant glass
- Reduce direct heat exposure to timber glazing beads
- Maintain the integrity of an approved fire-glazing assembly
The manufacturer states that expansion begins at approximately 180°C and can reach around three to four times the tape’s original volume.
Its expanded char is designed to remain stable under high-temperature fire conditions.
Flexible and compressible construction
GTR differs from a rigid intumescent glazing strip because it incorporates a flexible foam structure.
The tape can:
- Conform to the glazing bead and glass surface
- Accommodate limited normal tolerances within the glazing pocket
- Provide controlled compression around the glass
- Be cut accurately around rectangular or shaped apertures
- Support dry-glazing installation methods
The standard tape is 5mm thick and can be compressed to approximately 2mm where the approved glazing-system detail requires that degree of compression.
The tape must not be compressed beyond the requirements of the tested system.
Low-to-medium pressure intumescence
The product is described as a low-to-medium pressure intumescent glazing tape.
This means its expansion is intended to develop sealing pressure without applying the much higher forces associated with some rigid graphite products.
This characteristic can be useful around fire-resistant glass, where uncontrolled pressure could affect:
- The glass edge
- The glazing beads
- The bead fixings
- The surrounding door or screen construction
The correct tape size, compression and glazing-pocket dimensions must still follow the applicable fire-test evidence.
Self-adhesive backing
GTR incorporates a strong self-adhesive backing to assist installation.
The adhesive holds the tape in position while:
- The glass is placed within the aperture
- The glazing beads are aligned
- The mechanical bead fixings are installed
- The remainder of the glazing system is completed
The adhesive is an installation aid only.
It does not structurally retain the glass or replace the glazing beads, pins, screws, setting blocks or other components required by the tested glazing system.
Designed for precision-dependent applications
The flexible tape can be cut with sharp scissors or a suitable knife.
This allows it to be fitted accurately around:
- Rectangular vision panels
- Narrow glazed apertures
- Larger fire-resistant glazing panels
- Approved shaped or non-standard apertures
- Glazing beads requiring closely fitted tape joints
Cuts should be clean and square, with adjoining tape sections fitted closely together.
Open joints can leave an untreated route through the glazing seal.
Fire-resistance applications
GTR has been developed primarily for supported:
- 30-minute fire-glazing applications
- 60-minute fire-glazing applications
The tape does not possess a universal standalone fire rating.
The permitted performance depends on the complete glazed construction, including:
- The fire-resistant glass type and thickness
- The door leaf or screen construction
- The glazed-aperture dimensions
- The glazing-bead material and dimensions
- The bead fixing type, spacing and angle
- The glazing setting blocks
- The tape dimensions and compression
- Any required aperture liner
- The amount of glass edge cover
- The quality of installation
The required fire period must be supported by evidence for the complete glazing system rather than by the tape alone.
Suitable glass types
The manufacturer describes the product as suitable for a broad range of fire-resistant glazing applications, including systems using:
- Integrity-only fire-resistant glass
- Semi-insulating fire-resistant glass
- Insulating fire-resistant glass
Compatibility must be confirmed for the particular glass product and glazed construction.
Do not assume that GTR tape can be used with every fire-resistant glass solely because the required fire period is the same.
Fire-door glazing
Before using GTR within a fire door, confirm that the door’s evidence permits:
- A glazed aperture
- The selected glass type
- The proposed aperture dimensions
- The specified bead construction
- The selected GTR profile
- The required tape position and compression
- The bead fixing arrangement
- Any required aperture lining
Cutting glazing into an existing certified door without supporting evidence can invalidate the door’s fire classification and certification.
Black finish
GTR glazing tape is supplied in one colour:
Black
The tape will normally be largely concealed behind the glazing beads once installation is complete.
A narrow exposed sightline may remain depending on:
- The bead profile
- The glass position
- The tape width
- The degree of compression
- The glazing-system design
Do not paint the tape or apply decorative coatings to the intumescent surface.
Available profile sizes
The stocked options are:
- 10 × 5mm — the narrowest stocked profile.
- 15 × 5mm — a medium-width profile.
- 20 × 5mm — the widest stocked profile.
The width should be selected according to the tested glazing-system specification.
A wider tape is not automatically a higher-rated alternative, and the three profiles should not be substituted without evidence.
20m roll format
Each product is supplied as a continuous:
20-metre roll
The roll format allows installers to cut the required lengths for each side of the glazed aperture.
The quantity required depends on:
- The number of glazed apertures
- The perimeter dimensions of each aperture
- Whether tape is required on one or both faces of the glass
- The tested glazing arrangement
- Cutting waste and joint locations
Measure the complete glazing perimeter before calculating the required number of rolls.
Not a structural glazing product
GTR tape must not be relied upon to carry or retain the weight of the glass.
The complete glazing system may require:
- Approved glazing setting blocks
- Timber or steel glazing beads
- Steel pins or screws
- Specified glass edge cover
- Aperture liners
- Other fire-resistant glazing components
Every structural and fire-protection component must match the tested or assessed system.
Cold-smoke and acoustic limitations
The product is designed primarily as an intumescent fire-glazing tape.
It should not automatically be assigned:
- A standalone cold-smoke classification
- A standalone acoustic rating
- An airtightness classification
- A weather-sealing classification
Any smoke or acoustic performance must come from evidence for the complete glazed door or screen assembly.
Typical applications
Subject to the applicable test evidence, GTR may be used within glazed constructions in:
- Commercial offices
- Schools and universities
- Hospitals and healthcare buildings
- Care homes
- Hotels and guest accommodation
- Apartment developments
- Public buildings
- Plant and service rooms
- Fire-resisting corridors and screens
Key benefits
- Graphite-based intumescent tape — expands during fire conditions to help protect the glazing pocket.
- Flexible foam construction — conforms to glazing beads and glass surfaces.
- Highly compressible — the 5mm tape can be compressed where required by the approved system.
- Low-to-medium expansion pressure — developed for fire-resistant glazing applications.
- Self-adhesive backing — holds the tape in position during installation.
- Easy to cut — can be trimmed accurately with scissors or a sharp knife.
- Dry-glazing format — avoids the cleaning associated with wet glazing compounds.
- Three stocked widths — available in 10mm, 15mm and 20mm.
- Fixed 5mm thickness — provides a consistent uncompressed profile.
- 20m rolls — suitable for multiple glazing apertures.
- Black finish — provides a discreet glazing-pocket appearance.
- 30- and 60-minute applications — where supported by complete system evidence.
Important buying advice
Before ordering, confirm:
- The required tape width
- The required uncompressed and installed thickness
- The total glazing perimeter
- Whether tape is required on one or both sides
- The fire-resistant glass specification
- The door or screen construction
- The permitted aperture dimensions
- The required glazing beads and fixings
- Any required aperture liner
- The required fire-resistance period
- The current certification and assessment status
Do not select the tape width solely according to the available space within the glazing pocket. The selected profile must match the tested or assessed glazing system.
GTR Glazing Seal Roll – 20m Technical Specifications
GTR Glazing Seal Roll is a self-adhesive graphite-based intumescent foam tape for use within approved fire-resistant glazing systems.
Product Specification
| Product Name |
GTR Glazing Seal Roll – 20m |
| Manufacturer Product Name |
Sealmaster Intumescent Foam Glazing Tape |
| Product Reference |
GTR |
| Product Type |
Flexible intumescent fire-glazing foam tape |
| Application |
Glazed apertures in approved fire-resisting doors and screens |
| Material |
Graphite-based intumescent foam tape |
| Foam Type |
Flexible, highly compressible foam |
| Intumescent Pressure |
Low-to-medium pressure |
| Fixing |
Single-sided self-adhesive backing |
| Available Widths |
10mm, 15mm and 20mm |
| Uncompressed Thickness |
5mm |
| Published Compression |
Can be compressed to approximately 2mm where required by the approved glazing system |
| Roll Length |
20m |
| Colour |
Black |
| Activation Temperature |
Expansion begins at approximately 180°C |
| Published Expansion |
Approximately three to four times its original volume |
| Published Thermal-Erosion Resistance |
Char stability stated beyond 900°C |
| Fire-Test Standards Referenced |
BS 476-22 and BS EN 1634-1 |
| Typical Supported Fire Applications |
30-minute and 60-minute glazing systems, subject to complete test or assessment evidence |
| Certifire Reference |
CF5387; current certification status should be confirmed before reliance |
| Current Accessible Certificate Expiry |
13 May 2026 |
| Structural Glass Retention |
No — glazing beads, fixings and setting blocks are required as specified by the complete system |
| Standalone Fire Rating? |
No — performance applies only as part of a tested or assessed glazing assembly |
| Standalone Smoke Rating? |
No specific standalone cold-smoke classification is stated |
| Standalone Acoustic Rating? |
No |
Available Sizes and Product Codes
| Width |
Thickness |
Roll Length |
Colour |
Product Code |
| 10mm |
5mm |
20m |
Black |
GTR/10X5FM |
| 15mm |
5mm |
20m |
Black |
GTR/15X5FM |
| 20mm |
5mm |
20m |
Black |
GTR/20X5FM |
Product-Code Structure
The manufacturer’s general code structure is:
GTR + Size + FM
The exact stocked codes use the following supplier format:
- GTR/10X5FM — 10 × 5mm
- GTR/15X5FM — 15 × 5mm
- GTR/20X5FM — 20 × 5mm
Current Stocked Range
| Size Options |
Length Options |
Colour Options |
Total Variations |
| 10 × 5mm, 15 × 5mm and 20 × 5mm |
20m |
Black |
3 |
Size Selection
The required profile must be selected from the tested glazing-system detail.
The 10 × 5mm tape provides the narrowest stocked face width.
The 15 × 5mm tape provides an intermediate width.
The 20 × 5mm tape provides the widest stocked face width.
Do not assume that:
- A wider tape always provides greater fire resistance
- A narrower tape can be doubled to replace a wider profile
- Two tape layers can replace a specified thickness
- Any profile can be used with any glazing bead
Fire-Performance Note
GTR tape has been developed for use within fire-resistant glazing systems, particularly those designed for 30- and 60-minute applications.
The actual performance depends on:
- The fire-resistant glass
- The glass dimensions and aspect ratio
- The door or screen construction
- The glazing-bead material and dimensions
- The bead fixing type and spacing
- The glass edge cover
- The setting blocks
- The aperture lining
- The GTR size and installed compression
No fire period should be assigned to the tape in isolation.
Certificate-Status Note
Current product pages continue to reference Certifire CF5387.
The accessible certificate record states that the certificate was within its expiry date until 13 May 2026.
Before using CF5387 for a current project, obtain confirmation of:
- Whether the certificate has been renewed
- The current certificate revision
- The products and sizes covered
- The approved glass types
- The permitted glazing-system constructions
- The required fire-resistance periods
Adhesive Note
The integral adhesive is intended to retain the tape during assembly.
The adhesive must not be treated as:
- A structural glass-retention system
- A replacement for glazing beads
- A replacement for steel pins or screws
- A replacement for setting blocks
- A means of correcting an oversized glazing pocket
Compression Note
The published technical data states that the 5mm tape can be compressed to approximately 2mm where required.
The required compression must be controlled by:
- The glass thickness
- The glazing-pocket depth
- The bead dimensions
- The bead fixing position
- The approved glazing-system design
Excessive compression can distort the glazing assembly, while insufficient compression may leave localised gaps.
Handling and Storage
Store the rolls:
- In a clean and dry internal location
- Away from excessive heat and humidity
- With the release liner intact
- Protected from dust, water and oils
- Without crushing or sharply folding the roll
- In the original packaging until required
Inspection
Before installation, reject or replace tape that is:
- Wet or heavily contaminated
- Torn or punctured
- Permanently crushed
- Missing its adhesive liner
- No longer adhering reliably
- Painted or coated
- Incorrectly sized for the approved system
How to Install GTR Glazing Seal Roll – 20m
GTR Glazing Seal must be installed as part of an approved fire-resistant glazing system.
The glass, glazing beads, setting blocks, fixings, aperture dimensions, tape profile and installed compression must all match the applicable fire-test or assessment evidence.
Do not cut a glazed aperture into a fire door or screen until the complete specification has been confirmed.
What You’ll Need
Typical tools and components may include:
- GTR tape in the specified 10 × 5mm, 15 × 5mm or 20 × 5mm size
- The approved fire-resistant glass
- The specified timber or metal glazing beads
- The specified steel pins or screws
- Approved glazing setting blocks
- Any required aperture-lining material
- The current glazing-system drawing or assessment
- Tape measure
- Pencil or suitable marker
- Sharp scissors or utility knife
- Straight edge
- Square
- Clean lint-free cloth
- Brush or vacuum
- Suitable glazing tools
- Safety glasses
- Cut-resistant gloves suitable for handling glass
- Appropriate glass-lifting equipment
Before You Start
Confirm:
- The required fire-resistance period
- The approved door or screen construction
- The permitted aperture dimensions and location
- The fire-resistant glass type and thickness
- The required GTR width
- The required installed tape compression
- The glazing-bead material and dimensions
- The bead-fixing type, angle and spacing
- The required glass edge cover
- The setting-block arrangement
- Whether an aperture liner is required
- The current status of the relevant certification or assessment
Do not substitute components without written supporting evidence.
Step 1: Verify the Glazing-System Evidence
Read the complete glazing detail before preparing the aperture.
The evidence should identify:
- The door or screen construction
- The approved glass products
- The maximum glazed area
- The maximum height and width
- The permitted aspect ratio
- The aperture position
- The glazing-bead specification
- The required GTR profile
- The bead fixing arrangement
Where these details cannot be established, do not proceed.
Step 2: Inspect the Aperture
Check that the prepared glazed aperture is:
- Square and correctly dimensioned
- In the approved position
- Free from damaged or unsupported edges
- Clear of loose timber fibres
- Compatible with the specified aperture liner
- Large enough to accommodate the complete glazing system without excessive clearance
Machining a certified fire door outside the permitted detail can invalidate its evidence.
Step 3: Install Any Required Aperture Liner
Where the tested system requires an intumescent or fire-resistant aperture liner, install it before fitting the glass and beads.
The liner must:
- Use the specified material
- Have the required width and thickness
- Run continuously around the aperture
- Have closely fitted corner joints
- Remain free from gaps and damage
Do not add or omit a liner unless the glazing-system evidence permits it.
Step 4: Prepare the Glazing Beads
Cut and prepare the glazing beads according to the approved system.
Confirm:
- The bead material
- The bead dimensions
- The required mitred or butt-jointed corners
- The fixing positions
- The required glass edge cover
The bead faces receiving the adhesive tape must be clean, dry and stable.
Step 5: Clean the Bonding Surfaces
Remove:
- Timber dust
- Metal swarf
- Grease and oil
- Loose paint or coatings
- Old glazing compound
- Silicone contamination
- Moisture
The self-adhesive backing requires continuous contact with a clean surface.
Step 6: Identify the Tape Position
Confirm whether the approved arrangement requires the GTR tape to be applied:
- To the glazing bead
- Around the prepared aperture
- On both faces of the glass
- In another specified position within the glazing pocket
Do not assume that the same tape position applies to every fire-glazing system.
Step 7: Measure the First Section
Measure the first side of the glazed aperture or glazing bead.
Transfer the measurement to the tape without stretching it.
The tape should be long enough to meet the adjoining section closely at the corner.
Step 8: Cut the Tape
Cut the GTR cleanly using sharp scissors or a suitable knife.
The cut should be:
- Square
- Clean
- Free from tearing
- Free from crushed or ragged foam
Do not pull or stretch the tape while cutting.
Step 9: Apply the First Tape Section
Peel back a short portion of the release liner.
Align the tape in the required position and press the adhesive face firmly against the prepared surface.
Continue removing the liner progressively while applying the tape.
Do not:
- Stretch the foam
- Twist the tape
- Trap dust beneath the adhesive
- Apply the tape over a damp surface
- Repeatedly remove and reposition the same section
Step 10: Continue Around the Glazing Perimeter
Measure, cut and apply the remaining sections.
At each corner:
- Fit the tape ends closely together.
- Avoid leaving an open gap.
- Do not create a bulky overlap unless the tested detail requires it.
- Keep the tape at a consistent distance from the glass edge.
The tape should form a continuous sealing line around the complete aperture.
Step 11: Check the Tape Before Glazing
Inspect the installed tape for:
- Missing sections
- Open corner joints
- Loose adhesive areas
- Twisted tape
- Contamination
- Incorrect width
- Damage or permanent crushing
Correct defects before the glass is installed.
Step 12: Install the Setting Blocks
Position the approved glazing setting blocks exactly as required by the tested system.
Setting blocks support the glass and maintain the required clearance within the aperture.
Do not use the GTR tape itself to carry the weight of the glass.
Step 13: Position the Fire-Resistant Glass
Using suitable glass-handling equipment, place the approved glass into the prepared aperture.
Check that:
- The correct glass face is orientated as required.
- The glass rests on the setting blocks.
- The required edge clearances are maintained.
- The tape remains correctly positioned.
- The tape is not torn, rolled or displaced.
Do not allow the glass edge to cut through the tape.
Step 14: Fit the Opposing Tape
Where the system requires GTR on both sides of the glass, install the opposing tape in the specified position.
Maintain:
- The correct tape width
- Continuous perimeter coverage
- Closely fitted joints
- The required glass edge cover
- The required installed compression
Step 15: Fit the Glazing Beads
Position the glazing beads carefully around the glass.
The beads should compress the GTR evenly without:
- Excessively crushing the foam
- Applying concentrated pressure to the glass edge
- Displacing the setting blocks
- Leaving open gaps between the tape and glass
- Distorting the bead profile
The final tape thickness must match the approved glazing arrangement.
Step 16: Install the Bead Fixings
Secure the glazing beads using the specified steel pins or screws.
Follow the tested system for:
- Fixing type
- Fixing diameter
- Fixing length
- Fixing angle
- Distance from bead ends
- Maximum fixing centres
The self-adhesive tape does not replace these mechanical fixings.
Step 17: Check the Installed Compression
Inspect the visible tape line around the aperture.
The compression should be:
- Consistent
- Within the range permitted by the glazing system
- Free from completely uncompressed sections
- Free from severely crushed areas
- Free from tape projecting excessively beyond the bead
Do not rely solely on visual appearance where the specification requires a measured glazing-pocket dimension.
Step 18: Inspect the Corner Joints
Check all four corners on both faces where applicable.
The tape and beads should:
- Meet closely
- Contain no open voids
- Remain correctly aligned
- Maintain the required glass edge cover
- Remain free from excessive overlapping material
Step 19: Clean the Glazing
Remove loose dust and installation debris.
Do not use cleaning chemicals that may:
- Attack the foam
- Reduce adhesive performance
- Contaminate the glazing pocket
- Damage the fire-resistant glass
Do not paint over exposed GTR tape.
Step 20: Complete the Final Inspection
Confirm that:
- The correct GTR profile has been installed.
- The correct fire-resistant glass has been used.
- The glazing beads match the approved construction.
- All bead fixings are present.
- The setting blocks remain correctly positioned.
- The tape forms a continuous perimeter seal.
- The installed compression is consistent.
- The glazed aperture matches the supporting evidence.
Record the glass, tape and glazing-system references where the doorset is subject to certification or inspection.
Installation Tips
- Confirm the complete glazing specification before beginning work.
- Use only the specified 10 × 5mm, 15 × 5mm or 20 × 5mm profile.
- Do not stretch the foam tape during installation.
- Cut each section with sharp scissors or a clean knife.
- Keep adjoining joints closely fitted.
- Apply the tape only to clean and dry surfaces.
- Remove the release liner progressively.
- Do not rely on the adhesive to retain the glass.
- Use the specified setting blocks.
- Use the specified glazing beads and mechanical fixings.
- Maintain the required glass edge cover.
- Do not overcompress the tape.
- Do not paint or coat the intumescent material.
- Do not substitute components without supporting evidence.
Inspection and Maintenance
Inspect the glazed aperture as part of the fire-door or fire-screen maintenance programme.
Check for:
- Loose or missing glazing beads
- Loose, missing or corroded bead fixings
- Cracked or damaged glass
- Missing or displaced glazing tape
- Open joints around the tape
- Paint or sealant covering the tape
- Movement within the glazing pocket
- Unauthorised changes to the glazed aperture
Damage to any component may affect the performance of the complete glazed assembly.
Important Performance Note
GTR tape does not independently provide a fire-resistance period.
The performance of the installation depends on the complete approved system, including:
- The glass
- The door or screen construction
- The aperture dimensions and position
- The aperture lining
- The setting blocks
- The GTR size and compression
- The glazing beads
- The bead fixings
- The installation quality
Install the product only in accordance with current test evidence, assessment documentation and the instructions applicable to the complete glazed construction.