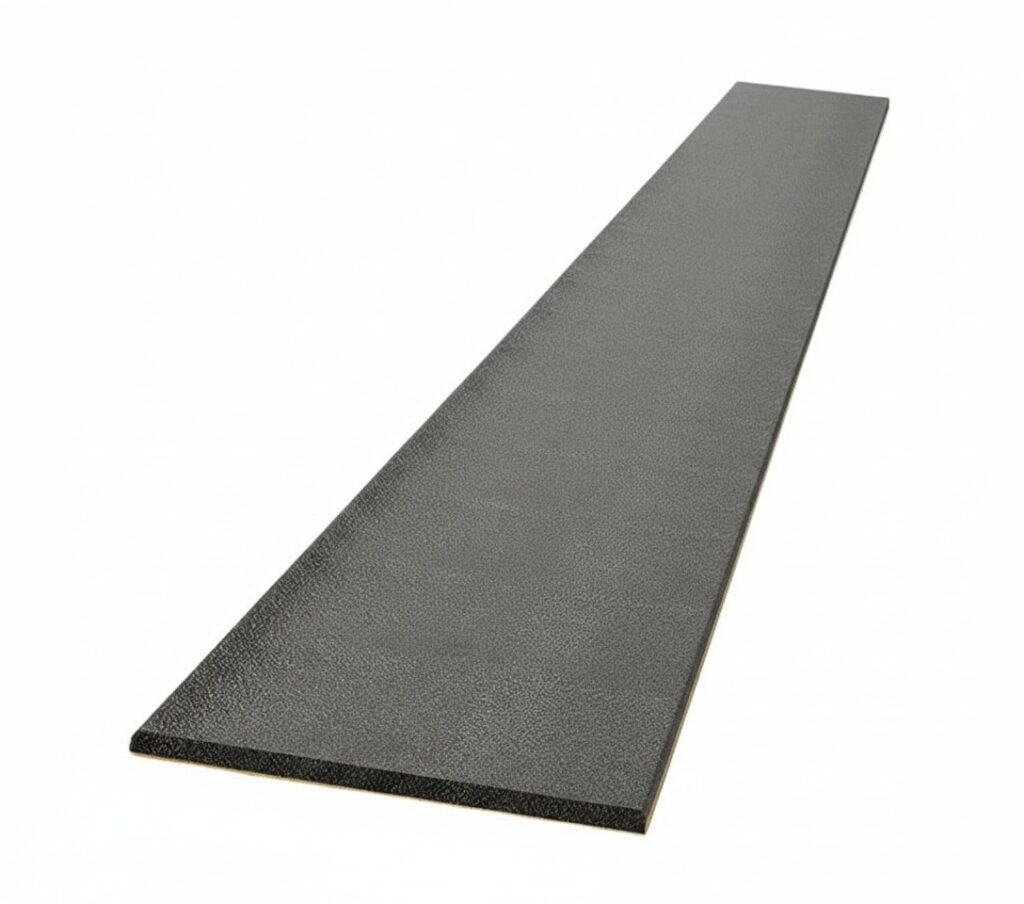
Pyroplex 8492 Glazing Seal – 10 × 2.5mm
Pyroplex 8492 Glazing Seal – 10 × 2.5mm is a slim, flexible and self-adhesive intumescent glazing strip designed for use within approved 30-minute fire-resistant glazed apertures.
The strip is fitted to the glazing bead as part of a complete fire-glazing system. During normal conditions, it forms a compact sealing layer within the glazing pocket. When exposed to elevated temperatures during a fire, the intumescent material expands to help seal the space around the glass and restrict the passage of flames and hot gases.
The stocked range is supplied in:
- 10m rolls
- 250m coils
- Black only
- One fixed 10 × 2.5mm profile
Designed for 30-Minute Fire Glazing
Pyroplex 8492 forms part of the manufacturer’s FG30 glazing range.
It has been developed for suitable glazed apertures in:
- Fire-resisting timber doors
- Fire-resisting steel doors
- Approved 30-minute glazed doorset constructions
The strip does not provide a fire-resistance period independently. Its performance depends on the complete tested or assessed glazing assembly.
Slimline Glazing Strip
The 10 × 2.5mm profile provides a particularly slim glazing-pocket arrangement.
It is designed for approved economical glazing-bead systems where a compact intumescent strip is required without a projecting glazing fin.
The slim profile can help provide:
- A low visual sightline around the glass
- A compact installation behind the glazing bead
- Continuous intumescent protection around the aperture
- Efficient use of space within the glazing pocket
The 8492 must not be substituted for a larger, finned or differently shaped glazing seal unless the complete doorset evidence permits the alternative.
Suitable Glass Types
Pyroplex specifies the 8492 glazing strip for compatible fire-resistant glass between:
5mm and 7mm thick
It may be used with approved:
- Insulating fire-resistant glass
- Non-insulating fire-resistant glass
The exact glass manufacturer, product, thickness and maximum aperture dimensions must be supported by the relevant fire-door or glazing-system evidence.
Self-Adhesive Backing
The glazing strip has high-performance self-adhesive backing for attachment to a clean glazing bead.
The adhesive helps retain the strip while:
- The glazing beads are measured and cut
- The first bead assembly is installed
- The fire-resistant glass is positioned
- The opposing beads are mechanically fixed
The adhesive is an installation aid only. It does not structurally retain the glass or replace the required glazing beads, screws, setting blocks or aperture lining.
Continuous-Reel Format
Pyroplex 8492 is supplied as a continuous flexible strip rather than individual pre-cut lengths.
This format helps:
- Reduce unnecessary joints
- Minimise cutting waste
- Simplify storage and dispensing
- Provide continuous protection along each glazing bead
- Allow the exact required lengths to be cut on site
The strip should not be stretched while it is measured or installed. Stretching may cause it to retract and leave gaps at the bead corners.
Fire Performance
The Pyroplex FG30 glazing range has been tested to standards including:
- BS 476: Part 20/22
- BS EN 1634-1
- BS EN 1363-1
Pyroplex currently lists the product under Certifire TS25 Certificate CF348.
Before relying on certification for a live project, confirm the current certificate revision and the permitted:
- Door constructions
- Glass products
- Aperture dimensions
- Glazing beads
- Fixing arrangements
- Aperture-lining requirements
Complete Glazing-System Performance
The resulting fire performance depends on the complete glazed assembly, including:
- The door leaf or screen construction
- The fire-resistant glass
- The aperture position and dimensions
- The hardwood aperture liner where required
- The glazing-bead material and dimensions
- The bead fixing type and spacing
- The glass edge cover
- The Pyroplex 8492 glazing strips
- The installation quality
No standalone fire, smoke or acoustic rating should be assigned to the strip itself.
Robust Intumescent Material
Pyroplex describes its intumescent glazing material as robust, non-flaking, resistant to tearing and unaffected by water.
The material should still be kept clean and dry before installation to protect its adhesive backing and prevent contamination.
Do not paint, coat, remove or modify the intumescent strip after installation.
Available Roll Lengths
- 10m: suitable for individual doors, small projects and maintenance stock.
- 250m: suitable for manufacturing, production work and larger projects containing multiple glazed apertures.
Pyroplex publishes the 8492 as a 250m standard coil. The 10m option is the shorter format included within the supplied stock range.
Black Graphite Finish
The stocked product is available in:
Black only
The strip is normally concealed behind the glazing bead, although a narrow sightline may remain visible depending on the complete bead and glass arrangement.
Quantity Guidance
Calculate the required quantity from the perimeter of each glazed aperture.
Allow for:
- Sealing on both faces where required
- The number of glazed apertures
- The width and height of each aperture
- Mitred bead joints
- Minor cutting waste
Key Benefits
- 30-minute glazing system: designed for supported glazed fire-door applications.
- Slim 10 × 2.5mm profile: provides a compact glazing-pocket arrangement.
- Self-adhesive backing: assists secure positioning on the glazing bead.
- Flexible continuous strip: can be cut accurately to the required length.
- Suitable for 5–7mm glass: supports approved insulating and non-insulating systems.
- Low sightline: suitable for approved economical glazing-bead details.
- Robust intumescent material: designed to resist tearing and flaking.
- Two stocked lengths: available in 10m and 250m formats.
Important Buying Advice
Before ordering, confirm:
- The required roll length
- That the specified profile is 10 × 2.5mm
- The fire-resistant glass product and thickness
- The required fire-resistance period
- The aperture dimensions and position
- The glazing-bead specification
- The required bead fixings
- The aperture-lining requirements
- The current certificate or assessment scope
Do not select a glazing seal solely by its dimensions. Every component must match the complete tested or assessed fire-glazing system.
Pyroplex 8492 Glazing Seal – 10 × 2.5mm Technical Specifications
| Product Name |
Pyroplex 8492 Glazing Seal – 10 × 2.5mm |
| Manufacturer |
Pyroplex |
| Manufacturer Part Number |
8492 |
| Supplier Product References |
PYR8492/10M and PYR8492/250M |
| Product Type |
Flexible self-adhesive intumescent glazing strip |
| Profile Design |
Slim plain glazing strip without an integral fin |
| Nominal Profile Size |
10 × 2.5mm |
| Application |
Approved glazed apertures in fire-resisting timber and steel doors |
| Fire-Resistance Period |
30 minutes as part of a suitable tested or assessed glazing system |
| Suitable Glass Thickness |
5–7mm |
| Suitable Glass Types |
Insulating and non-insulating fire-resistant glass, subject to supporting evidence |
| Fixing |
High-performance self-adhesive backing applied to the glazing bead |
| Integral Glazing Fin |
No |
| Stocked Roll Lengths |
10m and 250m |
| Manufacturer Standard Coil |
250m |
| Colour |
Black / graphite |
| Test Standards |
BS 476: Part 20/22, BS EN 1634-1 and BS EN 1363-1 |
| Approval Reference |
Certifire TS25 Certificate CF348; confirm the current revision and scope before reliance |
| Standalone Fire Rating? |
No — performance belongs to the complete tested or assessed glazing system |
| Standalone Smoke Rating? |
No separate cold-smoke classification should be assumed |
| Standalone Acoustic Rating? |
No |
Available Variations and Product Codes
| Roll Length |
Profile Size |
Colour |
Product Code |
| 10m |
10 × 2.5mm |
Black |
PYR8492/10M |
| 250m |
10 × 2.5mm |
Black |
PYR8492/250M |
Variation Summary
| Roll-Length Options |
Profile Options |
Colour Options |
Total Variations |
| 10m and 250m |
10 × 2.5mm |
Black |
2 |
Fire-Performance Requirements
The supported fire performance depends on the complete glazing construction, including:
- The approved fire-resistant glass
- The timber or steel door construction
- The aperture dimensions and location
- The aperture liner where required
- The glazing beads
- The bead fixing type and spacing
- The glass edge cover
- The Pyroplex 8492 glazing strips
- The installation quality
Published Installation Arrangement
Pyroplex’s current product instructions specify:
- A 6mm hardwood liner around the aperture
- The glazing strip applied to the bead
- Mitre-cut glazing beads
- M5 × 50mm stainless-steel screws
- Maximum 150mm fixing centres
- Glass cut to the aperture with a tolerance of ±2mm
The current project-specific door certificate or assessment takes precedence where it expressly permits a different arrangement.
Storage
Store the product:
- In its original packaging
- In a clean and dry internal location
- With the release liner intact
- Protected from dust, grease and oils
- Without stretching, crushing or sharply folding the strip
Pre-Installation Inspection
Do not install material that is:
- Torn or distorted
- Permanently crushed
- Wet or contaminated
- Missing its release liner
- No longer adhering reliably
- Incorrectly sized for the approved glazing system
How to Install Pyroplex 8492 Glazing Seal – 10 × 2.5mm
Pyroplex 8492 must be installed as part of an approved fire-resistant glazing system.
The door, aperture, glass, hardwood liner, glazing beads, mechanical fixings and intumescent strips must all match the current test evidence, certification or doorset assessment.
What You’ll Need
- Pyroplex 8492 glazing strip
- The approved 5–7mm fire-resistant glass
- The specified glazing beads
- M5 × 50mm stainless-steel screws where required by the published system
- A 6mm hardwood aperture liner
- Approved glazing setting blocks where specified
- Tape measure and pencil
- Mitre saw or suitable bead-cutting equipment
- Sharp scissors or a suitable profile-cutting knife
- Drill, suitable bits and screwdriver
- Clean lint-free cloth
- Brush or vacuum
- Suitable glass-handling equipment
- Safety glasses and protective gloves
Before You Start
Confirm:
- The required fire-resistance period
- The approved timber or steel door construction
- The permitted glass product and thickness
- The maximum aperture dimensions
- The permitted aperture position
- The required glazing beads
- The bead fixing type and centres
- The required glass edge cover
- The hardwood aperture-lining requirement
- That Pyroplex 8492 is included within the current system evidence
Do not cut or modify a certified fire door without evidence permitting the glazed aperture.
Step 1: Inspect the Aperture
Check that the prepared glazed aperture is:
- Square
- Correctly dimensioned
- Located in the permitted area of the door
- Free from loose material and damaged edges
- Suitable for the required aperture liner
Stop work if the exposed door construction does not match the expected tested or assessed doorset.
Step 2: Install the Aperture Liner
Pyroplex’s current published arrangement requires the aperture to be lined with:
6mm hardwood
Install the liner continuously around the aperture with closely fitted corner joints.
Do not omit or alter the liner unless current project-specific evidence expressly permits a different arrangement.
Step 3: Prepare the Glazing Beads
Prepare the glazing beads to the material and dimensions specified by the approved system.
The surfaces receiving the self-adhesive strip must be:
- Clean
- Dry
- Stable
- Free from timber or metal dust
- Free from grease and oil
- Free from loose finishes
Step 4: Apply the Strip to the Bead
Unwind the Pyroplex 8492 strip without stretching it.
Remove the release liner progressively and press the adhesive face firmly against the glazing bead.
Ensure that:
- The strip remains straight
- It runs continuously along the bead
- The profile is not twisted
- The strip remains within the specified bead position
- No contaminated or loose adhesive areas remain
Step 5: Cut the Strip
Cut the profile cleanly using sharp scissors or a suitable knife.
Do not:
- Stretch it before cutting
- Tear or crush the profile
- Leave the strip short of the bead ends
- Create unnecessary overlapping sections
Step 6: Mitre Cut the Beads
Mitre cut the glazing beads with the Pyroplex strip already attached.
Check that:
- The bead joints meet closely
- The intumescent strip continues into each corner
- No open gaps remain
- The strip has not been displaced during cutting
Step 7: Install the First Bead Assembly
Fit one complete side of the glazing-bead system into the lined aperture.
Under Pyroplex’s current published arrangement, secure the beads using:
- M5 × 50mm stainless-steel screws
- Fixings positioned at maximum 150mm centres
The current doorset certificate or assessment takes precedence if it specifies a different approved fixing arrangement.
Step 8: Prepare the Glass
Pyroplex’s published instructions require the glass to be cut to the aperture with a tolerance of:
±2mm
Confirm that the supplied glass:
- Is the approved fire-resistant product
- Is between 5mm and 7mm thick
- Has the correct dimensions
- Has no chipped or damaged edges
- Is correctly orientated where directional
Step 9: Position the Setting Blocks
Install the approved glazing setting blocks where required by the complete system.
The setting blocks support the weight of the glass and maintain the required edge clearances.
Do not use the Pyroplex strip as a structural glass support.
Step 10: Install the Glass
Place the glass into the aperture using suitable handling equipment.
Check that:
- The glass rests correctly on the setting blocks
- The required edge clearances are maintained
- The strip remains in position
- The glass does not cut, roll or displace the strip
- The required glass edge cover can be achieved
Step 11: Fit the Opposing Beads
Prepare and install the opposing bead assembly using the same process.
Secure the beads with the specified mechanical fixings.
As the beads are tightened, confirm that:
- The glass remains centred
- The strip contacts the glass consistently
- The profile is not excessively crushed
- The bead joints remain closed
- The glass is not subjected to excessive local pressure
Step 12: Inspect the Complete Aperture
Inspect every bead and corner on both faces.
Confirm that:
- The Pyroplex strip is continuous
- All mitred joints are closely fitted
- No strip section is missing or damaged
- All required bead fixings are present
- The glass is correctly supported
- The completed glazing detail matches the approved system
Installation Tips
- Verify the complete glazing specification before starting.
- Use 8492 only with the supported glazing arrangement.
- Apply the strip to clean, dry glazing beads.
- Remove the release liner progressively.
- Do not stretch, twist or sharply fold the profile.
- Mitre cut the beads with the strip attached.
- Maintain closely fitted corner joints.
- Use the specified aperture liner.
- Use the approved bead fixings and centres.
- Do not rely on the adhesive to retain the glass.
- Do not add mastic unless required by the approved system.
- Do not paint or remove the intumescent material.
Inspection and Maintenance
Inspect the complete glazed aperture as part of the fire-door maintenance programme.
Check for:
- Cracked or damaged glass
- Loose glazing beads
- Missing or corroded fixings
- Missing or displaced glazing strips
- Open bead joints
- Movement within the glazing pocket
- Paint or sealant covering the strip
- Unauthorised alterations to the aperture
Important Performance Note
Pyroplex 8492 does not independently provide a 30-minute fire rating.
Performance depends on the complete approved glazing system, including:
- The fire-resistant glass
- The door construction
- The aperture position and dimensions
- The hardwood aperture liner
- The glazing setting blocks
- The glazing beads
- The bead fixings
- The Pyroplex glazing strips
- The quality of installation
Install the product only in accordance with current certification, test evidence, assessment documentation and the instructions applicable to the complete glazed doorset.