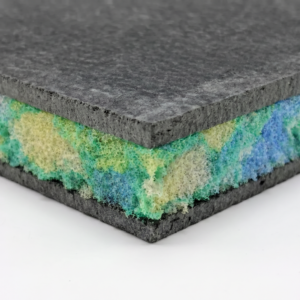
SRS Acoustilay 15 Acoustic Flooring Underlay
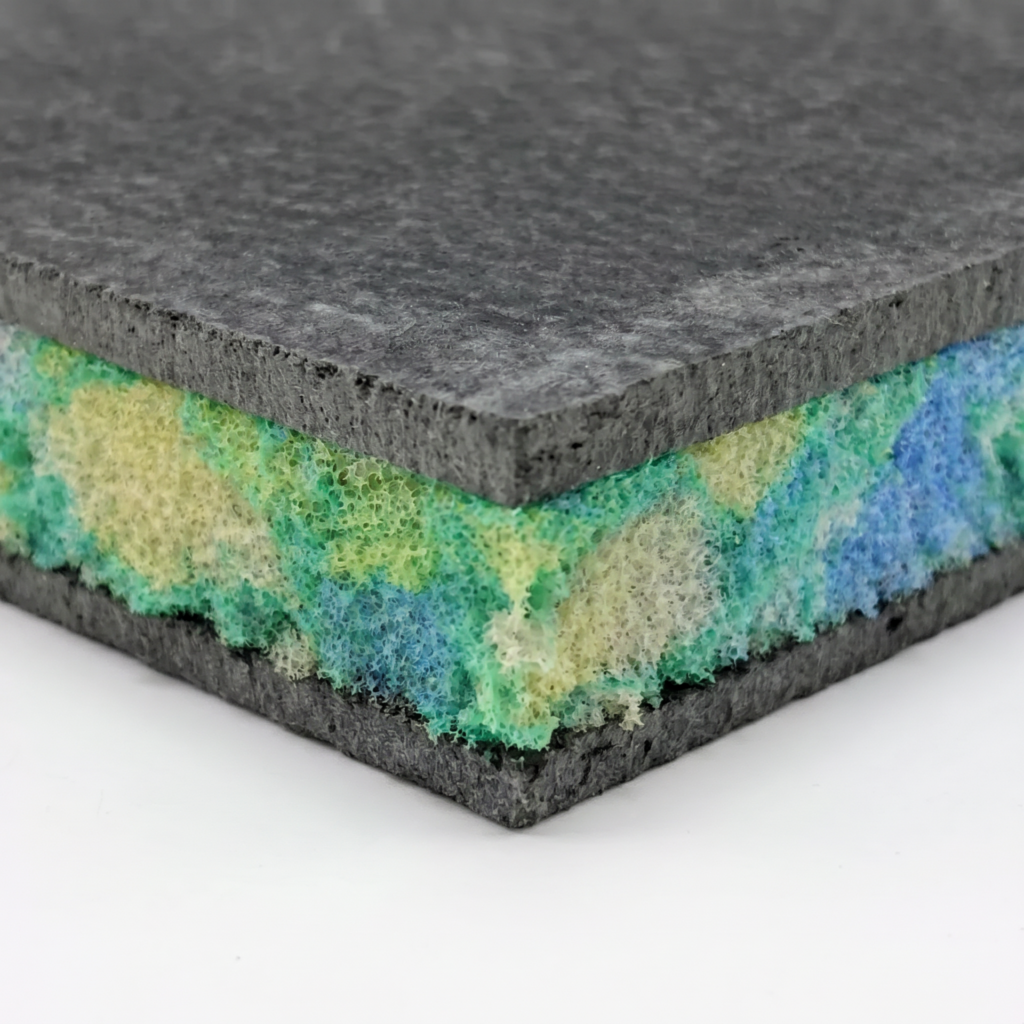
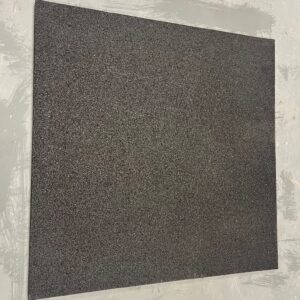
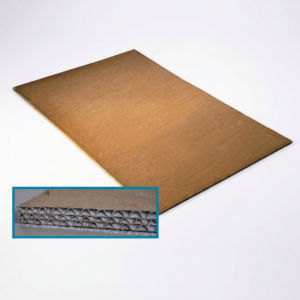
SRS Acoustilay 15 Acoustic Flooring Underlay is a high-performance acoustic floor underlay designed to improve both impact and airborne sound insulation through floor structures. Measuring 1200mm x 1200mm x 15mm, each sheet covers 1.44m² and weighs approximately 21.6kg.
Acoustilay 15 combines mass and resilience to help reduce noise transfer through timber and concrete floors. It is commonly used in domestic, residential, commercial and refurbishment projects where a slim floor soundproofing layer is required beneath suitable floor finishes.
What is SRS Acoustilay 15 used for?
SRS Acoustilay 15 is used as an acoustic flooring underlay to help reduce noise passing through floors. It is suitable for use over timber floors, concrete floors and other suitable floor substrates as part of a complete acoustic floor system.
It is commonly used in flats, apartments, bedrooms, living rooms, home offices, rental properties, commercial spaces and refurbishment projects where impact noise and airborne noise need to be reduced.
How does Acoustilay 15 work?
Acoustilay 15 works by combining dense barrier layers with a resilient acoustic layer. The mass helps reduce airborne sound transfer, while the resilient layer helps reduce impact vibration from footsteps, dropped items and movement across the floor.
This combination makes Acoustilay 15 useful where both footfall noise and general airborne noise are a concern. It performs best when installed correctly as part of a complete floor build-up, with tight joints, sealed edges and suitable floor finishes.
What type of noise does SRS Acoustilay 15 help reduce?
SRS Acoustilay 15 is designed to help reduce both impact noise and airborne noise.
Impact noise includes footsteps, dropped objects, furniture movement and general footfall noise. Airborne noise includes voices, TV noise, music and general sound transfer between rooms or properties.
For timber floors, performance can often be improved further by combining Acoustilay 15 with acoustic mineral wool between joists, properly sealed floorboards and an appropriate ceiling treatment below where required.
Where can SRS Acoustilay 15 be used?
SRS Acoustilay 15 is suitable for a range of floor soundproofing applications, including:
- Timber floor soundproofing
- Concrete floor soundproofing
- Flat and apartment refurbishments
- Bedrooms and living rooms
- Home offices and studies
- Rooms above occupied spaces
- Domestic renovation projects
- Commercial floor upgrades
- Projects requiring impact and airborne noise reduction
Why choose SRS Acoustilay 15?
SRS Acoustilay 15 is a strong choice where a slim but effective acoustic floor underlay is needed. At only 15mm thick, it helps improve sound insulation without adding excessive floor height.
It can be used beneath a variety of floor finishes when installed correctly, including hessian-backed carpet, engineered timber, laminate, vinyl, carpet tiles and bonded carpet systems, subject to the correct installation method and floor finish manufacturer guidance.
Key benefits
- 15mm acoustic flooring underlay — suitable for slim floor soundproofing build-ups.
- Helps reduce impact noise — useful for footsteps, dropped items and furniture movement.
- Helps reduce airborne noise — supports reduction of voices, TV noise, music and general sound transfer.
- 15kg/m² mass — adds useful acoustic mass to the floor build-up.
- 1.44m² coverage per sheet — simple to calculate for room areas.
- Suitable for timber and concrete floors — useful for domestic, commercial and refurbishment projects.
- Can be used beneath multiple floor finishes — subject to the correct overlay and installation method.
- Easy to cut and shape — can be trimmed around edges, pipes and awkward room details.
- Minimal floor height increase — helps improve performance without a deep acoustic floor system.
- Works within complete acoustic systems — can be combined with acoustic mineral wool, acoustic sealant and suitable ceiling treatments.
Helpful advice before buying
SRS Acoustilay 15 performs best when used as part of a complete floor soundproofing system. The final result will depend on the existing floor structure, ceiling construction below, floor finish, installation quality and how well flanking paths are controlled.
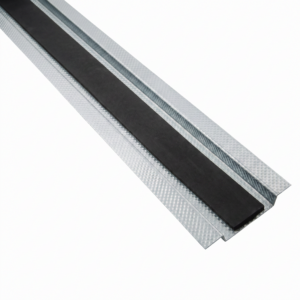
For carpet installations, Acoustilay perimeter strips may be required around the edge of the room. For laminate, vinyl, carpet tiles and bonded carpet finishes, an Acoustilay MDF or suitable board overlay is normally required between the Acoustilay and the floor finish.
If you are unsure whether SRS Acoustilay 15 is right for your project, please contact our team before ordering. We can help advise on the most suitable floor soundproofing system based on your property, floor type, noise issue and final floor finish.
SRS Acoustilay 15 Technical Specifications
SRS Acoustilay 15 is a 15mm acoustic flooring underlay designed to improve impact and airborne sound insulation through timber and concrete floor structures. It is commonly used beneath suitable floor finishes as part of domestic, commercial and refurbishment floor soundproofing systems.
Product Specification
| Product Name |
SRS Acoustilay 15 Acoustic Flooring Underlay |
| Brand |
SRS / Sound Reduction Systems |
| Product Type |
Acoustic flooring underlay / acoustic floor soundproofing mat |
| Application |
Floor soundproofing systems |
| Suitable For |
Timber floors, concrete floors, domestic floors, commercial floors and refurbishment projects |
| Sheet Size |
1200mm x 1200mm |
| Thickness |
15mm |
| Coverage |
1.44m² per sheet |
| Pack Size |
1 sheet |
| Weight |
15kg/m² |
| Approx. Weight Per Sheet |
21.6kg |
| Resilient Layer Density |
135kg/m³ open-cell resilient layer |
| Fire Properties |
Surface barrier layer self-extinguishing to FMVSS 302 |
| Main Noise Types |
Impact noise and airborne noise |
| Installation Method |
Loose laid or bonded, depending on the floor finish and installation method |
| Cutting Method |
Sharp long-bladed trimming knife, scissors, tin snips or circular saw for multiple straight cuts |
| Storage |
Store flat, dry and protected from frost |
| Suitable Floor Finishes |
Hessian-backed carpet, engineered timber, laminate, vinyl, carpet tiles and bonded carpet, subject to correct installation method |
| Not Suitable For |
Ceramic and stone tiles — use SRS Acoustilay Tilemat for tile applications |
| Standalone Product? |
No — should be used as part of a complete acoustic floor system |
Suitable Applications
SRS Acoustilay 15 can be used in a range of acoustic floor applications, including:
- Timber floor soundproofing
- Concrete floor soundproofing
- Impact noise reduction through floors
- Airborne noise reduction through floors
- Flat and apartment refurbishments
- Bedrooms, lounges and home offices
- Rooms above occupied spaces
- Domestic renovation projects
- Commercial floor upgrades
- Projects requiring minimal floor height increase
Acoustic Use
SRS Acoustilay 15 is used to improve sound insulation through floors by adding mass and resilience. The resilient layer helps reduce impact vibration, while the heavier acoustic barrier layers help reduce airborne sound transfer when used as part of the correct build-up.
It is especially useful where impact noise from footsteps and airborne noise from speech, TV or music need to be reduced through an existing floor structure.
Common System Uses
- Loose laid beneath hessian-backed carpet in domestic applications
- Installed with Acoustilay perimeter strips where required
- Bonded to the subfloor beneath laminate, vinyl, carpet tile or bonded carpet systems
- Used with Acoustilay MDF overlay for stability beneath certain floor finishes
- Installed beneath suitable engineered timber floors in domestic applications
- Combined with acoustic mineral wool between joists for timber floor upgrades
- Used with acoustic sealant around perimeter gaps and service penetrations
- Used as part of floor/ceiling systems designed to improve Part E acoustic performance
Important Performance Note
SRS Acoustilay 15 is an acoustic flooring underlay, not a complete soundproofing system on its own. The final acoustic result will depend on the existing floor construction, ceiling below, joist void treatment, floor finish, perimeter isolation, installation quality and any flanking noise paths.
For best results, the floor should be level, clean and dry before installation. Gaps, cracks, pipe penetrations and perimeter junctions should be sealed to reduce sound leakage.
Where laminate, vinyl, carpet tiles or bonded carpet finishes are being installed, an Acoustilay MDF or suitable board overlay is normally required above the Acoustilay layer.
Handling Advice
SRS Acoustilay 15 sheets are heavy and should be handled carefully. Store the sheets flat, dry and protected from frost before installation.
Cut using a sharp long-bladed trimming knife, making several passes through the material to avoid tearing. For shaping, scissors or tin snips may be used. For large numbers of straight cuts, a circular saw may be more suitable.
Do not fix directly through Acoustilay into the subfloor, as this can create sound bridges and reduce acoustic performance.
How to Install SRS Acoustilay 15 Acoustic Flooring Underlay
SRS Acoustilay 15 Acoustic Flooring Underlay is installed over a suitable floor surface as part of an acoustic floor soundproofing system. It can be loose laid or bonded depending on the floor finish and project requirements.
For the best result, the existing floor should be clean, dry, level, stable and properly sealed before the Acoustilay 15 sheets are fitted.
What You’ll Need
- SRS Acoustilay 15 sheets
- SRS Acoustilay Perimeter Strips, where required
- SRS Acoustic Sealant or suitable flexible acoustic sealant
- SRS Acoustilay Adhesive, where bonding is required
- Acoustilay MDF or suitable board overlay, where required
- Tape measure
- Pencil or marker
- Straight edge
- Sharp long-bladed trimming knife
- Scissors or tin snips for shaping
- Circular saw for multiple straight cuts, where suitable
- PVA adhesive for tongue-and-groove MDF joints, where applicable
- PPE gloves
- Safety glasses
- Knee pads
- Waste bag for offcuts
Before You Start
Check the existing floor before installation. The floor should be level, clean, dry and free from loose debris.
Remove loose floor coverings and check for damaged boards, protruding nails, screws, gaps or unstable areas. Loose floorboards should be fixed before the acoustic underlay is installed.
Where possible, remove skirting boards before fitting. This can help create a cleaner perimeter detail and make it easier to seal around the edge of the floor system.
Step 1: Prepare the Floor
Make sure the floor is ready for SRS Acoustilay 15. The floor should be:
- Clean
- Dry
- Level
- Stable
- Free from dust and loose debris
- Free from protruding nails or screws
If installing over timber floorboards, check that the boards are secure and do not move excessively. If installing over concrete, make sure the surface is dry, sound and suitable for the chosen installation method.
Step 2: Seal Gaps and Sound Leakage Points
Before laying the Acoustilay 15 sheets, seal obvious gaps and weak points in the floor.
Pay close attention to:
- Gaps between floorboards
- Perimeter gaps around the room
- Pipe penetrations
- Service openings
- Cracks or holes in the floor
- Gaps around hearths, alcoves and awkward junctions
Use acoustic sealant where suitable. The aim is to reduce air paths through the floor before the acoustic layer is installed.
Step 3: Acclimatise and Plan the Layout
Allow the Acoustilay 15 sheets to acclimatise to site conditions before installation.
Measure the room and plan the layout before cutting. SRS Acoustilay 15 sheets measure 1200mm x 1200mm and cover 1.44m² per sheet.
For most installations, sheets should be laid in a brick bond pattern with joints staggered where possible. Plan the layout to keep joints tight and avoid unnecessary small cuts.
Step 4: Cut the Acoustilay 15 Sheets
Cut the sheets to suit the room shape, edges and obstructions.
Use a sharp long-bladed trimming knife and straight edge. Score the surface first, then make several passes with the knife to cut through the sheet cleanly.
Cut carefully around:
- Doorways
- Corners
- Pipes
- Alcoves
- Fireplace hearths
- Thresholds
- Other floor obstructions
Keep cuts neat and avoid leaving gaps, as open gaps can reduce acoustic performance.
Step 5: Install Perimeter Detail Where Required
For domestic hessian-backed carpet finishes fitted with gripper rods, install SRS Acoustilay Perimeter Strips around the perimeter of the room where required.
The perimeter strips provide a suitable isolated edge detail for carpet grippers and help reduce sound bridging around the edge of the floor.
Make sure the perimeter detail is continuous and that the Acoustilay 15 sheets will butt tightly up to it.
Step 6: Lay the Acoustilay 15 Sheets
Lay the Acoustilay 15 sheets across the floor, keeping all joints tight. Avoid gaps between sheets and around the perimeter.
Depending on the floor finish, Acoustilay 15 may be loose laid or bonded to the subfloor using SRS Acoustilay Adhesive.
For loose-laid domestic carpet or engineered timber applications, follow the recommended installation method for that floor finish. For laminate, vinyl, carpet tile and bonded carpet finishes, the Acoustilay should normally be bonded to the subfloor before the MDF overlay is installed.
Step 7: Avoid Sound Bridges
Do not fix directly through Acoustilay 15 into the subfloor. Fixings that penetrate through the acoustic layer can create sound bridges and reduce the performance of the system.
Where heavy fixtures, kitchen units, bathroom units, cupboards or wardrobes need to be fixed securely, mount them onto an MDF plinth or suitable solid support at the same height as the Acoustilay layer. The Acoustilay can then be butted up to the plinth to maintain a consistent floor level.
Step 8: Install the Required Overlay
The required overlay depends on the final floor finish.
For laminate flooring, vinyl flooring, carpet tiles and bonded carpet, an Acoustilay MDF or suitable board overlay should be installed between the Acoustilay and the floor finish.
Bond the MDF overlay to the top of the Acoustilay using SRS Acoustilay Adhesive. If using tongue-and-groove MDF boards, bond the joints with PVA adhesive. Keep MDF joints at least 50mm away from the Acoustilay joints where possible.
Step 9: Leave and Seal Isolation Gaps
Where a board overlay is used, leave a 5mm to 10mm isolation gap between the board edge and the perimeter wall.
Fill this isolation gap with acoustic sealant. This helps prevent sound transmission flanking into the surrounding structure.
For engineered timber floors, allow the expansion gap required by the floor finish manufacturer and seal around perimeter gaps with acoustic sealant or a suitable flexible sealer.
Step 10: Install the Final Floor Finish
Once the Acoustilay 15 system is installed, fit the final floor finish according to the manufacturer’s instructions.
The correct method depends on the chosen finish.
Installing Carpet Over SRS Acoustilay 15
For domestic hessian-backed carpet finishes, Acoustilay 15 can be installed with Acoustilay Perimeter Strips and carpet gripper rods.
The Acoustilay sheets should be tightly butted against the perimeter detail and laid with no gaps between sheets. The carpet can then be fitted above the acoustic layer using the correct carpet installation method.
Installing Laminate, Vinyl, Carpet Tiles or Bonded Carpet
For laminate, vinyl, carpet tiles and bonded carpet, install an Acoustilay MDF or suitable board overlay above the Acoustilay 15 before fitting the floor finish.
This improves stability, helps prevent point loading issues and gives a suitable surface for the final floor finish.
Installing Engineered Timber Flooring
In domestic applications, engineered timber flooring may be installed directly over Acoustilay 15 where suitable, subject to the flooring manufacturer’s guidance.
As with all floating floor installations, do not allow fixings to penetrate through the Acoustilay layer. Leave the required expansion gap around walls and services, then seal with acoustic sealant or a suitable flexible sealer.
Do Not Use Beneath Ceramic or Stone Tiles
SRS Acoustilay 15 is not suitable for use directly beneath ceramic or stone tiles. For tiled floor finishes, use an appropriate tile-specific acoustic product such as SRS Acoustilay Tilemat.
Optional Upgrade: Acoustic Mineral Wool Between Joists
For timber floors, acoustic performance can often be improved by fitting acoustic mineral wool between the joists before installing Acoustilay 15.
This usually involves lifting floorboards, fitting acoustic mineral wool neatly into the joist void and then relaying the floorboards before installing the Acoustilay 15 system above.
Installation Tips
- Make sure the floor is clean, dry, level and stable before installation.
- Seal floorboard gaps, pipe penetrations and perimeter gaps before laying the sheets.
- Allow Acoustilay 15 to acclimatise to site conditions before fitting.
- Lay sheets with tight joints and avoid gaps.
- Use a brick bond layout where possible.
- Use perimeter strips where required for carpet and gripper installations.
- Use Acoustilay MDF or a suitable board overlay where required for laminate, vinyl, carpet tile or bonded carpet finishes.
- Do not fix directly through Acoustilay into the subfloor.
- Seal perimeter isolation gaps with acoustic sealant.
- Check the final floor finish manufacturer’s guidance before installation.
Important Soundproofing Note
SRS Acoustilay 15 helps reduce impact and airborne noise through floor structures, but the final result depends on the complete floor and ceiling build-up.
Existing floorboards, joist voids, ceiling type, perimeter gaps, service penetrations, floor finish and flanking paths can all affect performance. For best results, install Acoustilay 15 as part of a properly designed acoustic floor system.
If you are unsure how to use SRS Acoustilay 15 in your project, please contact our team before installation. We can help advise on the most suitable floor soundproofing system based on your property, floor type, noise issue and final floor finish.