MuteClip LP Bracket
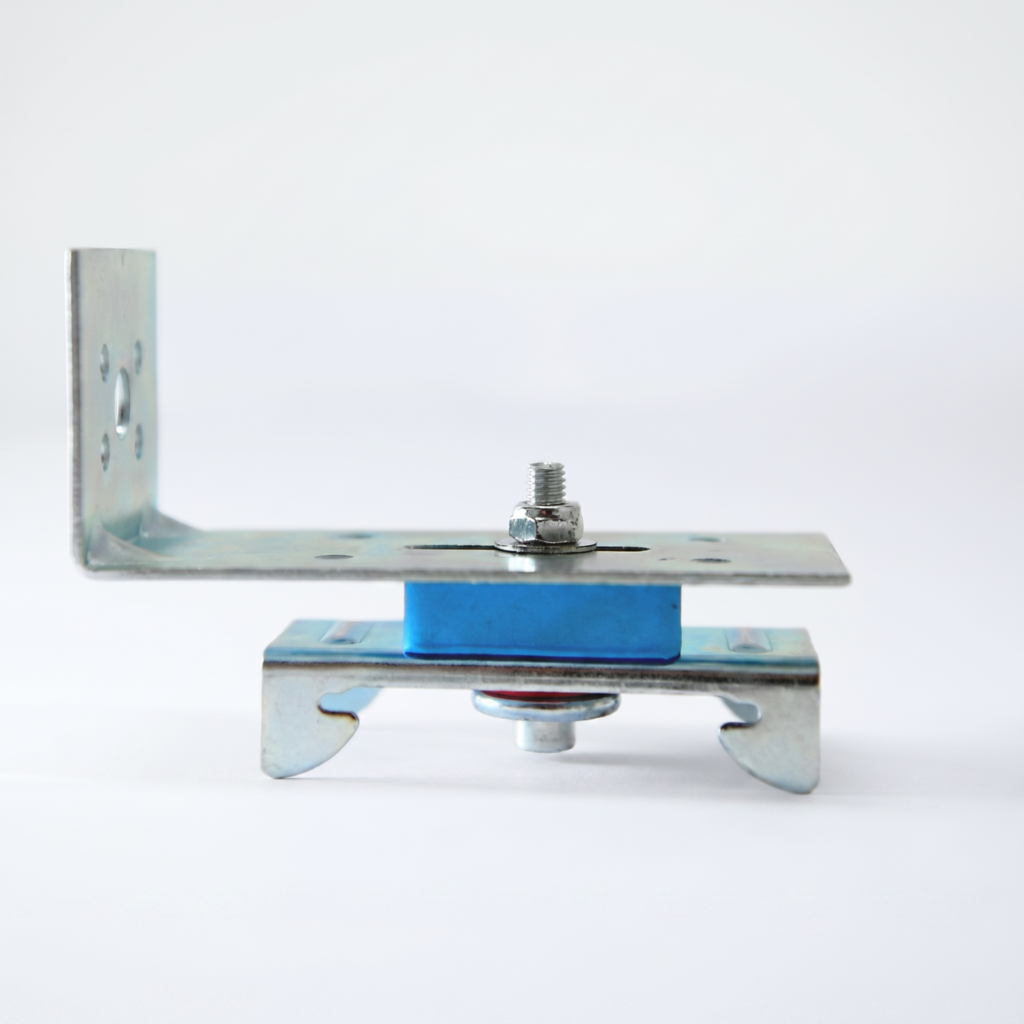
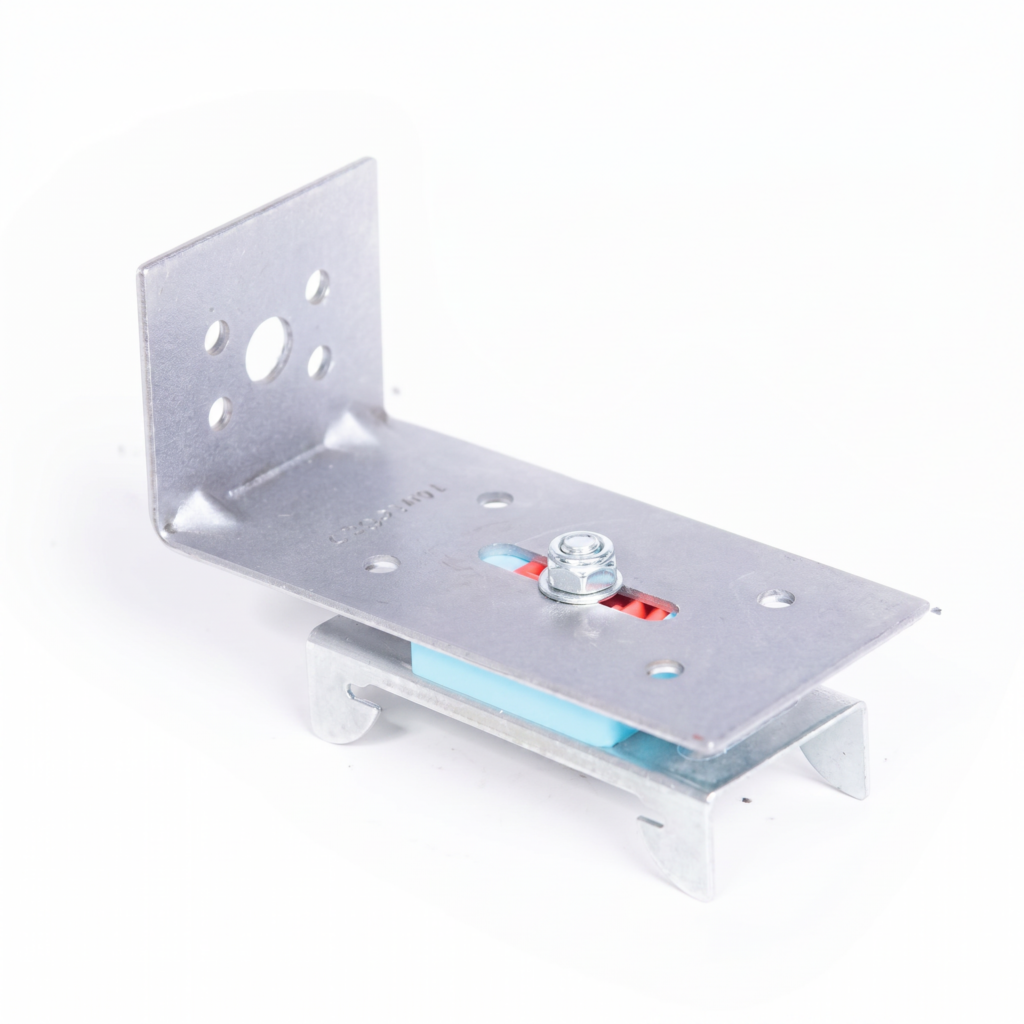
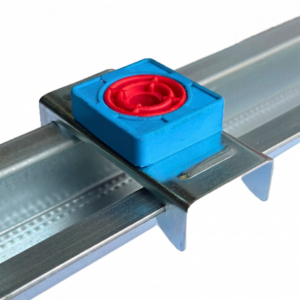
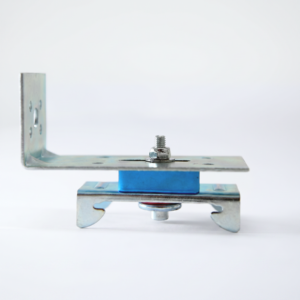
MuteClip LP Bracket is a low-profile acoustic isolation clip designed for ceiling soundproofing systems where room height is limited. It is used with MuteClip Channel or compatible acoustic furring channel to create a decoupled ceiling frame, helping reduce airborne noise, impact noise and vibration transfer through the ceiling structure.
The LP version is designed to minimise ceiling height loss while still providing a resilient separation between the existing structure and the new plasterboard or acoustic board ceiling layer.
What is the MuteClip LP Bracket used for?
MuteClip LP Brackets are used to create a low-profile suspended acoustic ceiling system. They are especially useful where a standard clip and channel system would take up too much ceiling height.
They are commonly used in flats, apartments, bedrooms, studios, home cinemas, offices, conversion projects and refurbishment projects where noise from above is an issue.
How does the MuteClip LP Bracket work?
The MuteClip LP Bracket is fixed to the side of the existing timber joist or suitable ceiling structure. MuteClip Channel is then installed into the bracket to create a decoupled frame for plasterboard or acoustic boards.
The board layer is fixed to the channel rather than directly to the joists. This separation helps reduce vibration transfer and improves the ability of the full ceiling system to reduce both airborne and impact noise.
The dual-density rubber/silicone isolator in the bracket acts as a shock absorber around the fixing point, helping reduce sound vibration passing through the structure.
What type of noise does MuteClip LP help reduce?
MuteClip LP Brackets can help reduce both airborne noise and impact noise when used as part of a complete ceiling soundproofing system.
Airborne noise includes voices, TV noise, music and general sound transfer from rooms above.
Impact noise includes footsteps, dropped items, furniture movement and vibration passing through the floor and ceiling structure.
The final result will depend on the full build-up, including joist structure, insulation, clip spacing, channel spacing, board layers, perimeter sealing and flanking noise paths.
Where can MuteClip LP Brackets be used?
MuteClip LP Brackets are suitable for ceiling soundproofing applications, including:
- Low-profile ceiling soundproofing systems
- Timber joist ceiling upgrades
- Flat and apartment ceiling soundproofing
- Bedrooms below noisy rooms
- Home offices and living rooms
- Music rooms and studios
- Home cinemas and media rooms
- Refurbishment and conversion projects
- Projects where ceiling height loss must be minimised
- Ceilings requiring reduced impact and airborne noise transfer
Why choose MuteClip LP?
MuteClip LP is useful where acoustic ceiling performance is required but available ceiling height is limited. The low-profile design helps reduce the depth of the acoustic ceiling build-up compared with some standard clip and channel systems.
The bracket is also designed to reduce points of contact between the new ceiling layer and the existing structure. This helps improve decoupling and reduces the risk of direct vibration transfer through the ceiling.
MuteClip LP vs standard MuteClip — what is the difference?
The standard MuteClip is commonly used for walls and ceilings where a normal clip and channel build-up is acceptable.
The MuteClip LP is the low-profile version, designed specifically for ceiling applications where height loss needs to be kept as low as possible. It is installed to allow the channel to sit in a lower-profile arrangement, helping preserve more room height.
The right option depends on the ceiling structure, available height, acoustic target and full system design.
Key benefits
- Low-profile acoustic ceiling bracket — designed to reduce ceiling height loss.
- Helps reduce airborne noise — useful for voices, TV noise, music and room-to-room sound transfer.
- Helps reduce impact noise — useful for footsteps, dropped items and vibration from above.
- Dual-density isolator — helps absorb vibration around the fixing point.
- Works with MuteClip Channel — creates a decoupled frame for plasterboard or acoustic boards.
- Suitable for timber joist ceilings — ideal for refurbishment and conversion projects.
- Compact bracket design — listed dimensions of 105mm x 50mm x 74mm.
- 16kg maximum load per clip — suitable for acoustic board systems when correctly specified.
- Useful alternative to resilient bar — provides a more controlled acoustic isolation system.
- Part E-focused systems — can be used within suitable acoustic ceiling systems where Building Regulations performance is required.
Helpful advice before buying
MuteClip LP Brackets are not a complete ceiling soundproofing system on their own. They should be used with MuteClip Channel, suitable acoustic plasterboard or soundproofing boards, acoustic mineral wool, acoustic sealant and correct perimeter detailing.
The number of brackets required depends on ceiling size, joist spacing, channel spacing, board weight and system specification. Always check the correct layout before installation.
If you are unsure how many MuteClip LP Brackets you need, or whether the LP version is right for your ceiling, please contact our team before ordering. We can help advise on the correct ceiling soundproofing build-up for your room.
MuteClip LP Bracket Technical Specifications
MuteClip LP Bracket is a low-profile acoustic isolation bracket used with MuteClip Channel or compatible acoustic furring channel to create a decoupled ceiling soundproofing system. It is designed to reduce vibration transfer while keeping ceiling height loss to a minimum.
Product Specification
| Product Name |
MuteClip LP Bracket |
| Common Product Reference |
MuteClip LP / Mute Clip LP – Single |
| Product Type |
Low-profile acoustic ceiling isolation bracket / clip |
| Pack Size |
Single bracket unless otherwise stated |
| Application |
Low-profile ceiling soundproofing systems |
| Suitable For |
Timber joist ceilings, low-height ceiling systems, flats, apartments, studios, media rooms and refurbishment projects |
| Dimensions |
105mm x 50mm x 74mm |
| Weight |
Approx. 174g per bracket |
| Maximum Load |
16kg / 36lb per MuteClip LP according to supplier/manufacturer data |
| Isolation Material |
Dual-density rubber/silicone acoustic isolator |
| Compatible Channel |
MuteClip Channel / compatible acoustic furring channel |
| Main Noise Types |
Airborne noise, impact noise and vibration transfer |
| Published Airborne Noise Reduction |
Supplier data lists up to 60dB airborne reduction; final performance depends on full system build-up |
| Published Impact Noise Reduction |
Supplier data lists up to 35dB impact reduction; final performance depends on full system build-up |
| Low-Profile Benefit |
Designed to minimise loss of room height in acoustic dropped ceiling systems |
| Fixing Method |
Fixed to suitable ceiling structure or joist using appropriate fixings for the substrate |
| Substrate Compatibility |
Timber and suitable ceiling structures, subject to correct fixing and system design |
| Typical Use |
Installed to the side of timber joists to reduce the depth of the acoustic ceiling build-up |
| Part E Use |
Can be used within suitable Part E-focused ceiling systems; confirm full tested system specification for compliance-led projects |
| Fire Rating |
System-dependent — confirm the full tested ceiling build-up before compliance-led use |
| Standalone Product? |
No — should be used as part of a complete acoustic ceiling system |
Suitable Applications
MuteClip LP Brackets can be used in a range of ceiling soundproofing applications, including:
- Low-profile acoustic ceilings
- Timber joist ceiling upgrades
- Flat and apartment ceiling soundproofing
- Ceilings below noisy neighbours
- Bedrooms, living rooms and home offices
- Recording studios and music rooms
- Home cinemas and media rooms
- Refurbishment and conversion projects
- Projects with limited ceiling height
- Part E-focused ceiling systems where the full build-up is correctly specified
Acoustic Use
MuteClip LP Brackets are used to decouple a new ceiling board layer from the existing ceiling or floor structure above. This reduces direct vibration transfer and helps improve the acoustic performance of the complete ceiling system.
The brackets should be used with MuteClip Channel or a compatible acoustic channel system, along with suitable board layers, acoustic mineral wool, acoustic sealant and correct perimeter isolation.
Common System Uses
- Fixed to the side of timber joists in low-profile ceiling systems
- Used with MuteClip Channel to support plasterboard or acoustic boards
- Used with one or more layers of acoustic plasterboard depending on the system
- Combined with acoustic mineral wool between ceiling joists
- Used where a standard clip and channel system would lose too much ceiling height
- Combined with acoustic sealant around perimeters, joints and penetrations
- Used as an upgrade over standard resilient bar in higher-performance ceiling systems
Important Performance Note
MuteClip LP Brackets are acoustic isolation components, not a complete soundproofing system on their own. Published performance figures should be treated as system-dependent.
The final acoustic result will depend on the existing ceiling/floor construction, joist layout, bracket spacing, channel spacing, board mass, insulation, fixing method, perimeter sealing, workmanship and flanking noise paths.
For Building Regulations, fire-rated or compliance-led projects, use the correct tested specification and seek project-specific acoustic advice where required.
Handling Advice
Store MuteClip LP Brackets clean, dry and protected before installation. Check that the supporting ceiling structure is stable and suitable for fixing before fitting the brackets.
Do not install onto weak, loose, rotten or unstable joists or ceiling structures. Do not over-tighten fixings in a way that compresses or damages the acoustic isolation element.
How to Install MuteClip LP Brackets
MuteClip LP Brackets are installed to the existing ceiling structure and used with MuteClip Channel to create a low-profile decoupled ceiling system. The system helps reduce sound transfer by separating the new plasterboard or acoustic board layer from the structure above.
For best results, MuteClip LP Brackets should be installed as part of a complete acoustic ceiling system, using the correct bracket spacing, channel spacing, board layers, insulation and acoustic sealing.
What You’ll Need
- MuteClip LP Brackets
- MuteClip Channel or compatible acoustic furring channel
- Acoustic plasterboard or suitable soundproofing boards
- Acoustic mineral wool, where specified
- Acoustic sealant
- Suitable fixings for timber joists or the specified ceiling substrate
- Drywall screws for fixing boards to the channel
- Tape measure
- Pencil or marker
- Laser level or spirit level
- Drill/driver
- Metal snips or suitable channel cutter
- Temporary shims for perimeter gaps
- PPE gloves
- Safety glasses
- Dust mask
- Waste bag for offcuts
Before You Start
Check the existing ceiling before installation. The structure should be stable, dry and capable of supporting the full acoustic system, including MuteClip LP Brackets, MuteClip Channel, plasterboard layers and acoustic insulation.
The LP system is normally used where ceiling height is limited. Plan the full build-up carefully before starting so you understand the finished ceiling height and the depth of the system.
Make sure the chosen fixings are suitable for the joists or substrate. Fixing strength is important because each bracket supports part of the ceiling load.
Step 1: Prepare the Ceiling
Make sure the ceiling area is ready. In many low-profile installations, the existing ceiling may need to be removed so the brackets can be fixed securely to the joists.
The structure should be:
- Clean
- Dry
- Stable
- Structurally suitable
- Free from loose material
- Suitable for the chosen fixing type
Repair weak joists, damaged timber, loose ceiling areas or unsuitable surfaces before installing the brackets.
Step 2: Install Acoustic Insulation Where Required
Where the system requires cavity treatment, install acoustic mineral wool between the ceiling joists.
The insulation should fit neatly without being over-compressed. It should not interfere with the position of the brackets, channels or board layers.
Acoustic mineral wool helps reduce resonance in the floor/ceiling void and supports the airborne performance of the complete system.
Step 3: Mark the Channel Layout
Mark the MuteClip Channel positions across the ceiling.
The correct channel spacing will depend on the board weight, joist direction, system design and acoustic specification. For many acoustic ceiling systems, channel centres are commonly around 400mm, but the project specification should always take priority.
Plan the layout so boards are properly supported and so channel joints do not create weak or unsupported areas.
Step 4: Mark the MuteClip LP Bracket Positions
Mark the MuteClip LP Bracket positions along the joists or ceiling structure.
Bracket spacing should be set according to the system design, board weight and manufacturer guidance. Add additional brackets where required around perimeters, board edges, openings and areas with heavier loading.
Do not guess bracket quantities where acoustic performance, fire performance or compliance is important. Use the correct system guidance or project-specific specification.
Step 5: Fix the MuteClip LP Brackets
Fix each MuteClip LP Bracket to the ceiling structure using suitable fixings.
The brackets should be installed in the correct orientation so the MuteClip Channel can be fitted properly and the low-profile ceiling build-up is maintained.
Tighten fixings securely, but do not over-tighten in a way that compresses or damages the acoustic isolation element. The bracket should be stable and correctly seated.
Step 6: Fit the MuteClip Channel
Install the MuteClip Channel into the LP Brackets.
Make sure the channel is fully seated and runs straight across the ceiling. The channel should be installed in the correct direction for the ceiling system and should be properly supported at all joints.
Where channels need to be joined, overlap or join them according to the system guidance. Avoid unsupported joints and excessive channel overhangs.
Step 7: Check the Bracket and Channel System
Before installing plasterboard or acoustic boards, check the full bracket and channel layout.
Check that:
- All brackets are securely fixed
- Fixings are not over-tightened
- Channels are fully seated in the brackets
- Channel spacing is correct
- Bracket spacing is correct
- Channel joints are properly supported
- There are no rigid bridges to the structure above
- Extra support is included around ceiling edges and openings where required
Correct any issues before fitting the board layers.
Step 8: Install the First Board Layer
Install the plasterboard or acoustic board onto the MuteClip Channel using suitable drywall screws.
Only fix the board into the channel. Do not screw through into the joists or structure above, as this can create an acoustic bridge and reduce performance.
Leave a small perimeter gap around the board layer so it does not touch the surrounding walls.
Step 9: Install Additional Board Layers Where Required
If the system requires a second layer of plasterboard or acoustic board, install it after the first layer.
Stagger board joints between layers where possible. Use the correct screw length so the screws fix into the channel without passing through into the structure above.
Additional board layers can improve acoustic mass, but they must be supported by the correct bracket and channel layout.
Step 10: Seal the Perimeter
Once the board layers are installed, seal the perimeter gap with non-hardening acoustic sealant.
Seal around:
- Ceiling perimeters
- Wall junctions
- Light fittings
- Pipe penetrations
- Service openings
- Board edges
- Awkward corners and junctions
Good sealing is essential because sound can pass through small air gaps.
Step 11: Finish the Ceiling
After the acoustic sealant has cured, tape and finish the plasterboard joints as required.
The final finish may include jointing compound, skim plaster, paint or another suitable decorative finish.
Avoid fixing heavy items directly to the decoupled ceiling layer unless the ceiling has been specifically designed to support them.
Installation Tips
- Use MuteClip LP for low-profile ceiling systems where headroom is limited.
- Check the ceiling structure is suitable before installation.
- Use suitable fixings for the joist or ceiling substrate.
- Install acoustic mineral wool between joists where specified.
- Plan bracket and channel spacing before fixing anything.
- Do not over-tighten the bracket fixings.
- Make sure the channel is fully seated in each bracket.
- Only fix boards into the channel, not the joists or structure above.
- Stagger board joints where multiple layers are used.
- Leave a perimeter gap around the board layer.
- Seal the perimeter with non-hardening acoustic sealant.
- Use MuteClip LP as part of a complete acoustic ceiling system, not as a standalone solution.
Important Soundproofing Note
MuteClip LP Brackets can significantly improve the acoustic performance of a ceiling system, but the final result depends on the complete build-up.
Existing joists, ceiling void, insulation, bracket spacing, channel spacing, board mass, fixing method, perimeter sealing and flanking noise paths can all affect the result.
If you are unsure how to use MuteClip LP Brackets in your project, please contact our team before installation. We can help advise on the most suitable ceiling soundproofing system based on your room height, structure and noise issue.