Hodgson Firestrip 60 Glazing Seal – 20 × 3mm
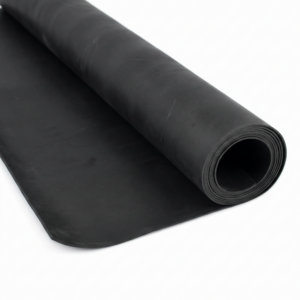
Hodgson Firestrip 60 Glazing Seal is a flexible, high-tack intumescent strip designed for approved 60-minute fire-resistant glazing systems in timber doors and timber-framed screens.
The 20 × 3mm strip is installed between the fire-resistant glass and the surrounding glazing beads. During normal conditions, it provides a continuous compressed seal within the glazing pocket. When exposed to fire conditions, the intumescent material reacts to help restrict the passage of flames and hot gases around the perimeter of the glass.
The stocked range is available in Brown and White, with a choice of an individual 15m roll or a 105m pack containing seven 15m rolls.
Designed for 60-Minute Fire Glazing
Firestrip 60 is intended for use within supported 60-minute fire-glazing constructions in:
- Internal timber fire doors
- Hardwood timber-framed screens
- Other glazed constructions specifically covered by current test or assessment evidence
The manufacturer identifies Firestrip 60 under BWF Certifire certificate CF297 and states that it has been tested with semi-insulating and fully insulating fire-resistant glass.
Depending on the selected glass and complete tested construction, supported systems may provide:
- 60 minutes’ integrity with no insulation classification
- 60 minutes’ integrity and 60 minutes’ insulation
These classifications apply to the complete glazed assembly, not to the Firestrip 60 seal by itself.
High-Tack Intumescent Strip
Firestrip 60 has a high-tack surface designed to provide strong initial adhesion to suitable glass and timber surfaces.
The tack helps retain the strip while:
- The first glazing rebate is prepared
- The fire-resistant glass is positioned
- The opposing strip is applied
- The remaining glazing beads are installed
The tacky surface is an installation aid only. It does not structurally support or retain the glass and does not replace the glazing beads, setting blocks, pins or screws required by the approved system.
Installed Under Positive Compression
The product is designed to be bedded under positive compression between the glass and the glazing beads.
Firm and even pressure helps create continuous contact around the glazed perimeter. Once the beads have been bedded into the strip, they must be mechanically secured using the fixing arrangement required by the relevant fire-test evidence or doorset assessment.
Firestrip 60 must not be used to compensate for:
- Incorrectly sized glass
- Oversized glazing rebates
- Insufficient glass edge cover
- Unsuitable glazing beads
- Missing mechanical fixings
Suitable Fire-Resistant Glass
Hodgson states that Firestrip 60 can be used with a range of semi-insulating and insulating fire-resistant glass products.
The exact glass product must be supported by the applicable CF297 construction or other project-specific evidence. Compatibility depends on:
- The glass type and thickness
- The maximum pane height and width
- The maximum permitted glazed area
- The timber door or screen construction
- The glazing-bead dimensions and timber density
- The bead fixing arrangement
- The required setting blocks
Do not substitute another glass solely because it has the same nominal thickness or advertised fire-resistance period.
Flexible Strip Format
The pliable strip can be measured and cut to suit each side of the glazed aperture.
Its flexible format allows installers to:
- Form continuous seals along the glazing rebate
- Cut accurate sections for different aperture sizes
- Create closely butted corner joints
- Trim the finished material to the required sightline
The strip should not be stretched during installation. Stretching may cause it to retract and leave gaps at the corners or bead joints.
Pack Size Options
- 15m roll: suitable for smaller installations, individual doors and maintenance stock.
- 105m pack: supplied as seven separate 15m rolls for production work and larger projects.
The 105m option should not be treated as one continuous reel.
Available Colours
- Brown: corresponding to Hodgson’s Mahogany colour description.
- White: corresponding to Hodgson’s Off-White colour description.
Firestrip 60 can be overcoated with compatible paints and decorative wood stains. Any coating must remain consistent with the doorset or glazing-system specification.
Fire and Smoke Performance
Hodgson describes Firestrip 60 as restricting the passage of fire and smoke under fire-test conditions.
This must not be interpreted as a separate ambient-temperature cold-smoke classification. Where the glazed doorset requires cold-smoke control, suitable evidence must cover the complete door, glazing and sealing arrangement.
Key Benefits
- Designed for approved 60-minute fire-glazing systems
- Suitable for timber doors and hardwood timber screens
- Tested with semi-insulating and fully insulating fire-resistant glass
- High-tack surface provides good adhesion to glass and timber
- Installed under positive compression
- Flexible and straightforward to measure and cut
- Can be overcoated with compatible paints and decorative wood stains
- Available in Brown and White
- Available as a 15m roll or 105m pack
Important Selection Advice
Before ordering or installing Firestrip 60, confirm:
- The required pack size and colour
- The exact fire-resistant glass product
- The permitted glass dimensions and area
- The timber door or screen construction
- The glazing-bead dimensions and timber density
- The setting-block specification
- The fixing type, angle and spacing
- The applicable CF297 construction or doorset assessment
Do not select Firestrip 60 solely because its 20 × 3mm profile fits the available glazing pocket.
Hodgson Firestrip 60 Glazing Seal Technical Specifications
| Product Name |
Hodgson Firestrip 60 Glazing Seal |
| Manufacturer |
Hodgson Sealants |
| Product Type |
High-tack intumescent glazing strip sealant |
| Profile Size |
20 × 3mm |
| Stocked Pack Sizes |
15m roll and 105m pack |
| 105m Pack Contents |
Seven separate 15m rolls |
| Stocked Colours |
Brown and White |
| Manufacturer Colour Names |
Mahogany and Off-White |
| Primary Application |
Approved fire-resistant glazing systems in internal timber doors and hardwood timber screens |
| Published Fire Application |
Up to 60 minutes as part of a suitable tested or assessed glazing assembly |
| Supported Glass Categories |
Semi-insulating and fully insulating fire-resistant glass, subject to system evidence |
| Published System Classifications |
60:0 and 60:60 integrity-to-insulation classifications, depending on the glass and complete tested construction |
| Adhesion |
Published as excellent to suitable glass and timber |
| Installation Condition |
Positive compression between glass and glazing beads |
| Movement Accommodation |
±10% |
| Shrinkage |
Less than 1% |
| Slump |
Nil |
| Staining |
Nil |
| Application Temperature |
+5°C to +30°C |
| Published Service Temperature |
+5°C to +40°C |
| Resistance to Mould |
High |
| UV Resistance |
Excellent |
| Paintability |
Can be overcoated with compatible paints and decorative wood stains |
| Published Predicted Service Life |
In excess of 20 years |
| Shelf Life |
12 months when stored flat in original packaging under cool, dry conditions |
| Certification Reference |
BWF Certifire CF297; confirm the current revision and applicable construction before specification |
| Standalone Fire Rating? |
No — fire performance belongs to the complete tested or assessed glazed assembly |
| Standalone Cold-Smoke Rating? |
No separate ambient-temperature smoke classification should be assumed |
| Standalone Acoustic Rating? |
No |
Available Variations and Product Codes
| Pack Size |
Colour |
Profile |
Product Code |
| 15m roll |
Brown |
20 × 3mm |
MAS/60/20X3/15M/BRN |
| 15m roll |
White |
20 × 3mm |
MAS/60/20X3/15M/WHT |
| 105m pack – 7 × 15m |
Brown |
20 × 3mm |
MAS/60/20X3/105M/BRN |
| 105m pack – 7 × 15m |
White |
20 × 3mm |
MAS/60/20X3/105M/WHT |
Variation Summary
| Pack-Size Options |
Colour Options |
Total Variations |
| 15m roll and 105m pack |
Brown and White |
4 |
System Requirements
The applicable CF297 construction or project-specific assessment determines:
- The permitted glass product
- The maximum pane height, width and area
- The integrity and insulation classification
- The door-leaf or screen construction
- The glazing-bead dimensions and timber density
- The setting-block specification
- The fixing type, angle, position and spacing
Storage Requirements
- Store rolls flat in their original packaging.
- Keep them in cool, dry internal conditions.
- Protect the backing paper and tacky surfaces from contamination.
- Do not crush, stretch or sharply fold the material.
- Do not install material that is wet, contaminated or permanently distorted.
How to Install Hodgson Firestrip 60 Glazing Seal
Firestrip 60 must be installed as part of a current tested, certified or assessed fire-resistant glazing system.
Before starting, verify the applicable CF297 construction or doorset evidence for the permitted glass, pane dimensions, timber construction, glazing beads, setting blocks and mechanical fixings.
1. Verify the Complete Glazing Specification
Confirm:
- The door or timber screen is approved for the proposed glazed aperture.
- The selected fire-resistant glass is permitted.
- The glass dimensions remain within the approved limits.
- The glazing beads have the required dimensions and timber density.
- The specified setting blocks are available.
- The correct pins or screws are available.
- The required fixing positions and centres are known.
Do not machine or alter a certified fire door unless the proposed glazing arrangement is supported by current evidence.
2. Prepare the Surfaces
All glass, timber and glazing surfaces must be:
- Clean
- Dry
- Free from frost
- Free from grease and oil
- Free from dust and loose material
Apply Firestrip 60 only when the ambient and substrate temperature is between +5°C and +30°C.
3. Form the First Rebate
Where the opening is not already rebated, secure the first set of approved glazing beads to form the rebate.
Hodgson’s general fitting instructions require the pins or screws to be angled at approximately 45°.
The exact fixing size, spacing and location must follow the applicable glazing-system evidence.
4. Apply Firestrip 60 to the First Rebate
Keep the backing paper in place while initially positioning the strip.
Begin along the top rebate. Run the edge of the backing paper along the rebate platform so that the Firestrip 60 reaches the required sightline.
For larger rebates, the paper may need to be held slightly above the platform to position the strip correctly.
Repeat the application along:
- The first side
- The second side
- The bottom rebate
5. Form the Corner Joints
Cut the strip cleanly at each corner and butt the adjoining ends closely together.
Do not overlap the corner joints.
Overlapping creates excessive local thickness and may prevent consistent contact between the glass, strip and glazing beads.
6. Remove the Backing Paper
Once the first perimeter is correctly positioned, carefully remove the backing paper.
Check that the strip remains:
- Straight
- Continuous
- At the correct sightline
- Firmly adhered
- Free from open joints
7. Position the Setting Blocks
Install the setting blocks specified by the approved glazing construction.
The setting blocks support the weight of the glass and maintain the required edge clearances. Firestrip 60 must not be used as a load-bearing glass support.
8. Install the Fire-Resistant Glass
Centralise the approved fire-resistant glass within the aperture and lower it onto the setting blocks.
Press firmly and evenly around the perimeter to establish continuous contact with the first Firestrip 60 seal.
Do not apply concentrated force to the corners or damaged edges of the glass.
9. Apply the Opposing Firestrip 60 Seal
Apply a second continuous perimeter of Firestrip 60 against the exposed glass face.
The strip may be positioned by guiding its backing paper along the rebate platform or applied directly to the prepared glazing beads where the approved arrangement permits.
Remove the backing paper and ensure that all corner joints are closely butted.
10. Fit the Opposing Glazing Beads
Position the approved glazing beads against the Firestrip 60.
Apply firm and even pressure to bed the beads into the strip and establish positive compression.
Check that:
- The glass remains central.
- The strip has not rolled or moved out of position.
- The beads sit evenly.
- No open perimeter gaps remain.
11. Mechanically Secure the Beads
Fix the glazing beads using the pins or screws required by the approved construction.
Hodgson’s general instructions require the fixings to be angled at approximately 45° so that they pass beneath the glass.
The applicable certificate or doorset assessment must determine the exact:
- Fixing type
- Fixing length
- Fixing spacing
- Distance from bead corners
12. Trim the Sightline
After the glazing beads have been secured, carefully trim any Firestrip 60 projecting above the required sightline with a sharp knife.
Avoid damaging the glass, glazing beads or remaining intumescent seal.
Final Inspection
Confirm that:
- The correct 20 × 3mm Firestrip 60 has been installed.
- The approved fire-resistant glass has been used.
- The glass is supported on the specified setting blocks.
- The seals form a continuous perimeter on both faces.
- All corner joints are butted and not overlapped.
- Positive compression has been achieved.
- All required mechanical fixings are present.
- The completed assembly matches the applicable fire evidence.
Important Performance Note
Firestrip 60 does not independently provide 60 minutes of fire resistance.
Do not change the glass, glazing beads, setting blocks, fixings, pane dimensions or timber construction without suitable supporting evidence.