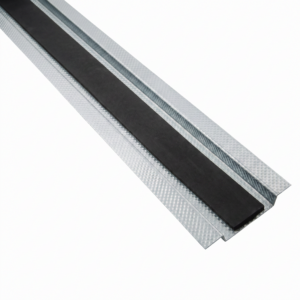
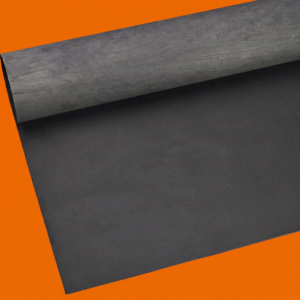
Norsound NOR920 Graphite Radius Hinge Pad – 2mm, 100 × 30mm
Norsound NOR920 Graphite Radius Hinge Pad is a pre-cut intumescent pad designed for installation behind a compatible radius-corner hinge blade within a fire-resisting timber doorset.
The pad creates a concealed layer of graphite intumescent material between the metal hinge blade and the timber door leaf or frame. When exposed to fire conditions, the graphite expands into available space around the hinge recess, helping protect the surrounding timber as part of the complete doorset arrangement.
Each pad is supplied in one fixed configuration:
- 100mm long
- 30mm wide
- 2mm thick
- Radius-corner profile
- Dark Grey graphite material
- Self-adhesive backing
Protection Behind Fire-Door Hinges
Recessing hinges into a door and frame removes part of the original timber construction. The metal hinge can also conduct heat into the surrounding material during a fire.
Where required by the hinge and doorset evidence, an intumescent hinge pad is installed directly behind the hinge blade to help:
- Protect the timber within the hinge recess
- Limit direct heat transfer from the metal hinge blade
- Protect the area surrounding the hinge fixings
- Reduce localised deterioration around the recessed ironmongery
- Reproduce the hardware-protection arrangement used in the tested or assessed doorset
2mm Graphite Construction
This stocked pad uses a 2mm-thick graphite intumescent material.
The thickness is an important part of the hardware specification. A 2mm pad must not be replaced with a 0.5mm or 1mm graphite pad merely because the alternative has the same length and width.
Similarly, do not substitute a white Interdens pad without evidence confirming that the alternative material, thickness and expansion characteristics are permitted.
Radius-Corner Profile
The rounded corners are intended to correspond with a compatible radius-corner hinge blade.
Before ordering, compare the pad with:
- The hinge-blade length and width
- The radius of the hinge corners
- The dimensions of the hinge recess
- The screw-hole positions
- The hinge manufacturer’s fire-test evidence
Do not use the radius pad behind a square-corner hinge where its shape would leave part of the required protection area uncovered.
Self-Adhesive Backing
The self-adhesive backing helps retain the pad within the prepared hinge recess while the hinge blade is positioned and mechanically fixed.
The adhesive is an installation aid only. It does not structurally secure the hinge and does not replace the screws specified for the hinge and doorset.
The receiving surface must be clean, dry, flat and free from dust, grease and loose timber fibres.
Supplied Individually
Each ordered item contains one hinge pad.
The number required depends on the fire-door specification. Protection may be required:
- Behind the hinge blade recessed into the door leaf
- Behind the corresponding blade recessed into the frame
- Behind both blades of every hinge
Where both blades of three hinges require protection, six individual pads will be needed.
Do not assume that one pad is sufficient for one complete hinge without checking the applicable evidence.
Fire-Performance Requirements
Graphite hinge pads are intended for use behind hinge blades within suitable fire-resisting doorsets. The pad does not independently provide an FD30, FD60 or other fire-resistance classification.
Performance depends on the complete assembly, including:
- The door-leaf and frame construction
- The hinge manufacturer and model
- The hinge dimensions and material
- The number and position of the hinges
- The specified graphite-pad thickness
- Whether one or both hinge blades are protected
- The screw type, length and fixing pattern
- The quality of installation
The exact pad arrangement stated by the hinge certificate, door manufacturer or doorset assessment must be reproduced on site.
Current Evidence Check
The exact 2mm product is included within the supplied stock and pricing range. However, it is not shown in the currently published standard Norseal graphite hinge-pad table.
Before specifying it for a current certified project, confirm:
- That the 2mm pre-cut pad remains an approved Norseal product
- The current manufacturer reference
- The applicable fire-test or assessment evidence
- The approved hinge models
- The required number and position of pads
Key Benefits
- Pre-cut to suit compatible 100 × 30mm hinge blades
- Radius corners for matching rounded hinge profiles
- 2mm graphite intumescent construction
- Protects the timber behind the hinge blade
- Self-adhesive backing assists accurate positioning
- Dark Grey material remains concealed after installation
- Supplied individually for accurate quantity selection
- Suitable for evidence-supported fire-door hinge arrangements
Important Selection Advice
Before ordering or installing, confirm:
- The hinge blade measures 100 × 30mm
- The hinge has a matching radius-corner profile
- A 2mm graphite pad is specifically required
- The required number of pads per hinge
- Whether the leaf blade, frame blade or both require protection
- The current hinge and doorset evidence permits the exact product
Norsound NOR920 Graphite Radius Hinge Pad Technical Specifications
| Product Name |
Norsound NOR920 Graphite Radius Hinge Pad – 2mm, 100 × 30mm |
| Supplier Product Description |
Norsound 2mm Graphite Hinge Pad, 100 × 30mm Radius with self-adhesive backing |
| Exact Stocked Product Code |
NOR9/20/100X30/R |
| Product Type |
Pre-cut graphite intumescent hinge-protection pad |
| Application |
Behind compatible hinge blades within evidence-supported fire-resisting doorsets |
| Length |
100mm |
| Width |
30mm |
| Thickness |
2mm |
| Corner Profile |
Radius |
| Material |
Graphite intumescent |
| Colour |
Dark Grey |
| Fixing |
Self-adhesive positioning beneath the mechanically fixed hinge blade |
| Unit of Sale |
One individual hinge pad |
| Hinge Included? |
No |
| Fixing Screws Included? |
No |
| Standalone Fire Rating? |
No — performance belongs to the complete tested or assessed hinge and doorset arrangement |
| Standalone Smoke Rating? |
No |
| Standalone Acoustic Rating? |
No |
Stocked Product
| Size |
Thickness |
Profile |
Material |
Product Code |
| 100 × 30mm |
2mm |
Radius |
Graphite |
NOR9/20/100X30/R |
Variation Summary
| Size Options |
Thickness Options |
Profile Options |
Total Variations |
| 100 × 30mm |
2mm |
Radius |
1 |
Product Reference Note
The supplied stock range uses the Product Code:
NOR9/20/100X30/R
The product is being listed as NOR920 based on the supplied naming and code structure. The currently published standard Norseal hinge-pad data does not show a corresponding NOR920 order reference.
Obtain current manufacturer confirmation before presenting NOR920 as a current standard manufacturer reference in project certification documents.
Quantity Guidance
The hinge pad is sold individually.
Calculate the quantity from:
- The number of hinges fitted to each door
- The number of doors
- Whether one or both blades of each hinge require protection
Where both blades require protection, order two pads per hinge.
Compatibility Requirements
Select the pad only where the supporting evidence permits:
- A 100 × 30mm hinge blade
- A radius-corner hinge profile
- 2mm graphite intumescent protection
- The proposed hinge and screw arrangement
- The intended location behind the leaf blade, frame blade or both
Do not substitute a thinner graphite pad, Interdens pad or differently shaped product without suitable evidence.
Storage
- Store flat in clean, dry internal conditions.
- Keep the adhesive release liner attached until installation.
- Protect the pad from moisture, dust, grease and oil.
- Do not fold, crease or permanently compress it.
- Keep the adhesive surface free from contamination.
Pre-Installation Inspection
Do not install a pad that is:
- Torn, punctured or delaminated
- Wet or contaminated
- Permanently compressed or distorted
- Missing part of its graphite material
- Incorrectly sized or shaped for the hinge
- Unable to sit flat within the hinge recess
How to Install the Norsound NOR920 Graphite Radius Hinge Pad
The hinge pad must be installed in the position required by the current hinge certificate, door manufacturer’s instructions or doorset assessment.
Before removing the hinge, establish whether protection is required behind the door-leaf blade, the frame blade or both blades.
1. Verify the Product and Evidence
Before installation, confirm:
- The exact 2mm graphite pad is permitted by the doorset evidence.
- The hinge is approved for the fire-resisting doorset.
- The hinge blade measures 100 × 30mm.
- The hinge has a compatible radius-corner profile.
- The required pad locations are known.
- The specified hinge screws are available.
Because the exact 2mm pre-cut variant is not shown in the currently published standard Norseal hinge-pad table, obtain current technical confirmation before using it for certification.
2. Support the Door
Support the door securely before loosening or removing any hinge.
Remove and refit one hinge at a time unless the approved installation procedure requires another method.
Supporting the door helps prevent:
- Excessive temporary loading on the remaining hinges
- Movement of the door within the frame
- Damage to the hinge screws or timber
- Changes to the required perimeter gaps
3. Remove the Hinge Blade
Remove the specified screws and carefully lift the relevant hinge blade from its recess.
Retain approved screws that remain suitable for reuse. Replace damaged fixings only with screws permitted by the hinge and doorset evidence.
4. Inspect the Hinge Recess
Check that the recess is:
- Correctly sized for the hinge blade
- Compatible with the specified hinge-and-pad arrangement
- Flat and free from raised timber fibres
- Free from loose material
- Structurally sound around every screw position
Do not deepen or enlarge the recess unless the resulting dimensions remain within the doorset evidence.
5. Clean the Receiving Surface
Remove dust and loose fibres using a suitable brush or vacuum.
The receiving surface must be clean and dry before the self-adhesive pad is applied.
Do not install the pad over:
- Grease or oil
- Wet timber
- Loose paint or coatings
- Splinters or raised fibres
- Old adhesive that prevents flat contact
6. Dry-Fit the Pad
Position the pad within the recess before removing the adhesive release liner.
Confirm that:
- The 100 × 30mm dimensions correspond with the hinge blade.
- The rounded corners align with the hinge profile.
- The pad lies flat without folding.
- The required hinge area is covered.
- The pad does not project into the operating door gap.
- The hinge can be seated correctly over the 2mm material.
Do not trim or reshape the pad unless the supporting hinge and doorset evidence expressly permits it.
7. Apply the Pad
Remove the release liner without touching or contaminating the adhesive surface.
Align the pad carefully within the recess and press it firmly into position.
Ensure that:
- The pad remains centred behind the hinge blade.
- The radius corners remain correctly aligned.
- The graphite material lies flat without creases.
- The adhesive makes continuous contact.
- The pad does not overlap the edge of the recess.
8. Refit the Hinge Blade
Position the hinge blade directly over the installed pad and align it with the approved fixing holes.
Refit the specified screws progressively and evenly.
Confirm that:
- The hinge blade is seated as required by the approved arrangement.
- The pad remains flat and correctly positioned.
- The screws achieve secure fixing into sound material.
- The hinge is not distorted.
- The screws are not overtightened.
The self-adhesive backing positions the pad. The hinge screws provide the structural fixing.
9. Protect the Corresponding Blade Where Required
Where the evidence requires protection behind both hinge blades, repeat the process behind the corresponding blade in the door leaf or frame.
Use one separate pad for each protected hinge blade.
10. Test the Door
Remove the temporary support and operate the door carefully.
Confirm that:
- The hinges move freely without binding.
- The door opens through its required range.
- The door closes fully into the frame.
- The latch engages correctly.
- The self-closing device remains effective.
- The required perimeter gaps remain within specification.
- No hinge screw has loosened.
Final Inspection
Verify that:
- The correct 2mm graphite radius pad has been fitted.
- The pad is installed behind every hinge blade required by the evidence.
- The hinge blade is correctly seated.
- The approved screws are secure.
- The door remains correctly aligned.
- The installation matches the current tested or assessed arrangement.
Maintenance
Inspect the hinges as part of the routine fire-door inspection programme.
Check for:
- Loose or missing hinge screws
- Movement of the hinge blades
- Damage around the hinge recesses
- Changes to the door alignment or perimeter gaps
- Incorrect replacement hinges
- Missing or disturbed intumescent protection
Whenever a hinge is removed or replaced, inspect and reinstate the specified intumescent protection before returning the door to service.
Important Performance Note
The graphite hinge pad does not independently provide a fire-resistance period.
Performance depends on the complete approved doorset, compatible hinge, correct pad material and thickness, protected hinge-blade locations, screw arrangement and installation quality.