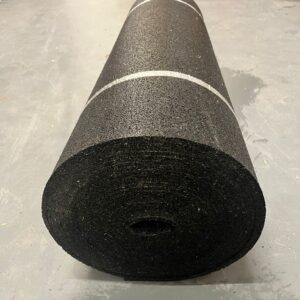
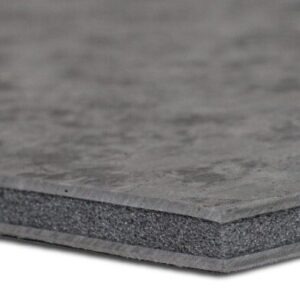
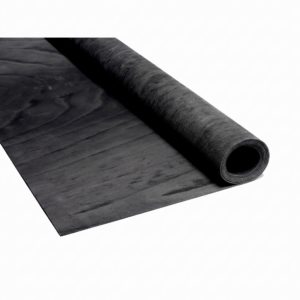
PET Acoustic Panel
PET Acoustic Panel is a decorative acoustic absorption panel designed to reduce echo, reverberation and sound reflections inside a room. Made from polyester fibre, PET panels are lightweight, durable and suitable for wall and ceiling acoustic treatment in homes, offices, studios, classrooms, meeting rooms, hospitality spaces and commercial interiors.
This variable product is available in two thicknesses:
- 12mm PET Acoustic Panel — a slim acoustic panel for general echo reduction and decorative wall treatment.
- 24mm PET Acoustic Panel — a thicker acoustic panel for improved absorption, stronger visual depth and more robust acoustic treatment.
What is a PET Acoustic Panel used for?
PET acoustic panels are used to improve the sound quality inside a room. They help absorb reflected sound from hard surfaces such as plasterboard walls, glass, concrete, timber floors and exposed ceilings.
They are commonly used to make rooms feel quieter, clearer and more comfortable by reducing echo and reverberation.
How does a PET acoustic panel work?
PET panels are made from dense polyester fibres. When sound waves hit the panel, some of the sound energy enters the fibre structure and is absorbed rather than bouncing straight back into the room.
This helps reduce harsh reflections and makes speech, music and general room sound clearer.
What type of noise does it help with?
PET Acoustic Panels are designed for acoustic treatment, not structural soundproofing.
They can help reduce:
- Echo
- Reverberation
- Room noise build-up
- Reflected sound from hard surfaces
- Poor speech clarity
- General acoustic discomfort in busy rooms
They are not designed to stop noise passing through walls, floors or ceilings. If you need to block sound transfer between rooms, you will usually need a separate soundproofing system with mass, isolation and airtight sealing.
12mm vs 24mm — which thickness should I choose?
The 12mm PET Acoustic Panel is a slimmer option for general acoustic treatment, decorative feature walls and spaces where a low-profile finish is required.
The 24mm PET Acoustic Panel provides a deeper panel build-up and is better suited to projects where stronger acoustic absorption, greater rigidity or a more substantial visual finish is preferred.
The right option depends on the room size, wall or ceiling layout, acoustic issue, budget and design preference.
Where can PET Acoustic Panels be used?
PET Acoustic Panels can be used in a wide range of internal spaces, including:
- Offices and open-plan workspaces
- Meeting rooms and boardrooms
- Classrooms and education spaces
- Restaurants, cafés and hospitality spaces
- Recording studios and podcast rooms
- Home offices and media rooms
- Reception areas and waiting rooms
- Retail interiors
- Gyms and activity spaces
- Commercial fit-outs and acoustic design projects
Why choose PET Acoustic Panels?
PET panels are a practical acoustic treatment option because they are lightweight, easy to handle and visually clean. They can be installed as full sheets, cut panels, feature wall sections, ceiling panels or decorative acoustic layouts.
They are often chosen where a room needs acoustic improvement without installing a full suspended acoustic ceiling or bulky fabric-wrapped panel system.
Key benefits
- Reduces echo and reverberation — helps improve acoustic comfort inside rooms.
- Available in 12mm and 24mm — choose the correct thickness for your space and acoustic requirement.
- Lightweight PET construction — easy to handle, cut and install.
- Decorative acoustic finish — suitable for visible wall and ceiling treatment.
- Suitable for commercial and residential interiors — ideal for offices, schools, studios, homes and hospitality spaces.
- Can be cut to size — useful for feature walls, custom layouts and design-led acoustic panels.
- Low-profile installation — especially useful where space is limited.
- Useful for speech clarity — helps reduce harsh reflections in meeting rooms, classrooms and workspaces.
- Good alternative to foam panels — more durable and suitable for professional interior projects.
- Works with other acoustic treatments — can be combined with ceiling rafts, wall panels, carpets and soft furnishings.
Helpful advice before buying
PET Acoustic Panels improve the acoustics inside a room, but they do not soundproof the room from outside noise. They should be used for reverberation control, echo reduction and room acoustic comfort.
For best results, consider the room size, ceiling height, amount of hard surface, number of people using the space and where sound reflections are strongest.
If you are unsure whether to choose 12mm or 24mm, please contact our team before ordering. We can help advise on the most suitable acoustic treatment layout for your space.
PET Acoustic Panel Technical Specifications
PET Acoustic Panel is a polyester-fibre acoustic absorption panel used for internal wall and ceiling acoustic treatment. It is available in 12mm and 24mm thickness options.
Product Specification
| Product Name |
PET Acoustic Panel |
| Product Type |
Decorative acoustic absorption panel |
| Material |
PET polyester fibre |
| Available Thicknesses |
12mm and 24mm |
| Common Sheet Size |
Often supplied around 2440mm x 1220mm; confirm exact sheet size against the supplier listing |
| Application |
Internal wall and ceiling acoustic treatment |
| Main Acoustic Function |
Reduces echo, reverberation and reflected sound within a room |
| Suitable For |
Offices, meeting rooms, classrooms, studios, reception areas, restaurants, home offices and commercial interiors |
| Installation Method |
Adhesive fixing, mechanical fixing, suspended fixing or custom installation depending on substrate and project design |
| Colour Options |
Colour range depends on supplier availability |
| Cutting |
Can usually be cut with suitable tools for custom shapes, strips and layouts |
| Fire Rating |
Supplier and batch dependent — confirm the current fire certificate before compliance-led use |
| Recycled Content |
Supplier dependent — confirm recycled content against the current product data sheet |
| Soundproofing Product? |
No — this is an acoustic absorption panel, not a structural soundproofing barrier |
Thickness Options
| Variation |
Thickness |
Typical Use |
Best For |
| PET Acoustic Panel 12mm |
12mm |
Slim acoustic wall and ceiling treatment |
General echo reduction, feature walls, offices, meeting rooms and decorative acoustic layouts |
| PET Acoustic Panel 24mm |
24mm |
Thicker acoustic wall and ceiling treatment |
Stronger acoustic absorption, more robust panels, larger spaces and higher-impact acoustic design |
Suitable Applications
PET Acoustic Panels can be used in:
- Office acoustic wall treatment
- Meeting room echo reduction
- Classroom acoustic treatment
- Reception area acoustic panels
- Restaurant and café noise control
- Studio and podcast room treatment
- Home office and media room acoustic upgrades
- Retail and commercial interiors
- Decorative acoustic feature walls
- Ceiling-mounted acoustic treatment
Acoustic Use
PET Acoustic Panels are designed to absorb sound within a room. They are most effective for reducing reflected sound and improving acoustic comfort in spaces with hard surfaces.
They help with speech clarity and room comfort but do not stop sound transferring through the structure of a building.
12mm PET Panel
The 12mm PET Acoustic Panel is a slim acoustic treatment panel suitable for areas where a lower-profile finish is required.
It is commonly used for:
- Decorative wall panels
- Small and medium rooms
- Meeting rooms
- Home offices
- Reception areas
- Light commercial acoustic treatment
24mm PET Panel
The 24mm PET Acoustic Panel provides a thicker acoustic treatment option. It is useful where improved absorption, additional depth or a more substantial visual finish is required.
It is commonly used for:
- Larger acoustic treatment areas
- Studios and media rooms
- Restaurants and hospitality spaces
- Open-plan offices
- Busy classrooms
- Feature walls and heavier-duty commercial fit-outs
Important Performance Note
PET Acoustic Panels are acoustic treatment panels. They are not designed to replace wall, floor or ceiling soundproofing systems.
The final acoustic result will depend on the number of panels installed, panel thickness, room size, mounting position, hard surface area, furniture, ceiling height and overall acoustic design.
For projects requiring specific reverberation targets, fire classification or compliance-led performance, confirm the product data sheet and seek project-specific acoustic advice before ordering.
Handling Advice
Store panels flat, clean, dry and protected before installation. Avoid impact damage to corners, edges and visible faces.
Keep panels away from moisture, dust and site contamination. Handle with clean hands or gloves, especially where coloured or light-finish panels are being installed.
How to Install PET Acoustic Panels
PET Acoustic Panels can be installed to walls, ceilings or custom frames depending on the project design. They are typically fixed using suitable adhesive, mechanical fixings, suspended systems or specialist mounting methods.
Always check the substrate, fixing method and panel layout before starting installation.
What You’ll Need
- PET Acoustic Panels in the chosen thickness: 12mm or 24mm
- Suitable panel adhesive or mechanical fixings
- Tape measure
- Pencil or marker
- Laser level or spirit level
- Straight edge
- Sharp utility knife, panel saw, circular saw or suitable cutting tool
- Clean cloth
- Step ladder or access equipment, where required
- Clean gloves
- Safety glasses
- Dust mask if cutting or drilling
Before You Start
Plan the panel layout before fixing anything. Consider where sound reflections are strongest and where the panels will have the best acoustic and visual effect.
For wall installations, panels are often placed around speaking areas, desk zones, meeting tables, seating areas or hard reflective surfaces.
For ceiling installations, panels are often positioned above desks, meeting tables, reception zones or noisy activity areas.
Step 1: Check the Substrate
Make sure the wall or ceiling surface is suitable for the chosen fixing method.
The surface should be:
- Clean
- Dry
- Stable
- Free from dust and loose paint
- Strong enough to support the panel
- Suitable for adhesive or mechanical fixing
Do not install onto damp, crumbling, greasy or unstable surfaces.
Step 2: Plan the Layout
Mark out the panel positions before installing.
Check:
- Panel spacing
- Panel alignment
- Height from floor level
- Relationship to desks, furniture and doors
- Lighting and ceiling services
- Socket and switch positions
- Visual pattern or feature wall design
Use a laser level for straight rows and larger layouts.
Step 3: Measure and Cut the Panels
If panels need to be cut, measure carefully and mark the cut line clearly.
Use a sharp blade, straight edge or suitable saw depending on the thickness and finish. The 12mm panel is generally easier to cut by hand, while the 24mm panel may require a more robust cutting method.
Cut slowly and keep the panel supported to avoid rough edges or unwanted movement.
Step 4: Dry Fit the Panels
Before applying adhesive or fixings, hold each panel in place and check the fit.
Confirm:
- The panel is the correct size
- The layout looks balanced
- Edges line up correctly
- There is clearance around sockets and services
- Cut panels fit neatly into position
Make any adjustments before permanent fixing.
Step 5: Apply Adhesive or Fixings
Install the panels using the chosen fixing method.
For adhesive fixing, apply a suitable adhesive to the back of the panel or substrate according to the adhesive manufacturer’s instructions.
For mechanical fixing, use suitable fixings for the substrate and panel thickness. Fixings should hold the panel securely without damaging the face.
For ceiling installations, use a fixing method designed for overhead use. Do not rely on unsuitable adhesive or weak substrates.
Step 6: Fix the Panel in Place
Press or secure the panel into position.
Make sure the panel is:
- Level
- Aligned with the layout marks
- Firmly fixed
- Flat to the surface where required
- Not bowed, twisted or loose
If using adhesive, support the panel until the adhesive has developed enough grab strength.
Step 7: Install Remaining Panels
Continue installing the remaining panels according to the planned layout.
Keep spacing consistent and check alignment as you work. Small errors can become more visible across a full feature wall or ceiling layout.
For patterned or coloured layouts, check the design before each panel is fixed.
Step 8: Finish Edges and Details
Check all exposed edges, corners and cut-outs.
Depending on the design, edges may be left visible, but they should be clean and neat. Around sockets, switches or services, make sure cut-outs are tidy and do not interfere with the function of the fitting.
Do not cover ventilation grilles, fire alarms, sprinklers or access panels unless the design has been approved.
Step 9: Clean the Panels
Once installed, remove dust or marks using a clean, dry cloth.
Avoid soaking the panel or using harsh chemicals unless approved by the supplier. For coloured panels, test any cleaning method in an inconspicuous area first.
Installing 12mm PET Acoustic Panels
The 12mm panel is suitable for slimmer wall and ceiling layouts. It is useful where you want acoustic improvement without adding too much depth to the surface.
It is commonly installed as wall panels, desk-area treatment, small meeting room treatment and decorative acoustic features.
Installing 24mm PET Acoustic Panels
The 24mm panel is thicker and can provide a more substantial acoustic treatment. It is useful for larger spaces, noisier rooms and design features where a deeper panel profile is preferred.
Take extra care when cutting and fixing the 24mm option because the increased thickness may require stronger fixings or a more suitable adhesive method.
Installation Tips
- Use 12mm panels for slim, low-profile acoustic treatment.
- Use 24mm panels where stronger absorption or a deeper visual finish is required.
- Plan the layout before applying adhesive or fixings.
- Use a laser level for straight rows and feature walls.
- Check the substrate is clean, dry and stable.
- Use adhesive or fixings suitable for the panel and substrate.
- Use mechanical support for overhead installations where required.
- Cut panels carefully using sharp tools.
- Keep panel edges clean and protected during installation.
- Do not cover sprinklers, smoke detectors, vents or electrical access points.
Important Acoustic Note
PET Acoustic Panels reduce echo and reverberation within the room they are installed in. They do not stop noise passing through walls, ceilings or floors.
For best acoustic results, use enough panel coverage for the room size and place panels where sound reflections are most problematic. In larger or more reflective spaces, combine PET panels with other acoustic treatments such as ceiling rafts, soft furnishings, carpets or additional wall panels.