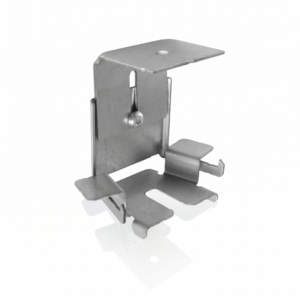
Connect Absorber Bracket
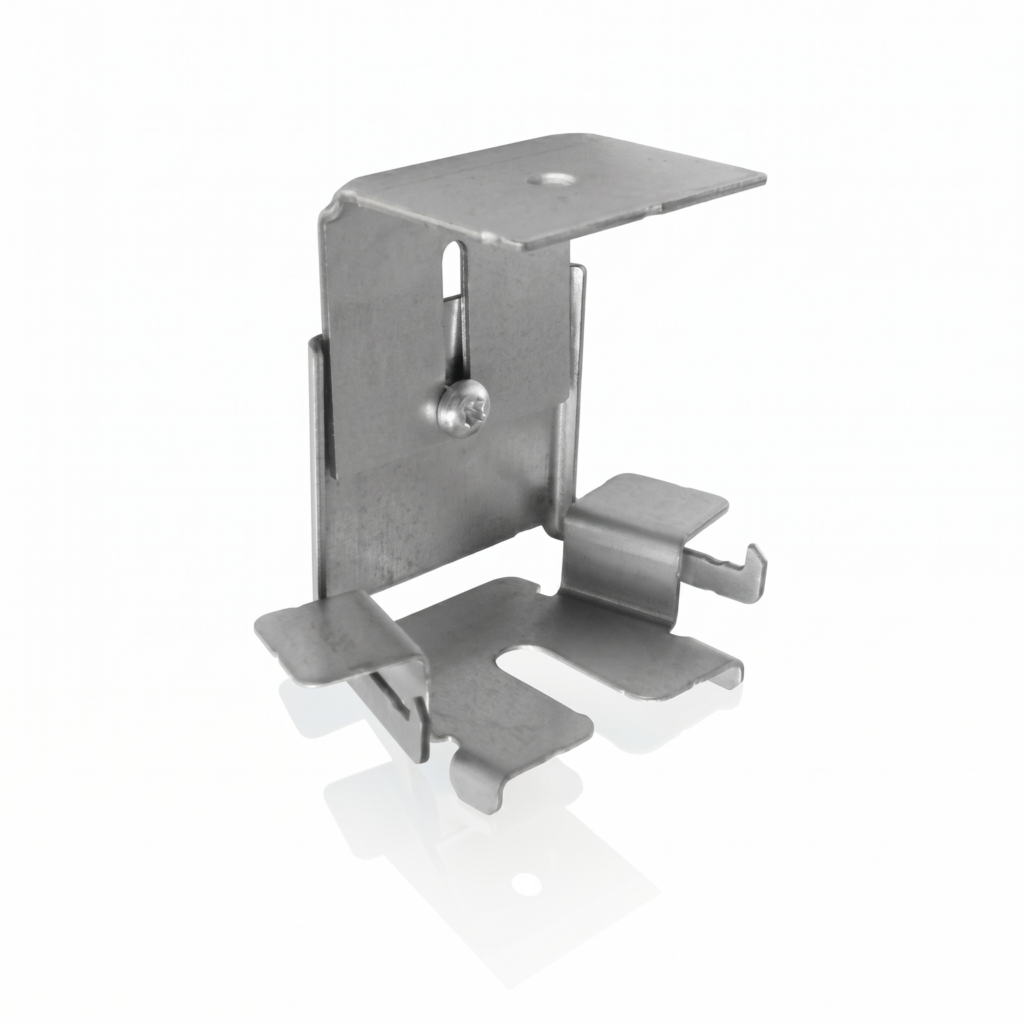
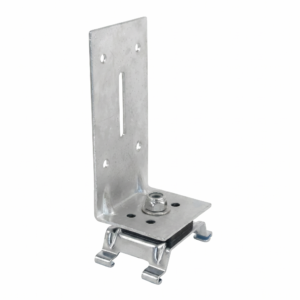
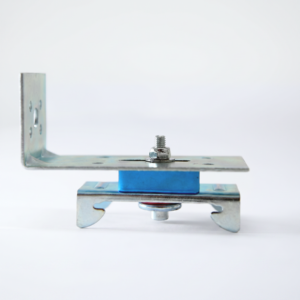
Connect Absorber Bracket is an Ecophon Connect suspension accessory used to install Ecophon Solo free-hanging acoustic panels closer to the ceiling or soffit. It is commonly used when a lower-profile acoustic panel installation is required, such as in rooms with limited ceiling height or where a neat, close-fitting finish is preferred.
The bracket is designed for use with compatible Ecophon Solo panels and Connect Absorber Anchors, helping create a secure ceiling-mounted fixing method for acoustic rafts and free-hanging absorber panels.
What is the Connect Absorber Bracket used for?
The Connect Absorber Bracket is used to suspend Ecophon Solo acoustic panels from a suitable ceiling or soffit structure. It is especially useful where the panel needs to sit closer to the ceiling compared with longer wire suspension systems.
It is commonly used with Ecophon Solo acoustic panels in offices, meeting rooms, classrooms, studios, reception areas, retail interiors, hospitality spaces and commercial acoustic treatment projects.
How does the Connect Absorber Bracket work?
The bracket is fixed to the ceiling or soffit using suitable fixings for the structure. The Ecophon Solo panel is then connected using the appropriate Connect Absorber Anchor and bracket arrangement.
This creates a close-to-ceiling acoustic raft installation, helping keep the panel secure while maintaining a cleaner, lower-profile appearance.
Where is this bracket most useful?
Connect Absorber Brackets are most useful where you want the acoustic panel to sit close to the soffit rather than hanging down on long suspension wires.
Common uses include:
- Low ceiling rooms
- Offices and meeting rooms
- Classrooms and education spaces
- Reception areas
- Retail and hospitality interiors
- Home offices and media rooms
- Studios and creative workspaces
- Rooms where a discreet acoustic panel fixing is required
- Ecophon Solo panel replacement or spare fixing orders
Compatible products
Connect Absorber Brackets are designed for use with suitable Ecophon Solo free-hanging acoustic panel systems.
They are commonly used with products such as:
- Ecophon Solo Square panels
- Ecophon Solo Rectangle panels
- Ecophon Solo Circle panels
- Other compatible Ecophon Solo free-hanging units, where specified
Always check the installation diagram for your specific Ecophon Solo panel size and shape before ordering or installing.
Bracket vs wire hanger — what is the difference?
Ecophon Solo panels can often be installed using different suspension methods.
A wire hanger system allows panels to be suspended lower from the ceiling and can be useful for visual design, angled layouts or layered acoustic treatments.
A Connect Absorber Bracket is used where a closer ceiling fit is preferred. This makes it suitable for lower ceilings or projects where a cleaner, more discreet installation is required.
Key benefits
- Low-profile installation — helps install Ecophon Solo panels closer to the soffit.
- Suitable for Ecophon Solo panels — used with compatible free-hanging acoustic absorbers.
- Useful for lower ceilings — helps reduce the overall drop compared with longer suspension wires.
- Clean ceiling finish — creates a neat, discreet acoustic panel installation.
- Works with Connect Absorber Anchor — used as part of the correct Ecophon fixing method.
- Suitable for replacement orders — useful where additional or spare brackets are required.
- Ideal for commercial interiors — suitable for offices, classrooms, meeting rooms and hospitality projects.
- Supports design-led acoustic treatment — allows Solo panels to be installed without a full suspended ceiling grid.
Helpful advice before buying
Connect Absorber Brackets are fixing accessories, not acoustic panels. They do not absorb sound by themselves. They are used to install compatible Ecophon Solo acoustic panels.
Check whether your acoustic panel already includes the required fixings before ordering. Some Ecophon Solo panel kits may include suspension accessories, while replacement or additional brackets may need to be ordered separately.
Fixing requirements vary depending on the ceiling structure, panel size, panel weight and installation layout. Always use the correct Ecophon installation diagram and suitable ceiling fixings for the substrate.
Connect Absorber Bracket Technical Specifications
Connect Absorber Bracket is an Ecophon Connect accessory used for low-profile installation of compatible Ecophon Solo free-hanging acoustic panels.
Product Specification
| Product Name |
Connect Absorber Bracket |
| Brand |
Ecophon |
| Product Range |
Ecophon Connect accessories |
| Product Type |
Acoustic panel suspension bracket / fixing accessory |
| Primary Use |
Low-profile suspension of compatible Ecophon Solo acoustic panels |
| Compatible Panel Range |
Ecophon Solo free-hanging acoustic panels, where specified by the installation diagram |
| Used With |
Connect Absorber Anchor and suitable ceiling fixings |
| Typical Drop / Bracket Range |
Commonly used for close-to-soffit installations; Ecophon data lists bracket options around 50–70mm and 70–90mm |
| Pack Size |
As listed — may be sold individually or in packs depending on supplier setup |
| Application Area |
Internal ceiling / soffit-mounted acoustic panel installations |
| Suitable For |
Offices, meeting rooms, classrooms, studios, reception areas, retail interiors and commercial acoustic treatment projects |
| Acoustic Function |
No direct acoustic absorption — used to install acoustic absorber panels |
| Soundproofing Product? |
No — this is a suspension accessory for acoustic treatment panels |
| Installation Requirement |
Must be installed according to the relevant Ecophon installation diagram and suitable structural fixing method |
Suitable Applications
Connect Absorber Brackets can be used in a range of acoustic panel installations, including:
- Ecophon Solo ceiling raft installations
- Low-profile acoustic panel installations
- Close-to-soffit acoustic treatment
- Office acoustic upgrades
- Meeting room acoustic treatment
- Classroom acoustic improvements
- Reception and waiting area acoustic panels
- Retail and hospitality ceiling panel layouts
- Studio and media room acoustic treatments
- Replacement or additional fixing orders for compatible Solo panels
Compatible Ecophon Solo Panel Types
Depending on the installation diagram and panel size, Connect Absorber Brackets may be used with:
- Ecophon Solo Square
- Ecophon Solo Rectangle
- Ecophon Solo Circle
- Other compatible Ecophon Solo shapes where specified
Always confirm compatibility against the specific Ecophon installation diagram for the panel being installed.
Important Compatibility Note
Connect Absorber Bracket is not a universal fixing for all acoustic panels. It is intended for compatible Ecophon Solo systems and should be used only where the selected panel and installation method allow it.
It should normally be used with the appropriate Connect Absorber Anchor and suitable ceiling fixings.
Quantity Guidance
The number of brackets required depends on the Ecophon Solo panel size, shape and installation diagram.
Some Ecophon Solo installation diagrams specify multiple brackets per panel. Larger panels may require more fixing points than smaller panels.
Always calculate bracket quantity from the official installation diagram for the exact panel being installed, allowing for waste, spare parts and project-specific requirements.
Important Safety Note
The ceiling or soffit fixing must be suitable for the panel weight, bracket arrangement and substrate.
Do not fix acoustic panels into weak plasterboard, loose materials or unsuitable ceiling finishes unless the fixing system has been specifically designed for that substrate.
For commercial, public, education or healthcare projects, the fixing method should be checked by a competent installer or project professional.
How to Install Connect Absorber Brackets
Connect Absorber Brackets should be installed according to the relevant Ecophon installation diagram for the specific Solo panel being fitted. The bracket is used as part of a low-profile suspension method for compatible Ecophon Solo free-hanging acoustic panels.
The exact fixing layout will depend on the panel shape, panel size, ceiling substrate and chosen Ecophon installation method.
What You’ll Need
- Connect Absorber Brackets
- Compatible Ecophon Solo acoustic panel
- Connect Absorber Anchors, where specified
- Suitable ceiling or soffit fixings for the substrate
- Relevant Ecophon installation diagram for the panel
- Tape measure
- Pencil or marker
- Laser level or spirit level
- Drill/driver
- Suitable drill bits
- Step ladder, platform or access equipment
- Clean gloves
- Safety glasses
- Dust mask, if drilling overhead
Before You Start
Check that the Connect Absorber Bracket is the correct fixing method for your Ecophon Solo panel.
Before drilling, confirm:
- The panel shape and size
- The required number of brackets
- The fixing positions from the Ecophon installation diagram
- The ceiling substrate type
- The correct ceiling fixing type
- The final panel height and clearance from services
Do not assume the same fixing layout applies to every Solo panel. Different panel shapes and sizes may use different fixing quantities and positions.
Step 1: Check the Ceiling Structure
Inspect the ceiling or soffit where the panel will be installed.
The structure must be strong enough to support the acoustic panel, brackets, anchors and any additional load or safety margin required for the project.
Common substrates may include:
- Concrete soffits
- Timber joists
- Steel structure
- Approved suspended ceiling support structures
Do not fix into weak plasterboard, damaged ceilings, loose finishes or unknown substrates without confirming a safe fixing method.
Step 2: Plan the Panel Position
Decide where the Ecophon Solo panel will be installed.
Consider:
- Room layout
- Ceiling height
- Lighting
- Sprinklers
- Air conditioning grilles
- Smoke detectors
- Ceiling services
- Door and window clearance
- Visual alignment with furniture or other panels
The panel should not obstruct services, safety systems or required access routes.
Step 3: Mark the Fixing Points
Use the correct Ecophon installation diagram to mark the fixing points on the ceiling.
Measure carefully and double-check the spacing before drilling. Incorrect fixing positions can prevent the panel from hanging correctly or place uneven load on the brackets.
Use a laser level or accurate measuring method where multiple panels are being installed.
Step 4: Install the Ceiling Fixings
Drill the marked fixing points and install the appropriate ceiling fixings.
The fixing type must be suitable for the ceiling substrate and project loading. Fixings for concrete, timber and steel will be different.
Make sure each fixing is secure before connecting the bracket.
Step 5: Fit the Connect Absorber Brackets
Attach the Connect Absorber Brackets to the ceiling fixings according to the installation diagram.
Check each bracket is:
- Securely fixed
- Correctly aligned
- Positioned in the correct orientation
- Not loose or twisted
- Ready to receive the panel fixing arrangement
Do not leave brackets partially fixed or unsupported.
Step 6: Fit the Connect Absorber Anchors to the Panel
Where specified, install the Connect Absorber Anchors into the Ecophon Solo panel.
Follow the panel-specific installation diagram for anchor positions, insertion method and depth.
Do not over-tighten or force the anchor in a way that could damage the acoustic panel.
Step 7: Lift the Panel into Position
Carefully lift the Ecophon Solo panel into position and connect it to the bracket and anchor system.
Use clean gloves to avoid marking the panel face. For larger panels, use two people and suitable access equipment.
Avoid bending the panel or damaging the painted edges during lifting.
Step 8: Level and Align the Panel
Check the panel is sitting level and aligned correctly.
Adjust the installation where possible according to the bracket system and installation diagram.
For multiple panels, check:
- Panel spacing is consistent
- Panel heights are even
- Panel edges line up where required
- The layout matches the design plan
- The panels do not clash with lighting or services
Step 9: Complete a Safety Check
Before finishing the installation, check every fixing point.
Confirm that:
- All ceiling fixings are secure
- All brackets are correctly fitted
- All anchors are correctly installed
- The panel is secure
- The panel is level
- The panel is not damaged
- The panel does not interfere with services or safety systems
Do not leave panels temporarily suspended or partially fixed.
Installation Tips
- Use the correct Ecophon installation diagram for the exact Solo panel being installed.
- Check bracket quantity before starting.
- Use suitable structural fixings for the ceiling substrate.
- Use Connect Absorber Anchors where required by the installation method.
- Wear clean gloves when handling white acoustic panels.
- Use two people for larger Solo panels.
- Do not over-tighten anchors into the panel.
- Do not fix into weak or unsuitable ceiling materials.
- Check alignment carefully when installing multiple panels.
- Do not modify brackets, anchors or panels unless approved by the manufacturer.
Important Installation Note
Connect Absorber Brackets are part of an acoustic panel suspension system. The final safety and appearance of the installation depends on correct panel compatibility, bracket quantity, anchor positioning, ceiling fixings and workmanship.
For commercial or public spaces, use a competent installer and check the fixing method against the project specification before installation.