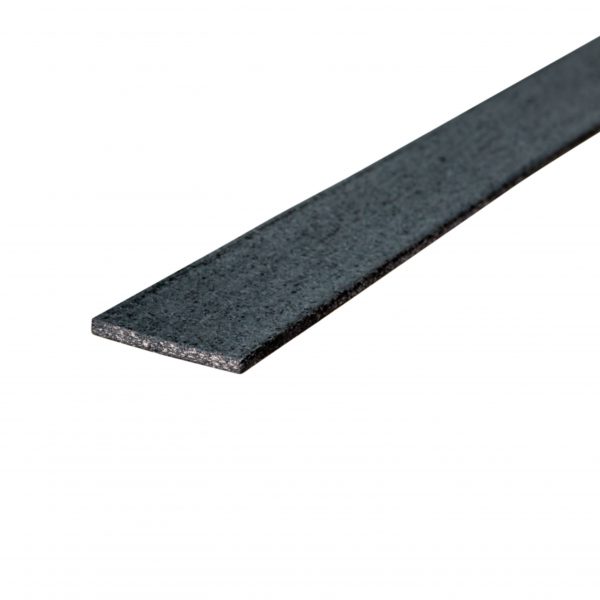
ISL Therm-A-Glaze 30 Glazing Seal – 10 × 2mm × 2100mm
ISL Therm-A-Glaze 30 Glazing Seal – 10 × 2mm × 2100mm is a flexible, self-adhesive intumescent strip developed for approved glazed apertures in 30-minute fire-resisting timber doorsets.
The dry glazing material is applied to the glazing beads before the fire-resistant glass is installed. During normal conditions, it forms a slim sealing layer within the glazing pocket. When exposed to elevated temperatures during a fire, the intumescent material expands to fill gaps and form a dense carbon barrier around the glazed aperture.
Each strip is supplied in one fixed configuration:
- 10mm wide
- 2mm thick
- 2100mm long
- Dark Grey
Designed for 30-Minute Fire Glazing
Therm-A-Glaze 30 is intended for use as one component within a suitable 30-minute fire-resistant glazing system.
Its function is to help protect the junction between:
- The fire-resistant glass
- The glazing beads
- The surrounding glazed aperture
The seal expands under fire conditions to help restrict flames and hot gases from passing around the edges of the glass.
The product does not independently provide a 30-minute fire rating. Performance belongs to the complete tested or assessed doorset, including the door leaf, glass, glazing beads, setting blocks, bead fixings and installation detail.
Flexible Intumescent Construction
Therm-A-Glaze 30 combines the fire-sealing properties of an intumescent material with the flexibility of a thin glazing strip.
The flexible construction makes it suitable for accurate fitting along glazing beads and around rectangular glazed apertures.
The profile can be:
- Measured directly against the glazing bead
- Cut using sharp scissors or a suitable knife
- Applied without wet glazing compounds
- Fitted continuously along each bead
- Cut neatly at the glazing-bead corners
The strip should not be stretched during installation, as it may retract and create gaps between adjoining sections.
Self-Adhesive Backing
The integral self-adhesive backing allows the strip to be applied directly to a clean and dry glazing bead.
This helps retain the material while:
- The glazing beads are prepared
- The first bead assembly is fixed
- The glass is positioned
- The opposing beads are installed
The adhesive is an installation aid only. It does not structurally support the glass or replace the mechanical bead fixings and setting blocks required by the complete glazing system.
High-Expansion Glazing Material
Therm-A-Glaze 30 is intended for glazing applications where generous intumescent expansion is required.
When activated, the material expands into available spaces and develops a dense intumescent carbon layer.
This can help:
- Seal movement gaps around the glass
- Protect timber glazing beads
- Restrict the passage of flames and hot gases
- Maintain the integrity of the glazed opening
The required expansion space, bead dimensions and glass clearances must follow the applicable fire-test or assessment evidence.
Certified Timber Doorset Application
Certifire certificate CF284 covers Therm-A-Glaze 30 in specified timber-based doorsets for 30 minutes’ fire integrity.
The certified basic arrangement includes:
- A nominally 44mm-thick FD30 timber door leaf
- Therm-A-Glaze 30 in a 10 × 2mm profile
- Fire-resistant glass covered by the certificate
- Hardwood glazing beads
- Non-combustible or hardwood setting blocks
- Mechanically screw-fixed glazing beads
The doorset must already be fire tested or Certifire approved for the inclusion of a glazed aperture of the proposed dimensions.
Integrity Performance
The certified Therm-A-Glaze 30 arrangement provides:
- Integrity: 30 minutes
- Insulation: 0 minutes under the listed Therm-A-Glaze 30 system
Integrity relates to the ability of the complete assembly to restrict flames and hot gases.
Do not describe this glazing seal as independently providing thermal insulation. Any insulation performance must be supported by evidence for the selected glass and complete glazed construction.
Suitable Fire-Resistant Glass
The current certificate includes specified fire-resistant glass products and maximum pane dimensions for the Therm-A-Glaze 30 arrangement.
Compatibility depends on:
- The exact glass product
- The glass thickness
- The maximum permitted height and width
- The maximum glazed area
- The glazing-bead construction
- The door-leaf construction
Do not substitute another glass solely because it has the same nominal thickness or advertised fire rating.
Dark Grey Finish
Therm-A-Glaze 30 is supplied in a Dark Grey finish.
The strip is normally largely concealed between the glass and glazing bead once installed. A narrow sightline may remain visible depending on the bead profile and glazing arrangement.
The material should not be painted or coated unless the manufacturer and doorset evidence expressly permit the proposed finish.
2100mm Length
Each product is supplied as one 2100mm strip.
The number of lengths required depends on:
- The width and height of the glazed aperture
- The number of glazed panels
- Whether seals are required on both faces
- The glazing-bead joint arrangement
- Cutting waste
Calculate the full perimeter of each aperture before ordering.
Key Benefits
- 30-minute certified system: covered by Certifire CF284 in specified timber doorsets.
- Flexible intumescent material: fits easily along glazing beads.
- Generous expansion properties: forms a dense carbon barrier under fire conditions.
- Self-adhesive backing: assists fast and accurate application.
- Dry glazing system: avoids the curing time associated with wet compounds.
- Easy to cut: can be trimmed with sharp scissors or a suitable knife.
- Slim 10 × 2mm profile: provides a compact glazing-pocket arrangement.
- 2100mm length: suitable for cutting around individual glazed apertures.
Important Buying Advice
Before ordering or installing, confirm:
- That Therm-A-Glaze 30 is specified
- The required number of 2100mm strips
- The approved fire-resistant glass
- The permitted glazed-aperture dimensions
- The required glazing beads and timber density
- The bead fixing type and centres
- The setting-block arrangement
- The required glass edge clearances
- The current doorset certificate or assessment
Do not create or alter a glazed aperture in a certified fire door unless the modification is supported by the door manufacturer’s evidence or a suitable fire assessment.
ISL Therm-A-Glaze 30 Glazing Seal – 10 × 2mm × 2100mm Technical Specifications
| Product Name |
ISL Therm-A-Glaze 30 Glazing Seal – 10 × 2mm × 2100mm |
| Manufacturer |
Intumescent Seals, a division of Dixon International Group Ltd |
| Manufacturer Product Reference |
SYSGZ30 |
| Stocked Product Code |
THE30 |
| Product Type |
Flexible self-adhesive intumescent fire-glazing strip |
| Application |
Approved glazed apertures in 30-minute timber-based fire doorsets |
| Profile Size |
10 × 2mm |
| Length |
2100mm |
| Colour |
Dark Grey |
| Fixing |
Integral self-adhesive backing |
| Cutting Method |
Sharp scissors or a suitable knife |
| Certified Fire Integrity |
30 minutes within the specified certified glazing system |
| Certified Insulation |
0 minutes for the listed Therm-A-Glaze 30 arrangement |
| Test Standard |
BS 476: Part 22: 1987 under the current Certifire approval |
| Certification |
Certifire TS25 Certificate CF284 |
| Certificate Reissue Date |
21 July 2025 |
| Certificate Valid Until |
10 June 2030 |
| Certified Door Type |
Timber-based fire-resisting doorsets |
| Nominal Certified Door Thickness |
44mm within the basic CF284 arrangement |
| Standalone Fire Rating? |
No — performance belongs to the complete tested or assessed glazing system |
| Standalone Smoke Rating? |
No separate cold-smoke classification should be assumed |
| Standalone Acoustic Rating? |
No |
Stocked Product
| Profile Size |
Length |
Colour |
Product Code |
| 10 × 2mm |
2100mm |
Dark Grey |
THE30 |
Variation Summary
| Size Options |
Length Options |
Colour Options |
Total Variations |
| 10 × 2mm |
2100mm |
Dark Grey |
1 |
Basic Certified Glazing Arrangement
Certifire CF284 identifies the following basic Therm-A-Glaze 30 construction:
- Therm-A-Glaze 30 glazing system measuring 10 × 2mm
- Nominally 44mm-thick FD30 timber door leaf
- Previously fire-tested or Certifire-approved doorset
- Fire-resistant glass listed within the certificate
- Hardwood glazing beads with a minimum density of 650kg/m³
- Glazing beads measuring 23 × 23mm, including a 5 × 5mm bolection return
- Beads chamfered by approximately 20 degrees
- Non-combustible or hardwood setting blocks
- No. 8 screws, 50mm long, installed at 150mm centres
This is the certificate’s basic approved arrangement. Project-specific doorset evidence may impose additional or different limitations and must always be checked.
Certified Glass Examples
The current certificate lists specified glass products for the Therm-A-Glaze 30 arrangement, including:
- Pyroshield 2
- Pyrostem
- Pyran S 6mm
- Pyrodur Plus 7mm
- Pyrobelite 7mm
Maximum permitted dimensions vary by glass type. Do not use this list as authority to substitute glass products without checking the current certificate and doorset evidence.
Storage
Store Therm-A-Glaze 30:
- In its original packaging
- In a clean and dry internal location
- With the release liner intact
- Protected from dust, grease and contamination
- Without crushing or sharply folding the strip
Pre-Installation Inspection
Do not install material that is:
- Torn or badly distorted
- Permanently crushed
- Wet or contaminated
- Missing its adhesive release liner
- No longer adhering reliably
- Incorrectly sized for the specified glazing system
How to Install ISL Therm-A-Glaze 30 Glazing Seal – 10 × 2mm × 2100mm
Therm-A-Glaze 30 must be installed as part of a tested, certified or assessed fire-resistant glazing system.
The fire door, glazed-aperture dimensions, glass, glazing beads, setting blocks, fixings and intumescent material must all match the applicable supporting evidence.
What You’ll Need
- ISL Therm-A-Glaze 30 strips
- The approved fire-resistant glass
- The specified hardwood glazing beads
- The specified non-combustible or hardwood setting blocks
- No. 8 × 50mm screws where required by the CF284 arrangement
- Tape measure
- Pencil
- Mitre saw or suitable bead-cutting equipment
- Sharp scissors or a suitable knife
- Drill and suitable pilot drill bits
- Screwdriver
- Clean lint-free cloth
- Brush or vacuum
- Suitable glass-handling equipment
- Safety glasses and appropriate protective gloves
Before You Start
Confirm:
- That the doorset is approved for a glazed aperture
- The required 30-minute fire integrity period
- The permitted aperture position and dimensions
- The exact approved fire-resistant glass
- The required glass edge clearances
- The glazing-bead dimensions and timber density
- The bead fixing type and maximum centres
- The required setting blocks
- That Therm-A-Glaze 30 is covered by the doorset evidence
Do not machine or alter a certified fire door unless the proposed glazing arrangement is expressly permitted.
Step 1: Inspect the Glazed Aperture
Check that the prepared opening is:
- Square
- Correctly dimensioned
- Located within the permitted area of the door
- Free from loose core material
- Free from damaged or unsupported edges
- Consistent with the approved doorset construction
Stop work where the exposed door construction does not match the expected fire-door evidence.
Step 2: Prepare the Glazing Beads
For the basic CF284 Therm-A-Glaze 30 arrangement, the hardwood glazing beads are:
- Minimum density 650kg/m³
- 23mm × 23mm overall
- Formed with a 5 × 5mm bolection return
- Chamfered by approximately 20 degrees
Prepare the beads to the exact dimensions required by the applicable certificate or doorset assessment.
Step 3: Clean the Bead Surfaces
The surfaces receiving the self-adhesive strip must be:
- Clean
- Dry
- Stable
- Free from timber dust
- Free from grease and oil
- Free from loose coatings
Remove all machining dust before applying the glazing seal.
Step 4: Measure the First Strip
Measure the length of the first glazing bead.
Transfer the measurement to the Therm-A-Glaze 30 strip without stretching it.
Allow the ends to meet adjoining seal sections closely at the bead corners.
Step 5: Cut the Strip
Cut the material cleanly using sharp scissors or a suitable knife.
Do not:
- Stretch the strip before cutting
- Tear the intumescent material
- Crush the profile
- Leave the strip short of the bead ends
Step 6: Apply the Strip to the Bead
Remove a short section of the adhesive release liner.
Align the strip on the glazing bead and press it firmly into position.
Continue removing the liner progressively while working along the bead.
Ensure that:
- The strip remains straight
- The material is not stretched
- The adhesive makes continuous contact
- No dust is trapped beneath the strip
- The profile is not twisted or folded
Step 7: Cut and Joint the Glazing Beads
Prepare the bead corners using the joint arrangement required by the doorset evidence.
Check that the adjoining intumescent strips:
- Meet closely
- Do not leave open gaps
- Are not excessively overlapped
- Remain securely bonded to the beads
Step 8: Install the First Bead Assembly
Fit the first set of glazing beads into the aperture.
For the basic CF284 arrangement, secure the beads using:
- No. 8 screws
- 50mm screw length
- Maximum 150mm fixing centres
Use the exact fixing positions, angles and edge distances required by the project-specific evidence.
Step 9: Install the Setting Blocks
Position the approved non-combustible or hardwood setting blocks.
The setting blocks support the glass and maintain the required edge clearances.
Do not rely on the Therm-A-Glaze 30 strip to support the weight of the glass.
Step 10: Position the Fire-Resistant Glass
Install the approved glass using suitable handling equipment.
Confirm that:
- The glass is the specified product
- The pane dimensions remain within the certificate limits
- The glass rests correctly on the setting blocks
- The required edge clearances are maintained
- The intumescent strip remains undamaged
- The glass does not cut or displace the seal
Step 11: Fit the Opposing Beads
Prepare and install the opposing bead assembly using the same glazing-seal arrangement.
Secure the beads using the specified mechanical fixings.
As the fixings are tightened, check that:
- The glass remains correctly centred
- The glazing strips make consistent contact
- The beads remain straight
- The glass is not subjected to excessive local pressure
- The bead joints remain closely fitted
Step 12: Inspect the Complete Aperture
Inspect the glazing system on both faces.
Confirm that:
- The correct glazing seal has been installed
- Every bead is securely fixed
- The strips form a continuous perimeter
- No seal section is missing or damaged
- The setting blocks remain correctly positioned
- The glass and aperture dimensions match the supporting evidence
Installation Tips
- Check Certifire CF284 and the doorset evidence before beginning work.
- Use only the specified glass, bead and fixing arrangement.
- Apply the strip only to clean and dry glazing beads.
- Remove the release liner progressively.
- Do not stretch, twist or sharply fold the material.
- Keep adjoining strip joints closely fitted.
- Use suitable setting blocks to support the glass.
- Do not rely on the self-adhesive backing to retain the glass.
- Do not paint or coat the intumescent strip unless expressly permitted.
- Do not substitute glazing components without supporting evidence.
Inspection and Maintenance
Inspect the complete glazed aperture as part of the fire-door maintenance programme.
Check for:
- Cracked or damaged glass
- Loose glazing beads
- Missing or corroded screws
- Missing or displaced glazing seals
- Open bead joints
- Movement within the glazing pocket
- Paint or sealant covering the intumescent material
- Unauthorised changes to the aperture
Important Performance Note
Therm-A-Glaze 30 does not independently provide 30 minutes’ fire resistance.
The certified performance depends on the complete glazing system, including:
- The timber fire-door construction
- The approved fire-resistant glass
- The aperture dimensions and location
- The glazing beads
- The mechanical fixings
- The setting blocks
- The Therm-A-Glaze 30 strips
- The installation quality
Install the product only in accordance with current certification, fire-test evidence, assessment documentation and the instructions applicable to the complete doorset.