Interdens 1mm DIN Lock Protection – Without Strike
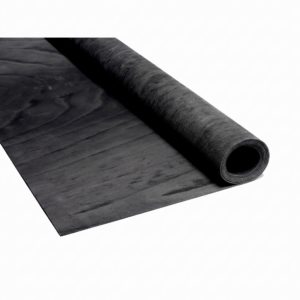
Interdens 1mm DIN Lock Protection – Without Strike is a pre-cut intumescent lock mask designed to protect a compatible European sashlock or DIN lock case within a fire-resisting timber doorset.
The 1mm Interdens material is installed around the recessed lock body before the lock is secured within the door leaf. During fire conditions, the material expands into available spaces around the metal lock case, helping protect the surrounding timber and support the performance of the complete fire-door assembly.
This product contains the lock-body protection only. Intumescent protection for the strike plate or keep within the door frame is not included.
Protection for Recessed DIN Lock Cases
Installing a mortice lock requires a substantial recess to be formed within the edge of the door leaf. This removes part of the original door core and introduces a metal component capable of transferring heat into the surrounding timber.
The Interdens lock mask is fitted around the compatible lock case to help:
- Protect timber around the mortice pocket
- Reduce direct heat transfer from the metal lock body
- Slow localised charring around the recessed ironmongery
- Protect the interface between the lock case and door construction
- Support the tested or assessed performance of the complete doorset
The kit should only be used where the relevant lock and doorset evidence permits an Interdens lock mask of this type and thickness.
For European Sashlocks and DIN Locks
Norseal describes the TH100 configuration as a lock mask for European sashlocks and DIN locks.
DIN-style lock cases generally follow standardised dimensional principles, but individual products can still differ in:
- Case height and depth
- Forend dimensions
- Spindle and cylinder positions
- Latch and deadbolt configuration
- Fixing-hole positions
Confirm that the mask matches the exact lock model and the supporting fire-door specification before installation.
The product should not be treated as universally compatible with every mortice lock merely because the lock is described as DIN-sized.
Lock Protection Without Strike
This product protects the lock-body location in the door leaf but does not include an intumescent strike-plate pad for the door frame.
Where the tested or assessed doorset requires protection behind the strike plate or keep, that protection must be ordered and installed separately.
Do not assume that frame-side protection is unnecessary simply because it is not included with this product. The required arrangement must be confirmed from:
- The lock manufacturer’s fire-test evidence
- The door manufacturer’s hardware schedule
- The doorset certificate or assessment
- The project-specific fire-door specification
1mm Interdens Material
The mask is manufactured from 1mm Interdens, a low-pressure intumescent material used for protecting ironmongery within fire-resisting doorsets.
Interdens remains thin and discreet during normal use. When exposed to elevated temperatures, it expands into available spaces around the lock case.
Its low-pressure expansion characteristic makes it suitable for closely fitted hardware locations where controlled intumescence is required without unnecessarily forcing the ironmongery from its recess.
Self-Adhesive Installation
The Interdens material incorporates self-adhesive backing to assist accurate positioning around the lock case or within the prepared mortice pocket.
The adhesive helps retain the protection while the lock is inserted and mechanically secured.
The adhesive is an installation aid only. It does not replace:
- The lock fixing screws
- The forend fixings
- The handle or cylinder fixings
- Any mechanical retention required by the lock manufacturer
Pre-Cut Lock-Mask Format
The prepared mask reduces the need to manufacture individual protection pieces from loose intumescent sheet on site.
A pre-cut kit helps provide:
- Repeatable protection around compatible lock cases
- Consistent 1mm material thickness
- Reduced on-site measuring and cutting
- Simpler identification of the protected lock area
- A cleaner installation behind concealed ironmongery
Dry-fit the complete mask before removing the adhesive liner. Do not trim, overlap or omit sections unless permitted by the current fitting instructions or doorset evidence.
Fire Performance
Norseal lists its Interdens lock kits for lock and latch locations within fire-resisting doorsets, with fire resistance tested in accordance with BS 476-22.
The lock mask does not independently provide an FD30, FD60 or other fire-resistance classification.
The achieved performance depends on the complete assembly, including:
- The door-leaf and frame construction
- The exact lock model
- The lock mortice dimensions
- The position and completeness of the Interdens mask
- Any separately required forend or strike protection
- The lock fixing arrangement
- The door dimensions and weight
- The quality of installation
Replacement Lock Work
When a lock is removed from an existing fire door, inspect the intumescent protection before installing the replacement lock.
Replace the mask if it is:
- Missing
- Torn or incomplete
- Contaminated
- Permanently compressed
- Incorrectly positioned
- Incompatible with the replacement lock
A replacement lock should not automatically be fitted using the protection from the previous lock. The new lock and intumescent arrangement must remain supported by the complete doorset evidence.
Key Benefits
- Designed for compatible European sashlocks and DIN locks
- Protects the recessed lock-body location
- Pre-cut lock-mask format
- Low-pressure Interdens intumescent material
- Slim 1mm thickness
- Self-adhesive backing assists positioning
- White material remains concealed after installation
- Suitable for supported fire-resisting doorset applications
Important Selection Advice
Before ordering, confirm:
- The lock is a compatible European sashlock or DIN lock
- The mask shape matches the exact lock case
- A 1mm Interdens mask is specified
- Lock-body protection without a strike pad is required
- Whether separate strike or forend protection is required
- The required fire-resistance period
- The lock and doorset evidence permits the complete arrangement
Interdens 1mm DIN Lock Protection – Without Strike Technical Specifications
| Product Name |
Interdens 1mm DIN Lock Protection – Without Strike |
| Product Code |
INT/1/TH100 |
| Manufacturer Reference |
INT(1)TH100 |
| Manufacturer Description |
Lock Mask – European Sashlock/DIN Lock |
| Product Type |
Pre-cut intumescent lock-body mask |
| Application |
Compatible European sashlock and DIN lock locations within fire-resisting doorsets |
| Protection Supplied |
Lock-body protection only |
| Strike Protection Included? |
No |
| Material |
Interdens |
| Thickness |
1mm |
| Colour |
White |
| Fixing |
Self-adhesive positioning, retained behind the mechanically fixed lock case |
| Expansion Characteristic |
Low-pressure intumescent expansion |
| Published Activation Temperature |
Approximately 180°C for Interdens material |
| Fire-Test Standard Referenced |
BS 476-22 |
| Unit of Sale |
One lock-protection kit |
| Lock Included? |
No |
| Strike Plate Included? |
No |
| Fixing Screws Included? |
No |
| Standalone Fire Rating? |
No — performance belongs to the complete tested or assessed lock and doorset arrangement |
| Standalone Smoke Rating? |
No |
| Standalone Acoustic Rating? |
No |
Stocked Product
| Lock Type |
Thickness |
Strike Protection |
Product Code |
| European sashlock / DIN lock |
1mm |
Not included |
INT/1/TH100 |
Variation Summary
| Lock Options |
Thickness Options |
Strike Options |
Total Variations |
| European sashlock / DIN lock |
1mm |
Without strike |
1 |
Compatibility Requirements
The lock mask should only be selected where the supporting evidence permits:
- The exact European sashlock or DIN lock model
- Interdens intumescent material
- A 1mm material thickness
- The supplied lock-mask configuration
- The proposed mortice dimensions
- The intended installation within the door leaf
Do not assume compatibility solely from the DIN description. Compare the mask with the lock and verify the complete fire-door specification.
Components Not Included
- DIN lock or sashlock
- Lock forend
- Strike plate or keep
- Separate strike-plate protection
- Door handles or spindle
- Euro cylinder or key cylinder
- Mechanical fixing screws
Quantity Guidance
One ordered item contains one lock-body protection kit.
One kit will normally be required for each compatible lock case, subject to the applicable doorset specification.
Any separately required strike or forend protection must be calculated and ordered independently.
Storage
- Store the kit flat in clean, dry internal conditions.
- Keep the adhesive release liner attached until installation.
- Protect the material from moisture, dust, grease and oil.
- Do not fold, crease or permanently compress the mask.
- Keep all supplied sections together.
Pre-Installation Inspection
Do not install the mask if it is:
- Torn, creased or delaminated
- Wet or contaminated
- Permanently compressed
- Missing part of its protective shape
- Incorrectly sized for the lock case
- Unable to sit flat around the lock
How to Install Interdens 1mm DIN Lock Protection – Without Strike
The lock mask must be installed in accordance with the current lock-manufacturer instructions and the evidence for the complete fire-resisting doorset.
This product protects the lock-body location only. Confirm separately whether protection is required behind the forend, strike plate or other associated hardware.
1. Verify the Lock and Doorset Specification
Before installation, confirm:
- The lock is a compatible European sashlock or DIN lock.
- The door leaf is approved for the selected lock.
- The doorset evidence specifies 1mm Interdens protection.
- The supplied mask matches the lock-case dimensions.
- The permitted mortice dimensions are known.
- The required lock fixings are available.
- Any separate forend or strike protection has been identified.
Do not substitute a different lock, mask thickness or intumescent material without supporting evidence.
2. Inspect the Lock Mask
Lay the mask on a clean, dry surface and compare it with the lock case.
Confirm that:
- The complete mask is present.
- The material is clean and dry.
- The mask is not torn, creased or compressed.
- The adhesive liner remains intact.
- The openings correspond with the required lock features.
3. Prepare the Lock Mortice
Form the lock recess only to the dimensions permitted by the lock and doorset evidence.
The mortice should be:
- Correctly sized for the protected lock case
- Flat and free from raised timber fibres
- Free from loose door-core material
- Structurally sound around all fixing positions
- Free from excessive clearance
Allow for the specified 1mm mask without creating an unnecessarily oversized mortice.
4. Clean the Receiving Surfaces
Remove all machining dust and loose material using a suitable brush or vacuum.
The surfaces receiving the adhesive-backed mask must be clean and dry.
Do not install the material over:
- Wet timber
- Grease or oil
- Loose coatings
- Splinters or raised fibres
- Old adhesive that prevents flat contact
5. Dry-Fit the Mask
Position the mask around the lock case or within the mortice without removing the release liner.
Follow the orientation shown by the current product instructions or doorset detail.
Check that the mask:
- Sits flat around the lock body
- Protects the required surfaces
- Does not obstruct the latch, deadbolt or follower
- Does not cover required fixing positions
- Will not fold or tear as the lock is inserted
Do not trim the mask unless this is expressly permitted by the supporting evidence.
6. Apply the Intumescent Mask
Remove the adhesive release liner carefully without contaminating the adhesive surface.
Apply the mask in the required position and press it firmly into place.
Ensure that:
- The material remains flat.
- No crease or overlap is introduced.
- The complete required area is protected.
- The mask remains aligned with the lock case.
- The moving lock components remain unobstructed.
7. Install the DIN Lock
Insert the compatible lock carefully into the protected mortice.
Take care not to:
- Scrape the mask from the mortice
- Fold the material beneath the lock
- Tear it on sharp metal edges
- Displace it from the required position
- Force an oversized lock into the opening
The lock should seat correctly without excessive force.
8. Secure the Lock
Align the lock forend with the door edge and install the fixings specified by the lock manufacturer and doorset evidence.
Tighten the fixings evenly so that:
- The lock remains correctly aligned.
- The forend sits flush where specified.
- The mask remains in position.
- The surrounding timber is not damaged.
- The lock mechanism operates freely.
9. Fit Separate Protection Where Required
This product does not include strike-plate protection.
Where the evidence requires additional protection, install the specified separate components behind:
- The strike plate or keep
- The lock forend
- Any additional recessed hardware
Do not improvise these components from unsuitable materials.
10. Complete the Hardware Installation
Fit the approved handles, spindle, cylinder, escutcheons and other hardware in accordance with the lock and doorset instructions.
Ensure that no fixing damages or displaces the concealed intumescent mask.
11. Test the Lock and Door
Operate the lock and door several times.
Confirm that:
- The latch operates freely.
- The deadbolt operates correctly where fitted.
- The handles return normally.
- The door closes fully into the frame.
- The latch engages with the strike plate.
- The self-closing device remains effective.
- The required door gaps have not been altered.
Final Inspection
Verify that:
- The correct 1mm Interdens DIN lock mask has been installed.
- The complete required mask is present.
- The lock is mechanically secure.
- Any separately required strike or forend protection has been fitted.
- The hardware operates correctly.
- The installation matches the doorset evidence.
Maintenance
Inspect the lock as part of the routine fire-door inspection programme.
Check for:
- Loose lock or handle fixings
- Difficulty operating the latch or deadbolt
- Movement of the lock case or forend
- Damage around the lock mortice
- Incorrect replacement hardware
- Missing or disturbed intumescent protection
Whenever the lock is removed or replaced, inspect and reinstate the specified intumescent protection before returning the door to service.
Important Performance Note
The Interdens DIN lock mask does not independently provide a fire-resistance period.
Performance depends on the complete approved doorset, compatible lock, mortice dimensions, intumescent protection, associated frame hardware, mechanical fixings and installation quality.