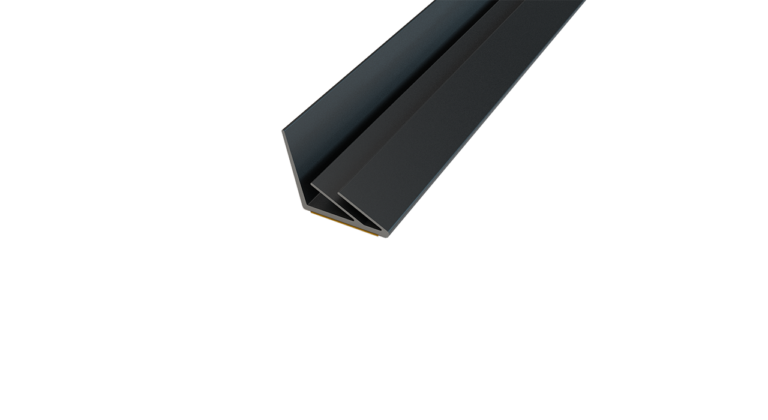
Norsound NOR710 Acoustic Perimeter Seal – 10 × 10.2mm × 2100mm
Norsound NOR710 Acoustic Perimeter Seal – 10 × 10.2mm × 2100mm is a self-adhesive, surface-mounted seal designed for installation around the head and jambs of acoustic and smoke-control doorsets.
The profile combines a rigid PVC mounting section with flexible sealing blades. When the door closes, the blades deflect against the opposing surface to help close the operating gap between the door leaf and frame.
This helps restrict:
- Airborne sound leakage
- Cold-smoke passage
- Draughts and uncontrolled airflow
- Visible light around the door perimeter
- Dust moving through the door-to-frame gap
The NOR710 is fixed using an integral self-adhesive backing, so no routed groove or mechanical fixing is normally required.
Each seal is supplied in a fixed 2100mm length and is available in:
What is an acoustic perimeter seal?
An acoustic perimeter seal closes the small gaps that remain around the head and vertical sides of a closed door.
Even where a door leaf has a high mass and strong acoustic performance, sound can pass through untreated gaps between the door and frame.
The NOR710 creates flexible contact around the door perimeter, helping reduce this direct air path.
It should normally be used as part of a complete door-sealing system incorporating:
- Perimeter seals around the head and jambs
- An automatic drop seal or suitable door-bottom seal
- A firm threshold or threshold plate where required
- An appropriately constructed acoustic door leaf
- Correctly sealed glazing and ironmongery
- A sealed frame-to-wall junction
Where is the NOR710 installed?
The NOR710 is designed for installation around:
- The hinge-side jamb
- The closing-side jamb
- The head of the door frame
The manufacturer’s standard fitting arrangement places the adhesive edge against the frame, with the rear blade positioned against the door stop.
Norseal also permits the adhesive edge to be fitted directly to the door stop where this suits the frame configuration.
The seal should be installed with the door fully open so the fixing surface is accessible and the profile can be positioned accurately.
Surface-mounted installation
The NOR710 does not require a routed groove.
Its self-adhesive mounting edge is applied directly to a clean and dry frame or stop surface.
This makes the seal suitable for:
- New doorsets
- Suitable existing doors
- Acoustic refurbishment work
- Remedial smoke-sealing installations
- Doors where routing the frame is undesirable
- Pre-finished timber frames
The fixing surface must be stable and free from dust, grease, moisture and loose coatings.
Multi-blade sealing profile
The NOR710 uses flexible blades to create multiple sealing contacts between the door and frame.
When correctly positioned, the blades deflect as the door closes rather than relying on a rigid compression block.
This helps provide:
- Continuous contact around the door perimeter
- Controlled compression within the operating gap
- Low impact on normal door operation
- Separate air spaces within the profile
- Improved sealing compared with an untreated gap
The blades should contact the door without becoming completely flattened or preventing the door from closing and latching.
Recommended door-to-frame gap
Norseal’s fitting instructions specify a 3mm gap between the door and frame for the standard installation arrangement.
The actual permitted gap on a particular doorset may also be controlled by:
- The door manufacturer’s specification
- The acoustic test evidence
- The smoke-control evidence
- The fire-door assessment or certification
- The hinges and closing device
- The door-leaf alignment
The NOR710 should not be used to compensate for an excessively large, inconsistent or badly aligned perimeter gap.
Acoustic performance
The NOR710 has been acoustically tested in accordance with BS EN ISO 10140-2.
It helps reduce sound leakage by sealing the air path between the closed door and frame.
The individual perimeter seal does not have a universal standalone decibel rating.
Final acoustic performance depends on the complete door assembly, including:
- The construction and mass of the door leaf
- The door frame
- The perimeter gaps
- The automatic drop or threshold seal
- The continuity of the NOR710 around the frame
- Glazing and ironmongery
- The frame-to-wall junction
- The quality of installation
Any published acoustic rating applies to a tested complete doorset rather than the NOR710 strip alone.
Smoke-sealing performance
The NOR710 has been smoke tested in accordance with BS 476-31.1.
When correctly fitted, the flexible blades help restrict cold smoke passing through the operating gap around the head and jambs.
A complete smoke-control doorset may also require:
- An automatic drop seal beneath the door
- A suitable threshold surface
- Protected letter plates and air-transfer grilles
- Correctly sealed glazing
- Appropriate lock and latch details
- A sealed frame-to-wall junction
Smoke performance does not provide a standalone fire-resistance rating.
Fire-door applications
Norseal currently associates the NOR710 with Certifire Certificate CF629.
The NOR710 itself is an acoustic and smoke perimeter seal. It does not contain an intumescent fire-sealing element and must not be described as independently providing an FD30, FD60 or other fire-resistance period.
Where the seal is used on a fire-resisting doorset:
- Confirm that it is permitted by the doorset evidence.
- Maintain the specified perimeter gaps.
- Do not remove or replace required intumescent seals.
- Use the specified threshold-sealing arrangement.
- Confirm that the door continues to close and latch correctly.
The acoustic and smoke seal may be used alongside separately specified intumescent fire-door seals where required.
High-cycle durability
The NOR710 has been tested to 1,000,000 operating cycles.
This makes it suitable for frequently operated doors in environments such as:
- Hotels and guest accommodation
- Schools and universities
- Hospitals and healthcare buildings
- Care homes
- Offices and meeting rooms
- Apartment developments
- Libraries and study spaces
- Commercial and public buildings
- Recording, broadcast and media rooms
Cycle testing relates to the tested seal profile and does not remove the need for routine inspection and maintenance.
Rigid and flexible PVC construction
The NOR710 is manufactured using rigid and flexible PVC components.
The rigid mounting section provides:
- A stable surface for the self-adhesive backing
- Consistent positioning along the frame
- Support for the flexible sealing blades
The flexible blades provide:
- Deflection as the door closes
- Contact with the opposing door surface
- Recovery when the door opens
- Accommodation of limited normal gap variation
Available colours
This product is available in:
- Black — suitable for dark doors and frames.
- Brown — suitable for timber and brown frame finishes.
- Grey — suitable for grey and neutral doorsets.
- White — suitable for white-painted doors and frames.
Colour affects the visible appearance of the seal but does not change its profile dimensions or performance classification.
Standard length
Each seal in this product range is supplied as one 2100mm length.
The profile can be cut using a sharp knife to suit the height and width of the frame.
A typical single-leaf door will usually require separate pieces for:
- The hinge-side jamb
- The closing-side jamb
- The frame head
The number of 2100mm lengths required will depend on the dimensions of the opening and the desired joint arrangement.
Norseal also manufactures the NOR710 in a 3000mm length, but that length is not included within the current available product range.
Compatible door-bottom seals
The NOR710 treats the head and jambs but does not seal beneath the door.
It can be combined with a suitable Norsound door-bottom seal, such as:
- NOR810 automatic drop seal
- NOR810S automatic drop seal
- NOR810S+ automatic drop seal
- NOR820 retrofit automatic drop seal
- Another tested threshold seal approved for the doorset
The complete combination should match the applicable acoustic, smoke or fire doorset evidence.
Key benefits
- Acoustic perimeter sealing — helps reduce airborne sound leakage around the door.
- Cold-smoke control — smoke tested in accordance with BS 476-31.1.
- Acoustically tested — tested in accordance with BS EN ISO 10140-2.
- High durability — tested to 1,000,000 operating cycles.
- Self-adhesive fixing — no routed groove or screws are normally required.
- Surface-mounted installation — suitable for new and retrofit applications.
- Multi-blade profile — creates multiple flexible sealing contacts.
- Low operating resistance — flexible blades deflect as the door closes.
- Rigid and flexible PVC construction — combines stable fixing with flexible contact.
- Suitable for head and jambs — seals three sides of a single-leaf door opening.
- Four available colours — Black, Brown, Grey and White.
- 2100mm length — can be trimmed to suit the door frame.
- Compatible with automatic drop seals — supports a complete acoustic and smoke-sealing system.
- Certifire reference — currently associated by Norseal with CF629.
Important buying advice
Before ordering, confirm:
- The door height and width
- The number of 2100mm lengths required
- The required colour
- The gap between the door and frame
- That the fixing surface is suitable for self-adhesive installation
- Whether a door-bottom or automatic drop seal is also required
- The acoustic and smoke-control requirements
- Whether the seal is permitted by the fire-door evidence
The NOR710 should not be used to conceal or compensate for a warped door, loose frame, defective hinges or excessive perimeter gaps.
Norsound NOR710 Acoustic Perimeter Seal – 10 × 10.2mm × 2100mm Technical Specifications
Norsound NOR710 Acoustic Perimeter Seal is a self-adhesive, surface-mounted PVC profile for sealing the head and jambs of suitable acoustic and smoke-control doorsets.
Product Specification
| Product Name |
Norsound NOR710 Acoustic Perimeter Seal – 10 × 10.2mm × 2100mm |
| Brand |
Norsound by Norseal |
| Product Reference |
NOR710 |
| Product Type |
Self-adhesive acoustic and smoke perimeter seal |
| Application |
Around the head and jambs of acoustic and smoke-control doorsets |
| Primary Functions |
Acoustic, cold-smoke, draught and airflow sealing |
| Fixing Method |
Integral self-adhesive backing |
| Installation Type |
Surface mounted; no routed groove normally required |
| Nominal Profile Width |
10mm |
| Overall Profile Height |
10.2mm |
| Flexible Blade Dimension Shown on Drawing |
Approximately 4.2mm at the lower blade position |
| Recommended Door-to-Frame Gap |
3mm in the standard manufacturer fitting arrangement |
| Material |
Flexible and rigid PVC |
| Profile Construction |
Rigid self-adhesive mounting section with flexible sealing blades |
| Available Length |
2100mm |
| Manufacturer’s Wider Length Range |
2100mm and 3000mm |
| Available Colours |
Black, Brown, Grey and White |
| Acoustic Test Standard |
BS EN ISO 10140-2 |
| Smoke Test Standard |
BS 476-31.1 |
| Durability |
Tested to 1,000,000 operating cycles |
| Certifire Reference |
Norseal currently lists Certificate CF629 |
| Intumescent Fire Seal |
No — this product does not replace a required intumescent strip |
| Standalone Acoustic Rating? |
No — acoustic performance depends on the complete tested doorset |
| Standalone Fire Rating? |
No — the NOR710 does not independently provide a fire-resistance period |
Available Colours and Product Codes
| Colour |
Profile Size |
Length |
Product Code |
| Black |
10 × 10.2mm |
2100mm |
NOR710/2100/BLK |
| Brown |
10 × 10.2mm |
2100mm |
NOR710/2100/BRN |
| Grey |
10 × 10.2mm |
2100mm |
NOR710/2100/GRY |
| White |
10 × 10.2mm |
2100mm |
NOR710/2100/WHT |
Manufacturer Order-Code Format
Norseal’s general manufacturer order-code format is:
NOR710 / Colour – Length
Examples from the manufacturer’s documentation include:
- NOR710/BK-2100 — Black, 2100mm
- NOR710/B-2100 — Brown, 2100mm
- NOR710/G-2100 — Grey, 2100mm
- NOR710/W-2100 — White, 2100mm
The slash-separated product codes in the table above are the exact codes used within the current supplied product range.
Typical Quantity for a Single Door
A standard single-leaf door normally requires sealing at:
- One hinge-side jamb
- One closing-side jamb
- One frame head
The precise number of 2100mm lengths required depends on the door dimensions.
For example, one 2100mm strip may cover one full-height jamb, while additional material will be required for the opposite jamb and head.
Measure every opening before calculating the quantity.
Acoustic Performance Note
The NOR710 has been acoustically tested in accordance with BS EN ISO 10140-2.
No universal standalone decibel rating should be assigned to one length of seal.
Final acoustic performance depends on:
- The door-leaf construction
- The door frame
- The perimeter gaps
- The continuity of the NOR710
- The door-bottom or threshold seal
- The glazing and ironmongery
- The frame-to-wall junction
- The installation quality
Smoke Performance Note
The NOR710 has been smoke tested in accordance with BS 476-31.1.
Effective smoke sealing requires:
- A consistent operating gap
- Continuous blade contact around the frame
- Closely fitted corner joints
- A door that closes completely
- A compatible threshold-sealing arrangement
- Correctly sealed glazing and hardware preparations
The seal should not be treated as the only smoke-control component within a complete doorset.
Fire-Door Performance Note
The NOR710 is not an intumescent fire-only seal.
Where it is installed on a fire-resisting doorset:
- Confirm that the product is permitted by the doorset evidence.
- Do not remove required intumescent strips.
- Maintain the specified door-to-frame gaps.
- Do not obstruct hinges, latches or closing devices.
- Use the specified automatic drop or threshold seal.
- Confirm that the door continues to self-close and latch.
Surface Requirements
The self-adhesive mounting surface should be:
- Clean
- Dry
- Sound
- Smooth enough for continuous adhesive contact
- Free from dust
- Free from grease and oil
- Free from loose paint or varnish
Adhesion may be reduced on contaminated, damp, rough or unstable coatings.
Handling and Storage
Store the NOR710:
- Flat or in a manner that prevents permanent deformation
- In a clean and dry location
- With the adhesive release liner intact
- With the flexible blades protected from crushing
- Away from direct heat and moisture
- Protected from paint, adhesive and construction debris
Do not fold the seal sharply or store heavy materials on top of the flexible blades.
Inspection and Maintenance
Inspect the NOR710 regularly as part of the door-maintenance programme.
Replace the specified seal where it is:
- Missing
- Loose or lifting from the frame
- Cut or torn
- Permanently flattened
- Painted over
- Contaminated with adhesive or debris
- Interrupted at a corner
- No longer contacting the closed door
Do not replace the NOR710 with a differently sized perimeter seal without confirming compatibility with the doorset specification.
How to Install the Norsound NOR710 Acoustic Perimeter Seal – 10 × 10.2mm × 2100mm
Norsound NOR710 Acoustic Perimeter Seal is self-adhesive and installed around the head and jambs of a suitable acoustic or smoke-control doorset.
Norseal’s standard fitting arrangement positions the adhesive edge on the frame with the rear blade against the door stop.
The manufacturer also permits the adhesive edge to be fitted directly to the door stop.
What You’ll Need
- Norsound NOR710 in the required colour and quantity
- The applicable doorset evidence or specification
- Tape measure
- Pencil or suitable marker
- Sharp utility knife
- Straight edge or square
- Clean, dry lint-free cloth
- Suitable non-residue surface cleaner where required
- Plastic application tool or clean finger pressure
- Safety gloves suitable for knife work
Before You Start
Inspect the door and frame.
Confirm that:
- The door opens, closes and latches correctly
- The hinges and frame are secure
- The door is not significantly warped
- The door-to-frame gaps are consistent
- The intended fitting arrangement provides approximately a 3mm gap
- The door stop is securely fixed
- The frame surface is suitable for self-adhesive fixing
- The seal will not obstruct hinges, latches or other hardware
- The installation is permitted by any applicable fire-door evidence
Correct substantial alignment or gap defects before fitting the seal.
Step 1: Open the Door Fully
Open the door fully to provide unrestricted access to the head, jambs and door stop.
Norseal instructs that the NOR710 should be fitted with the door fully open.
Secure the door if necessary so it cannot move during installation.
Step 2: Select the Mounting Arrangement
Choose the fixing position permitted by the frame configuration and doorset specification.
The standard arrangement is:
- The self-adhesive edge fixed to the frame surface
- The tall rear blade positioned against the door stop
- The flexible angled blades facing the closing door leaf
Norseal also permits the adhesive edge to be fitted directly to the door stop.
Whichever arrangement is selected, maintain the same profile orientation around the complete head and both jambs.
Step 3: Check the Operating Gap
Check the gap between the door and frame at several points around:
- The hinge-side jamb
- The closing-side jamb
- The frame head
The manufacturer’s fitting instructions show a 3mm gap.
Do not rely on the flexible blades to correct a substantially larger or inconsistent gap.
Adjust the door, hinges or stop before installing the seal where necessary.
Step 4: Clean the Fixing Surface
Remove all dirt, dust and loose material from the frame or door stop.
The fixing surface must be:
- Completely clean
- Dry
- Free from grease and oil
- Free from sanding dust
- Free from loose paint or varnish
- Free from silicone, wax and adhesive residue
Allow any cleaning product to evaporate fully before exposing the adhesive backing.
Step 5: Measure the First Jamb
Measure the first vertical jamb from the frame head down to the required finishing point.
The manufacturer instructs installers to apply the jamb pieces from the top towards the bottom.
The seal can be trimmed after application using a sharp knife.
Step 6: Position the First Jamb Seal
Hold the NOR710 against the first jamb without removing the complete backing liner.
Check that:
- The rear blade is against the door stop
- The flexible blades face the door leaf
- The seal runs straight from top to bottom
- The profile will not interfere with the hinges
- The adhesive edge has full contact with the mounting surface
Step 7: Peel the Adhesive Backing Progressively
Peel back a short section of the release liner to expose the self-adhesive edge.
Do not remove the complete liner at once.
Progressive removal helps:
- Maintain alignment
- Prevent the adhesive touching the wrong surface
- Avoid stretching the seal
- Reduce trapped air beneath the mounting edge
Step 8: Apply the First Jamb Seal
Begin at the top of the jamb and press the adhesive edge firmly onto the frame or stop.
Work downwards while progressively removing the backing liner.
Maintain the rear blade against the door stop throughout the installation.
Do not:
- Stretch the seal
- Twist the profile
- Trap the flexible blades beneath the adhesive section
- Apply the strip over dust or loose coatings
Step 9: Trim the First Jamb
At the bottom of the jamb, trim the seal cleanly using a sharp knife.
Make a straight cut without crushing or tearing the flexible blades.
The finished end should not obstruct the threshold, floor or automatic drop seal.
Step 10: Install the Second Jamb
Repeat the same process on the opposite jamb:
- Clean and inspect the surface
- Check the 3mm operating gap
- Position the rear blade against the stop
- Apply the seal from top to bottom
- Remove the backing progressively
- Trim the lower end cleanly
Maintain the same profile orientation on both sides.
Step 11: Measure and Install the Head Seal
Measure the clear distance across the frame head between the installed jamb seals.
Position the NOR710 along the head with the rear blade against the door stop.
Peel the backing progressively and press the adhesive edge firmly into place.
Trim the head section accurately so the ends meet the jamb seals without a large open gap.
Step 12: Form Neat Corner Joints
At both upper corners:
- Bring the head and jamb sections together neatly
- Avoid large open gaps
- Do not overlap the rigid mounting sections
- Do not crush the flexible blades
- Maintain sealing contact into the corner
Closely fitted butt joints are preferable to bulky overlaps.
Step 13: Apply Firm Pressure
Press along the full adhesive edge of all three installed sections.
Pay particular attention to:
- The upper corners
- The ends of each strip
- Painted surfaces
- Any slight irregularities in the frame
Confirm that no part of the mounting edge is lifting.
Step 14: Close the Door Slowly
Close the door carefully and observe the flexible blades.
They should:
- Contact the door leaf around the required perimeter
- Deflect smoothly
- Remain correctly orientated
- Return towards their original shape when the door opens
- Maintain contact without being completely crushed
Stop and correct the profile if a blade folds backwards or becomes trapped.
Step 15: Check Door Operation
Open and close the door several times.
Confirm that:
- The door opens freely
- The door closes completely
- The latch engages correctly
- The self-closing device remains effective where fitted
- The seal stays firmly bonded
- The flexible blades make continuous contact
- The door does not require excessive closing force
A door that no longer closes or latches correctly requires adjustment before being returned to service.
Step 16: Check the Threshold Seal
The NOR710 treats the head and jambs only.
Where acoustic or smoke containment is required, confirm that the bottom of the door is sealed using an appropriate:
- Automatic drop seal
- Surface-mounted door-bottom seal
- Threshold seal
- Other tested doorset arrangement
Ensure that the lower ends of the NOR710 jamb seals meet the threshold-sealing zone without leaving open corner gaps.
Installation Tips
- Fit the NOR710 with the door fully open.
- Clean all dirt and dust from the frame before installation.
- Use the profile orientation shown by the manufacturer.
- Position the rear blade against the door stop.
- Maintain the recommended 3mm door-to-frame gap.
- Install both jamb sections from top to bottom.
- Fit the head section after the jambs.
- Remove the adhesive liner progressively.
- Do not stretch the profile during installation.
- Trim the seal using a sharp knife.
- Keep corner joints neat and closely fitted.
- Do not paint over the flexible blades.
- Check that the door continues to close and latch correctly.
- Install a compatible threshold seal where required.
Maintenance Advice
Inspect the NOR710 regularly as part of the door-maintenance programme.
Check for:
- Loose or lifting adhesive edges
- Cuts or tears in the flexible blades
- Permanently flattened sections
- Paint or varnish covering the profile
- Missing sections
- Open corner joints
- Accumulated dust and debris
- Loss of contact with the closed door
- Changes in the door-to-frame gap
- Failure of the door to close or latch
Clean the seal using a soft cloth and a mild cleaning solution compatible with PVC.
Avoid:
- Strong solvents
- Abrasive pads
- Sharp scraping tools
- Painting the flexible blades
- Applying additional adhesive over contaminated surfaces
Replace damaged sections using the same specified NOR710 profile and colour.
Important Performance Note
Correct surface preparation, alignment, blade orientation and door-gap control are essential to the operation of the NOR710.
The seal does not independently create an acoustically rated, smoke-control or fire-resisting door.
Final performance depends on:
- The construction of the door leaf
- The door frame
- The perimeter gaps
- The door-bottom and threshold seal
- The glazing and ironmongery
- The frame-to-wall junction
- The quality of installation and maintenance
For certified doorsets, install the NOR710 only in accordance with the applicable test evidence, assessment, certification and door-manufacturer instructions.