Pyrogrille 100 Air Transfer Grille – 25mm Thick
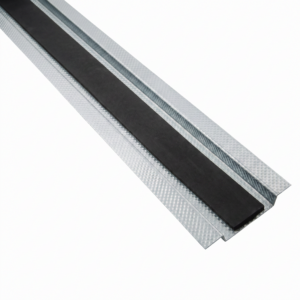
Pyrogrille 100 Air Transfer Grille – 25mm Thick is an intumescent air-transfer grille designed for installation within approved apertures in fire-resisting doors, walls and ventilation ducts.
During normal conditions, the open grille construction allows air to circulate between adjoining rooms or through a ventilation system.
When exposed to elevated temperatures during a fire, the graphite-based intumescent material expands to many times its original volume. This expansion closes the openings through the grille and forms a solid fire-resisting barrier within the aperture.
The 25mm-deep profile is available in eleven stocked square and rectangular sizes, ranging from 100 × 100mm to 300 × 300mm.
What is an intumescent air-transfer grille?
An intumescent air-transfer grille allows ventilation through an otherwise fire-resisting construction.
The grille remains open during normal building use, providing a free path for air movement.
During a fire:
- The surrounding temperature rises.
- The graphite-based intumescent components activate.
- The material expands into the spaces between the grille blades.
- The ventilation opening closes.
- A solid char forms to restrict the passage of fire and hot gases.
This allows ventilation to be incorporated into a suitable fire-resisting element without leaving the opening permanently unprotected.
Where can the Pyrogrille 100 be used?
The Pyrogrille 100 range is designed for approved apertures within:
- Fire-resisting timber doorsets
- Fire-resisting flexible wall constructions
- Suitable fire-resisting ductwork
- Other tested separating elements covered by the relevant evidence
The exact application, grille size, fire-resistance period and installation detail must be supported by the test or assessment evidence for the complete construction.
Fire-door applications
The Pyrogrille 100 has been tested within timber doorsets to:
BS EN 1634-1
The product range can offer up to 60 minutes’ fire integrity when installed within a suitable tested or assessed door assembly.
This does not mean that every size automatically provides 60 minutes in every fire door.
Before cutting an aperture into a door, confirm:
- That the door has test or assessment evidence permitting an air-transfer grille
- The maximum permitted aperture dimensions
- The permitted grille thickness
- The permitted position within the door leaf
- The required aperture lining or edge construction
- The permitted fire-resistance period
- The required fixing and perimeter-sealing method
- Whether decorative cover plates are permitted or required
Cutting an unapproved aperture into a fire door can invalidate its fire-resistance evidence, certification and warranty.
Wall and duct applications
The Pyrogrille 100 has also been tested within flexible walling and ducting to:
BS 476: Part 20
The range can provide up to 120 minutes’ fire integrity in suitable tested constructions.
The exact performance depends on factors including:
- The construction type
- The wall or duct thickness
- The selected grille dimensions
- The installation position
- The aperture preparation
- The mechanical fixing arrangement
- The perimeter fire-stopping system
The grille must not be installed into an unverified partition or duct solely because the required aperture appears to be the correct size.
Integrity performance
The published fire performance relates to integrity.
Integrity measures the ability of the tested system to restrict the passage of flames and hot gases.
The product should not automatically be described as providing an equivalent period of thermal insulation.
Where insulation performance is required, the complete separating element and grille arrangement must have evidence supporting that requirement.
Approximately 60% free area
The Pyrogrille 100 provides approximately:
60% free area
Free area is the proportion of the grille face that remains available for airflow under normal conditions.
The actual airflow through an installed grille also depends on:
- The selected grille dimensions
- The pressure difference across the opening
- The adjoining duct or room arrangement
- Decorative cover plates
- Any insect screen or additional grille component
- Obstructions around the installation
The approximate free-area percentage should not be treated as a complete ventilation-system design calculation.
25mm slimline construction
This product range has a fixed thickness of:
25mm
The slimmer profile can be suitable where the door, wall or duct construction cannot accommodate the wider 38mm Pyrogrille 100.
Only specific Pyrogrille sizes are manufactured in the 25mm thickness.
The current stocked 25mm range contains eleven square and rectangular sizes.
Graphite-based intumescent material
The grille incorporates graphite-based intumescent material supported within a galvanised steel construction.
When exposed to fire conditions, the graphite material expands and develops a stable char that closes the ventilation paths.
The intumescent material is:
- Inactive during normal ambient conditions
- Designed to activate when exposed to elevated temperatures
- Contained within a robust modular grille construction
- Black in its normal unexpanded state
The intumescent components must not be painted, cut, removed or obstructed.
Galvanised steel construction
The Pyrogrille 100 incorporates galvanised steel components.
These provide:
- Structural support for the intumescent grille
- A rigid frame around the ventilation aperture
- Predrilled side fixing positions
- Protection during normal installation and building use
- A stable modular grille construction
The grille should remain square and undistorted during cutting, handling and installation.
No moving parts
The Pyrogrille 100 operates through the thermal expansion of its intumescent material.
It contains no powered actuator, motor or mechanically operated damper.
The product therefore requires:
- No electrical connection
- No control panel
- No fusible link
- No moving shutter mechanism
- No routine mechanical servicing
Periodic inspection and cleaning are still required to confirm that the grille remains unobstructed and undamaged.
Cold-smoke limitation
The standard Pyrogrille 100 does not provide a cold-smoke containment function while the intumescent material remains unactivated.
It allows air to pass through the grille during normal ambient conditions. Cold smoke could therefore also pass through the same open air path.
For this reason, an air-transfer grille without a separate cold-smoke-control function must not automatically be installed within a fire-and-smoke door.
Before using it within a door identified as requiring smoke control, confirm that:
- The complete doorset evidence permits the grille
- An approved smoke-control arrangement is included
- The building’s fire strategy permits the open transfer path
- Any associated damper or detector-controlled system is correctly specified
Do not describe the standard grille as cold-smoke rated.
Optional decorative cover plates
The intumescent grille is normally installed within the aperture and may be concealed using compatible decorative cover plates.
Cover plates can:
- Provide a more finished appearance
- Conceal the cut aperture edges
- Protect the grille face from casual contact
- Coordinate the visible grille with the surrounding door or wall
Compatible Pyrocover 100 plates are sold separately and are not included with the Pyrogrille 100 unless expressly stated.
A cover plate should be selected to match the dimensions of the intumescent grille.
Available stocked sizes
The current 25mm-thick stocked range includes:
- 100 × 100 × 25mm
- 150 × 150 × 25mm
- 200 × 200 × 25mm
- 225 × 75 × 25mm
- 225 × 150 × 25mm
- 225 × 225 × 25mm
- 250 × 150 × 25mm
- 250 × 250 × 25mm
- 300 × 150 × 25mm
- 300 × 225 × 25mm
- 300 × 300 × 25mm
Select the grille size according to both the ventilation requirement and the maximum aperture permitted by the fire-test evidence.
Square sizes
The stocked square options are:
- 100 × 100mm
- 150 × 150mm
- 200 × 200mm
- 225 × 225mm
- 250 × 250mm
- 300 × 300mm
Square grilles can be suitable where a relatively balanced width-to-height airflow opening is required.
Rectangular sizes
The stocked rectangular options are:
- 225 × 75mm
- 225 × 150mm
- 250 × 150mm
- 300 × 150mm
- 300 × 225mm
Rectangular grilles can be useful where the available installation area or ventilation design requires a wider, lower-profile aperture.
Not suitable for high or constant humidity
The manufacturer states that the Pyrogrille 100 should not be used in areas exposed to high or constant humidity.
The product should not be:
- Installed where it will remain wet
- Immersed in water
- Used in continuously saturated environments
- Exposed to uncontrolled condensation
- Installed externally without specific supporting approval
Suitability should be confirmed before use in bathrooms, wet rooms, swimming-pool environments, commercial kitchens or other high-humidity areas.
Typical applications
Subject to the applicable evidence, the Pyrogrille 100 may be used in:
- Plant-room doors
- Service-cupboard doors
- Electrical-room doors
- Boiler-room doors
- Fire-resisting corridor doors where smoke control is not required
- Fire-resisting partitions
- Ventilation ducts
- Commercial and industrial buildings
- Education and healthcare premises
- Apartment and residential developments
The fire strategy and complete doorset or wall evidence take priority over the general application list.
Key benefits
- Allows normal ventilation — provides an open airflow path during ordinary building use.
- Intumescent fire protection — expands during a fire to close the grille aperture.
- Up to 60 minutes in timber doorsets — subject to the tested door construction and permitted size.
- Up to 120 minutes in walls and ducts — subject to the tested separating element.
- Approximately 60% free area — supports effective passive airflow.
- 25mm slimline profile — suitable for approved applications requiring a shallower grille.
- Galvanised steel frame — provides a robust modular construction.
- Graphite intumescent material — expands to close the ventilation openings.
- No moving parts — no motor, electrical supply or mechanical damper is required.
- Simple mechanical fixing — secured through the predrilled side components.
- Eleven stocked sizes — includes square and rectangular options.
- Optional decorative covers — compatible faceplates are available separately.
Important buying advice
Before ordering, confirm:
- The required ventilation free area
- The required grille width and height
- That the 25mm thickness is appropriate
- The fire-resistance period required
- The construction into which the grille will be installed
- The maximum aperture permitted by the test evidence
- Whether the door requires cold-smoke containment
- The required perimeter intumescent sealant
- Whether matching cover plates are required
- Whether the environment is subject to high or constant humidity
Do not cut an aperture into a fire-resisting door, wall or duct until the selected grille and installation arrangement have been verified against the applicable evidence.
Pyrogrille 100 Air Transfer Grille – 25mm Technical Specifications
Pyrogrille 100 is a galvanised-steel and graphite intumescent air-transfer grille for use within approved apertures in fire-resisting doors, walls and ducts.
Product Specification
| Product Name |
Pyrogrille 100 Air Transfer Grille – 25mm Thick |
| Current Supplier |
Norseal |
| Product Reference |
Pyrogrille 100 / PG100 |
| Product Type |
Intumescent fire-resisting air-transfer grille |
| Stocked Thickness |
25mm |
| Applications |
Approved apertures in fire-resisting timber doors, flexible walls and ducts |
| Normal Operation |
Allows passive airflow through the open grille |
| Fire Operation |
Graphite-based intumescent material expands and closes the ventilation openings |
| Frame Material |
Galvanised steel |
| Active Material |
Graphite-based intumescent material |
| Normal Appearance |
Silver metal frame with black intumescent components |
| Approximate Free Area |
60% |
| Moving Components |
None |
| Electrical Supply Required |
No |
| Door Fire-Test Standard |
BS EN 1634-1 |
| Maximum Published Door Integrity |
Up to 60 minutes, subject to the tested doorset, grille size and installation arrangement |
| Wall and Duct Test Standard |
BS 476: Part 20 |
| Maximum Published Wall or Duct Integrity |
Up to 120 minutes, subject to the tested construction and installation arrangement |
| Performance Type |
Fire integrity |
| Standalone Fire Rating? |
No — performance applies only within an approved tested or assessed construction |
| Cold-Smoke Containment |
No — the standard open grille does not restrict cold smoke under ambient conditions |
| Suitable for Fire-and-Smoke Doors? |
Only where the complete doorset evidence includes an approved cold-smoke-control arrangement |
| Standard Fixing |
Screw or pin securely through the grille’s side components |
| Predrilled Fixing Holes |
Yes |
| Perimeter Fire Stopping |
Pyromas A intumescent sealant applied around the perimeter on both sides under the manufacturer arrangement |
| Cover Plates Included? |
No — matching decorative covers are available separately |
| High-Humidity Use |
Not recommended for areas of high or constant humidity |
| Maintenance |
No mechanical servicing; periodic inspection and wiping with a damp cloth are recommended |
| Water Immersion |
Not permitted |
Current Stocked Sizes and Product Codes
| Width × Height |
Thickness |
Shape |
Product Code |
| 100 × 100mm |
25mm |
Square |
PG100/25/100X100 |
| 150 × 150mm |
25mm |
Square |
PG100/25/150X150 |
| 200 × 200mm |
25mm |
Square |
PG100/25/200X200 |
| 225 × 75mm |
25mm |
Rectangular |
PG100/25/225X075 |
| 225 × 150mm |
25mm |
Rectangular |
PG100/25/225X150 |
| 225 × 225mm |
25mm |
Square |
PG100/25/225X225 |
| 250 × 150mm |
25mm |
Rectangular |
PG100/25/250X150 |
| 250 × 250mm |
25mm |
Square |
PG100/25/250X250 |
| 300 × 150mm |
25mm |
Rectangular |
PG100/25/300X150 |
| 300 × 225mm |
25mm |
Rectangular |
PG100/25/300X225 |
| 300 × 300mm |
25mm |
Square |
PG100/25/300X300 |
Product-Code Structure
The stocked product codes use the following format:
PG100 / Thickness / Width × Height
For example:
- PG100/25/100X100 — 100 × 100 × 25mm grille
- PG100/25/225X075 — 225 × 75 × 25mm grille
- PG100/25/300X300 — 300 × 300 × 25mm grille
Available Sizes
The current stocked range contains:
- Six square sizes
- Five rectangular sizes
- Eleven total size options
- One fixed 25mm thickness
Manufacturer’s Wider 25mm Range
The wider manufacturer range also identifies additional dimensions as potentially available in 25mm thickness.
These include:
- 150 × 100mm
- 200 × 150mm
- 250 × 200mm
- 300 × 200mm
These dimensions are not included within the current stocked range listed above.
Free-Area Note
The approximate 60% free-area figure is based on the grille geometry.
It should not be treated as a complete ventilation calculation.
System airflow depends on:
- Grille face dimensions
- Pressure differential
- Duct resistance
- Decorative cover plates
- Other ventilation-system components
Fire-Performance Note
The published fire periods represent maximum performance achieved within tested constructions.
The permitted performance for an individual project depends on:
- The selected grille size
- The grille thickness
- The door, wall or duct construction
- The aperture position
- The aperture edge preparation
- The fixings
- The perimeter sealant
- The supporting assessment or certification
Cold-Smoke Warning
The grille remains open during normal ambient conditions.
It therefore does not independently prevent the passage of cold smoke.
Do not use the standard Pyrogrille 100 in a smoke-control door unless the complete tested or assessed system includes an approved cold-smoke-control solution.
Cover-Plate Compatibility
Optional Pyrocover 100 plates should match the nominal width and height of the selected grille.
Cover plates:
- Are ordered separately
- Are normally fitted to both visible faces where required
- Must not obstruct the required free area
- Must be compatible with the applicable fire-test evidence
Storage and Handling
Store the Pyrogrille 100:
- In a clean and dry internal location
- Protected from high humidity
- Protected from water immersion
- Flat or securely supported
- Protected from crushing and distortion
- With the intumescent components free from paint and contamination
Inspection and Maintenance
Inspect the installed grille periodically.
Check for:
- Physical damage
- Loose fixings
- Missing intumescent material
- Paint or plaster obstructing the openings
- Damage to the perimeter sealant
- Water exposure or corrosion
- Loose or damaged decorative covers
- Obstructions restricting normal airflow
The grille can be wiped using a damp cloth but should not be immersed in water.
How to Install the Pyrogrille 100 Air Transfer Grille – 25mm Thick
Pyrogrille 100 is installed into a prepared aperture within a suitable fire-resisting door, wall or duct.
The exact aperture position, maximum size, lining arrangement, fixings and fire-stopping detail must follow the evidence for the complete construction.
Do not cut an aperture into a fire-resisting element until the proposed grille installation has been approved.
What You’ll Need
The exact tools and materials depend on the construction.
Typical requirements include:
- Pyrogrille 100 in the approved size
- The applicable fire-test, assessment or doorset instructions
- Compatible Pyrocover 100 plates where required
- Pyromas A intumescent sealant or the currently approved equivalent
- Suitable steel screws or pins
- Tape measure
- Pencil or suitable marker
- Square and straight edge
- Drill and appropriate drill bits
- Jigsaw, router or other cutting equipment suitable for the substrate
- Fine-tooth metal-cutting equipment only where approved adjustments are permitted
- File or deburring tool
- Vacuum or brush
- Sealant gun
- Suitable door supports and restraints
- Safety glasses
- Protective gloves
- Hearing protection
- Respiratory protection appropriate to the material being cut
Before You Start
Confirm:
- The exact door, wall or duct construction
- The required fire-resistance period
- The approved grille width, height and thickness
- The permitted aperture position
- The required distance from door edges and ironmongery
- The required aperture lining or edge preparation
- The approved fixing method
- The approved perimeter sealant
- Whether decorative cover plates are required
- That the construction does not require unsupported cold-smoke containment
Where the required evidence is unavailable, do not proceed.
Step 1: Verify the Fire-Door or Construction Evidence
For door installations, inspect the door identification and supporting documentation.
Confirm that the door leaf is permitted to contain an air-transfer grille.
The evidence should identify or support:
- The maximum aperture size
- The minimum remaining door material
- The aperture location
- The required grille specification
- The fire-resistance period
- The lining and fixing arrangement
Do not rely solely on the nominal fire rating marked on the door.
Step 2: Confirm the Cold-Smoke Requirement
Determine whether the door or separating element requires cold-smoke containment.
The standard Pyrogrille 100 remains open during normal ambient conditions and has no independent cold-smoke-control function.
Do not install it into a fire-and-smoke door unless the complete approved system includes the required smoke-control arrangement.
Step 3: Confirm the Selected Grille Size
Check the supplied product code and physical dimensions.
Confirm that:
- The width is correct.
- The height is correct.
- The thickness is 25mm.
- The size is permitted by the evidence.
- The required free area is suitable for the ventilation design.
- Matching cover plates have been selected where required.
Do not enlarge the approved aperture to accommodate an incorrectly selected grille.
Step 4: Establish the Aperture Position
Mark the approved aperture position on the door, wall or duct.
Check the location in relation to:
- Door edges and lippings
- The threshold
- Glazing apertures
- Hinges
- Locks and latches
- Door closers
- Internal framing or studs
- Duct joints and reinforcements
- Electrical and mechanical services
Use the location required by the applicable test or assessment.
Step 5: Mark the Aperture
Measure and mark the aperture accurately using a square and straight edge.
The required opening dimensions and installation clearance should follow the current fitting instructions and supporting fire evidence.
Do not assume that the aperture must be oversized by a standard universal amount.
Check all dimensions before cutting.
Step 6: Support the Door or Construction
For a door installation, remove the door where necessary and support it securely on a stable work surface.
Protect:
- The door faces
- Decorative finishes
- Existing ironmongery
- Glazing
- The door edges and corners
For walls and ducts, isolate and support the work area as required.
Step 7: Cut the Aperture
Cut the marked opening using tools appropriate to the construction.
Maintain:
- Square corners where required
- Straight aperture edges
- The approved opening dimensions
- The required edge distance
- The integrity of the surrounding construction
Do not damage adjacent intumescent materials, reinforcement, studs, duct seams or essential ironmongery.
Step 8: Inspect the Exposed Aperture
After cutting, inspect the opening.
Check for:
- Damage to the door core
- Loose or unsupported facing material
- Splintered or uneven aperture edges
- Damaged wall boards or framing
- Sharp metal edges within ductwork
- Unexpected services or reinforcement
Stop work where the exposed construction does not match the expected tested arrangement.
Step 9: Install Any Required Aperture Lining
Fit an aperture liner only where required by the supporting doorset, wall or duct evidence.
Do not automatically add or omit:
- Hardwood liners
- Timber framing
- Calcium-silicate board
- Intumescent sheet
- Additional steel framing
The lining detail must match the approved construction.
Step 10: Clean the Aperture
Remove:
- Timber dust
- Plasterboard dust
- Metal swarf
- Loose fibres
- Grease and oil
- Loose paint or coatings
The fixing and sealant surfaces should be clean, dry and sound.
Step 11: Dry Fit the Pyrogrille 100
Insert the grille into the prepared aperture without applying the final sealant.
Check that:
- The grille fits squarely.
- The body is not distorted.
- The side fixing holes remain accessible.
- The grille sits at the required depth.
- The decorative cover plates will sit correctly.
- The aperture clearance matches the approved detail.
Do not force the grille into an undersized opening.
Step 12: Mark the Mechanical Fixings
Use the grille’s predrilled side holes to mark the required fixing positions.
Confirm that each fixing will enter suitable surrounding material.
The fixings must not:
- Break through the door face
- Split an aperture liner
- Damage ductwork or adjoining services
- Distort the grille frame
- Interfere with the intumescent material
Step 13: Drill the Fixing Positions
Remove the grille where required and drill suitable pilot holes.
Select the drill bit and fixing type according to:
- The door, wall or duct material
- The approved fixing specification
- The selected steel screws or pins
Remove all drilling debris before installing the grille.
Step 14: Apply the Perimeter Intumescent Sealant
Apply the specified Pyromas A intumescent sealant, or the currently approved equivalent, around the grille perimeter as required by the installation detail.
The manufacturer arrangement requires the perimeter to be sealed on:
Both sides of the installation
Apply the sealant continuously so that no unsealed perimeter gaps remain.
Step 15: Insert the Grille
Position the Pyrogrille 100 within the prepared aperture.
Check that:
- The grille remains square.
- The intended face orientation is maintained.
- The body is centred or positioned as required.
- The perimeter sealant remains continuous.
- The intumescent slats are not damaged.
Step 16: Secure the Grille
Secure the system through the predrilled side components using the approved screws or steel pins.
Tighten or drive the fixings evenly.
Do not overtighten, as this may:
- Distort the galvanised steel frame
- Damage the surrounding aperture
- Crush the intumescent components
- Prevent cover plates from fitting correctly
Step 17: Complete the Perimeter Seal
Inspect the sealant around both faces.
Fill and finish any remaining approved perimeter gaps.
The completed fire stop should be:
- Continuous
- Free from open voids
- In contact with the grille and surrounding construction
- Installed to the required depth
- Finished without obstructing the grille openings
Step 18: Fit Optional Cover Plates
Where matching Pyrocover 100 plates are specified, fit a compatible plate to each required face.
Align each cover centrally over the intumescent grille.
Secure it using the supplied cover-plate screws.
Check that:
- The cover matches the grille size.
- The grille remains unobstructed.
- The cover sits flat.
- No sharp aperture edge remains visible.
- The cover does not damage the door or wall face.
Step 19: Rehang and Test the Door
For a door installation, rehang the leaf and inspect its operation.
Confirm that:
- The door opens freely.
- The door closes completely.
- The latch engages correctly.
- The self-closing device remains effective.
- The added grille weight has not affected alignment.
- The cover plates do not interfere with the frame or floor.
Wall Installation
For a wall installation:
- Confirm the wall type and required fire period.
- Locate the aperture clear of studs and services unless the tested detail states otherwise.
- Prepare the opening to match the approved construction.
- Secure the grille through its side components.
- Seal the perimeter on both faces.
- Fit compatible decorative covers where required.
Do not install into an unverified wall construction.
Duct Installation
For duct installations:
- Confirm that the duct construction is covered by the supporting evidence.
- Prepare the approved aperture.
- Screw through the duct wall into the Pyrogrille frame.
- Seal the perimeter with the approved intumescent sealant on both sides.
- Ensure that the installed grille does not obstruct unrelated duct components.
Confirm that the ventilation-system design accounts for the grille’s approximate free area and pressure resistance.
Final Inspection
Before completing the installation, check:
- The correct grille size has been installed.
- The thickness is 25mm.
- The grille is square and undamaged.
- All required fixings are present.
- The perimeter is sealed continuously on both sides.
- The intumescent material is unobstructed.
- Cover plates are secure where fitted.
- The installation matches the supporting evidence.
- The grille has not been installed within an unsupported smoke-control door.
Installation Tips
- Check the complete fire-test evidence before cutting the aperture.
- Confirm the maximum permitted grille size.
- Do not assume all fire doors can accept an air-transfer grille.
- Do not use the standard grille as a cold-smoke seal.
- Keep the grille clear of high or constant humidity.
- Protect the intumescent material from paint and damage.
- Use the predrilled side fixing holes.
- Use approved steel screws or pins.
- Seal the perimeter continuously on both sides.
- Do not obstruct the grille with sealant.
- Fit size-compatible decorative cover plates.
- Record the product code and installation location for future inspections.
Maintenance Advice
The Pyrogrille 100 has no moving parts and requires no mechanical servicing.
It should nevertheless be inspected periodically.
Check for:
- Loose or missing fixings
- Damage or distortion
- Missing intumescent material
- Paint, plaster or debris obstructing the openings
- Damaged perimeter sealant
- Corrosion or prolonged water exposure
- Loose cover plates
- Unauthorised alterations to the aperture
Wipe the grille using a damp cloth where required.
Do not:
- Immerse the grille in water
- Pressure wash the installation
- Paint the intumescent components
- Remove individual grille blades
- Insert cables or other services through the grille openings
- Cover or permanently obstruct the ventilation path
Important Performance Note
The Pyrogrille 100 does not possess a universal standalone fire rating.
Its performance depends on the complete installed system, including:
- The door, wall or duct construction
- The selected grille dimensions
- The aperture position
- The aperture edge preparation
- The fixing method
- The perimeter intumescent sealant
- The decorative cover arrangement
- The quality of installation
Install the grille only in accordance with current test evidence, assessment documentation and the instructions applicable to the complete construction.